This guide walks through building a simple order form using Paperform's Product and Price fields. As a working example, we'll go through how to set up a form that sells a selection of products, plus a flat-rate shipping fee on top. We'll go through how to connect a payment gateway, how to set up an automated invoice, and how best to manage your products so you can keep your audience up-to-date as your products or prices evolve.
You'll learn how to:
Set up Product and Price fields to sell your items
Connect a payment method and start accepting payments
Create and send an invoice automatically
Test your form before going live
Other helpful tips and tricks for managing your store
Step 1: Listing Your Products or Services
How to set up your store
Before you build your form, decide which type of pricing field fits what you're selling. Paperform offers three main payment field types that can be combined to fit your needs:
Product field — best for selling a number of distinct items or services. Customers pick from a list, and you can set individual prices for each option. Learn more about products here.
Price field — best for a flat, fixed amount that doesn't vary by selection, like a shipping charge or booking fee. You can also use it to collect a user-set amount, such as a donation. Learn more about the price field here.
This guide will focus primarily on Product and Price fields — we'll build a simple order form selling three products, plus a flat shipping fee. If you're setting up recurring payments instead, use the Subscription field.
To get started, create a new form and add any basic questions you'd like to know about the user (e.g. their name, email, shipping address, etc...).
You can use Paperform's AI form creator to do this by describing exactly what products or services you are selling. You might need to do some finessing of the generated form to get it exactly how you want it.
Next, we'll add product and price fields.
Setting up the Product field
Add a question to your form and select "Product" from the dropdown, or use the slash command by typing /product right into a blank line of the editor.
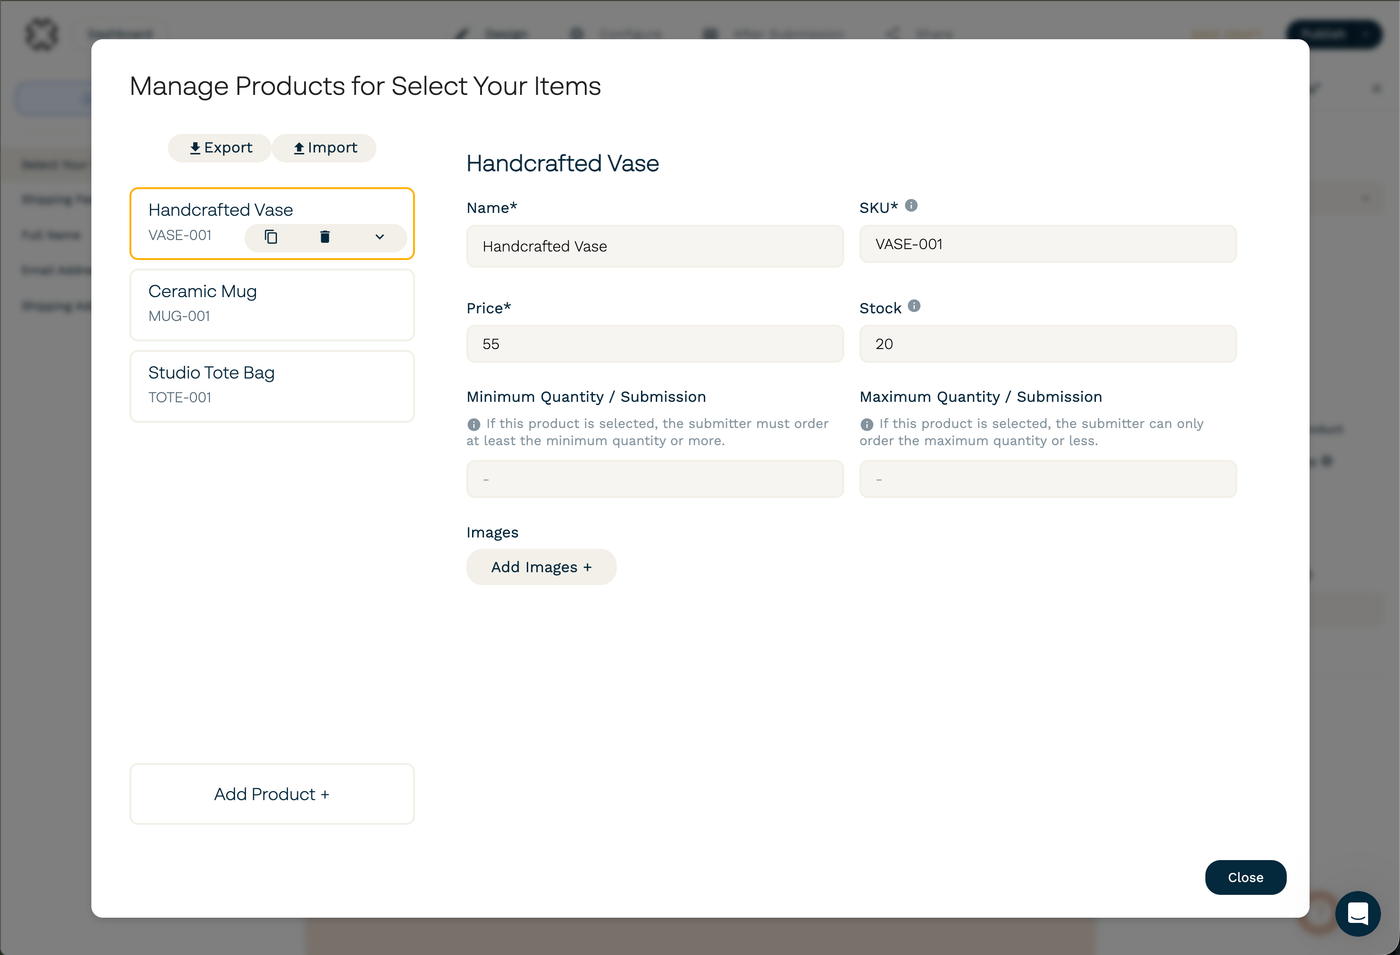
On the configuration panel, click "Manage Products" and add your products or services, giving each a name and price. For example:
Each product must have their own unique SKU and is given one by default. You can customize this as long as each SKU on the form is different.
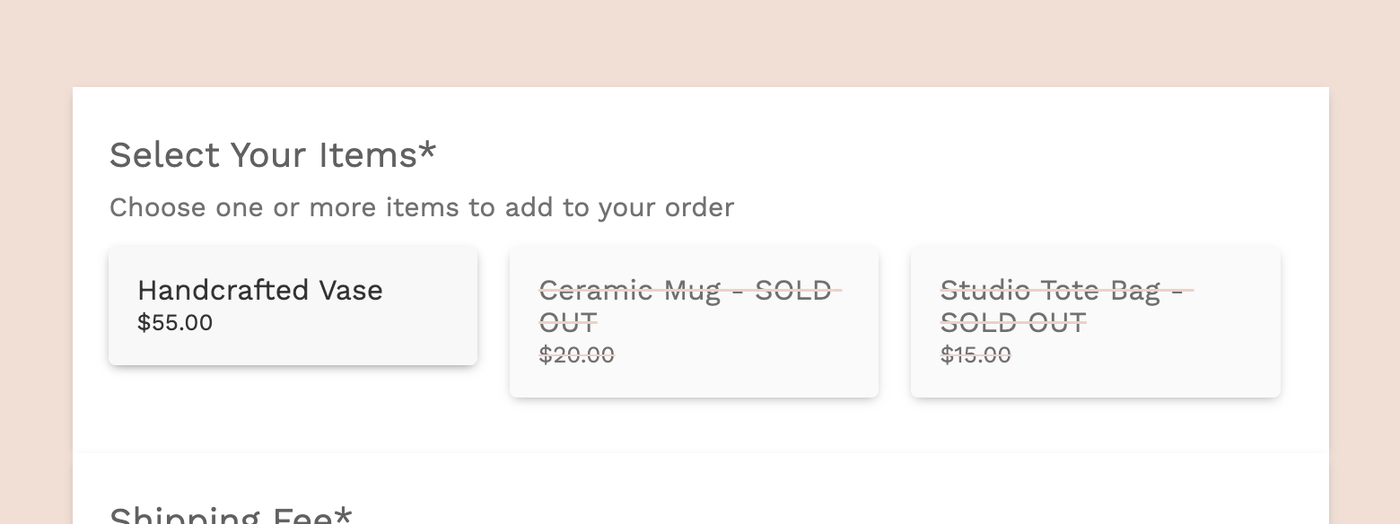
Optionally, you can set a limited number of products to sell using "Stock" and add a minimum or maximum amount of products, and also add an image. Learn more about product configurations here.
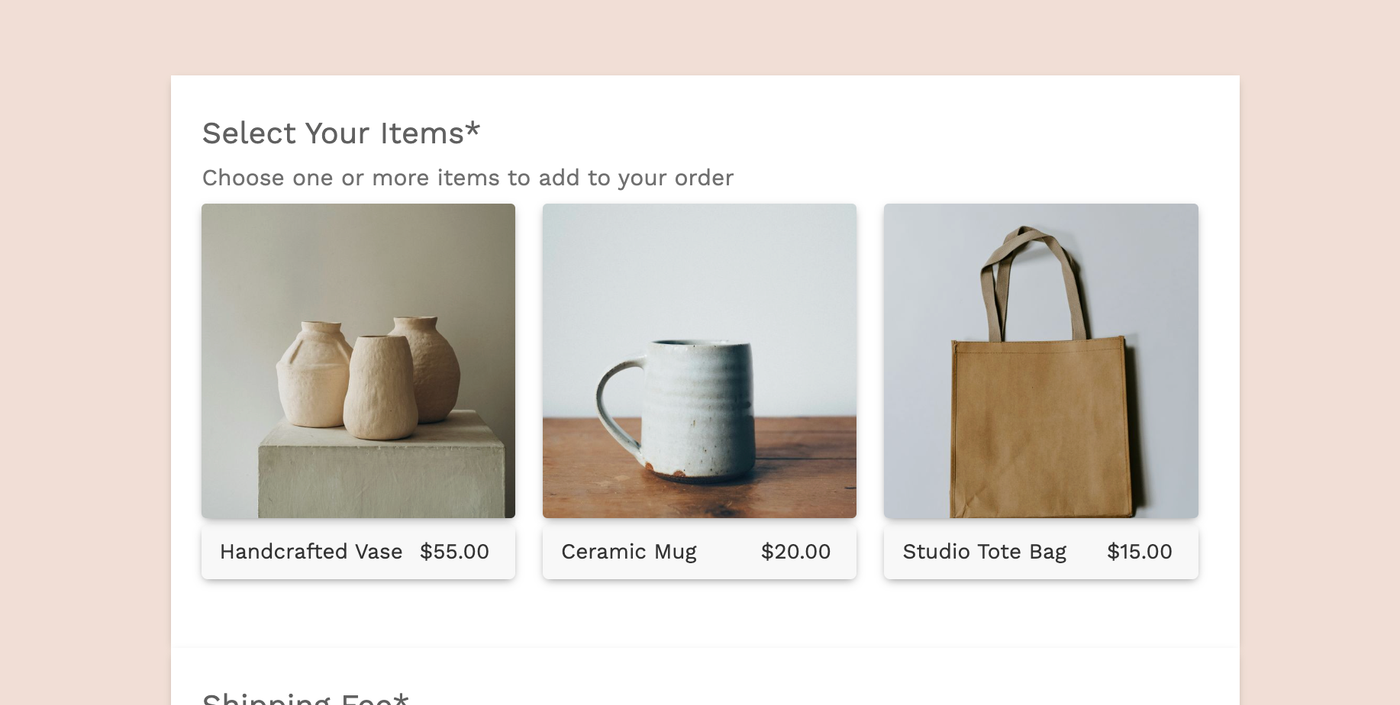
Customers will see these as selectable options with prices attached, and Paperform will calculate the order total based on their choice.
Adding the flat shipping fee
A Price field, when visible, will always be added to the form total, which makes adding the shipping fee quite straightforward.
To set up the price field:
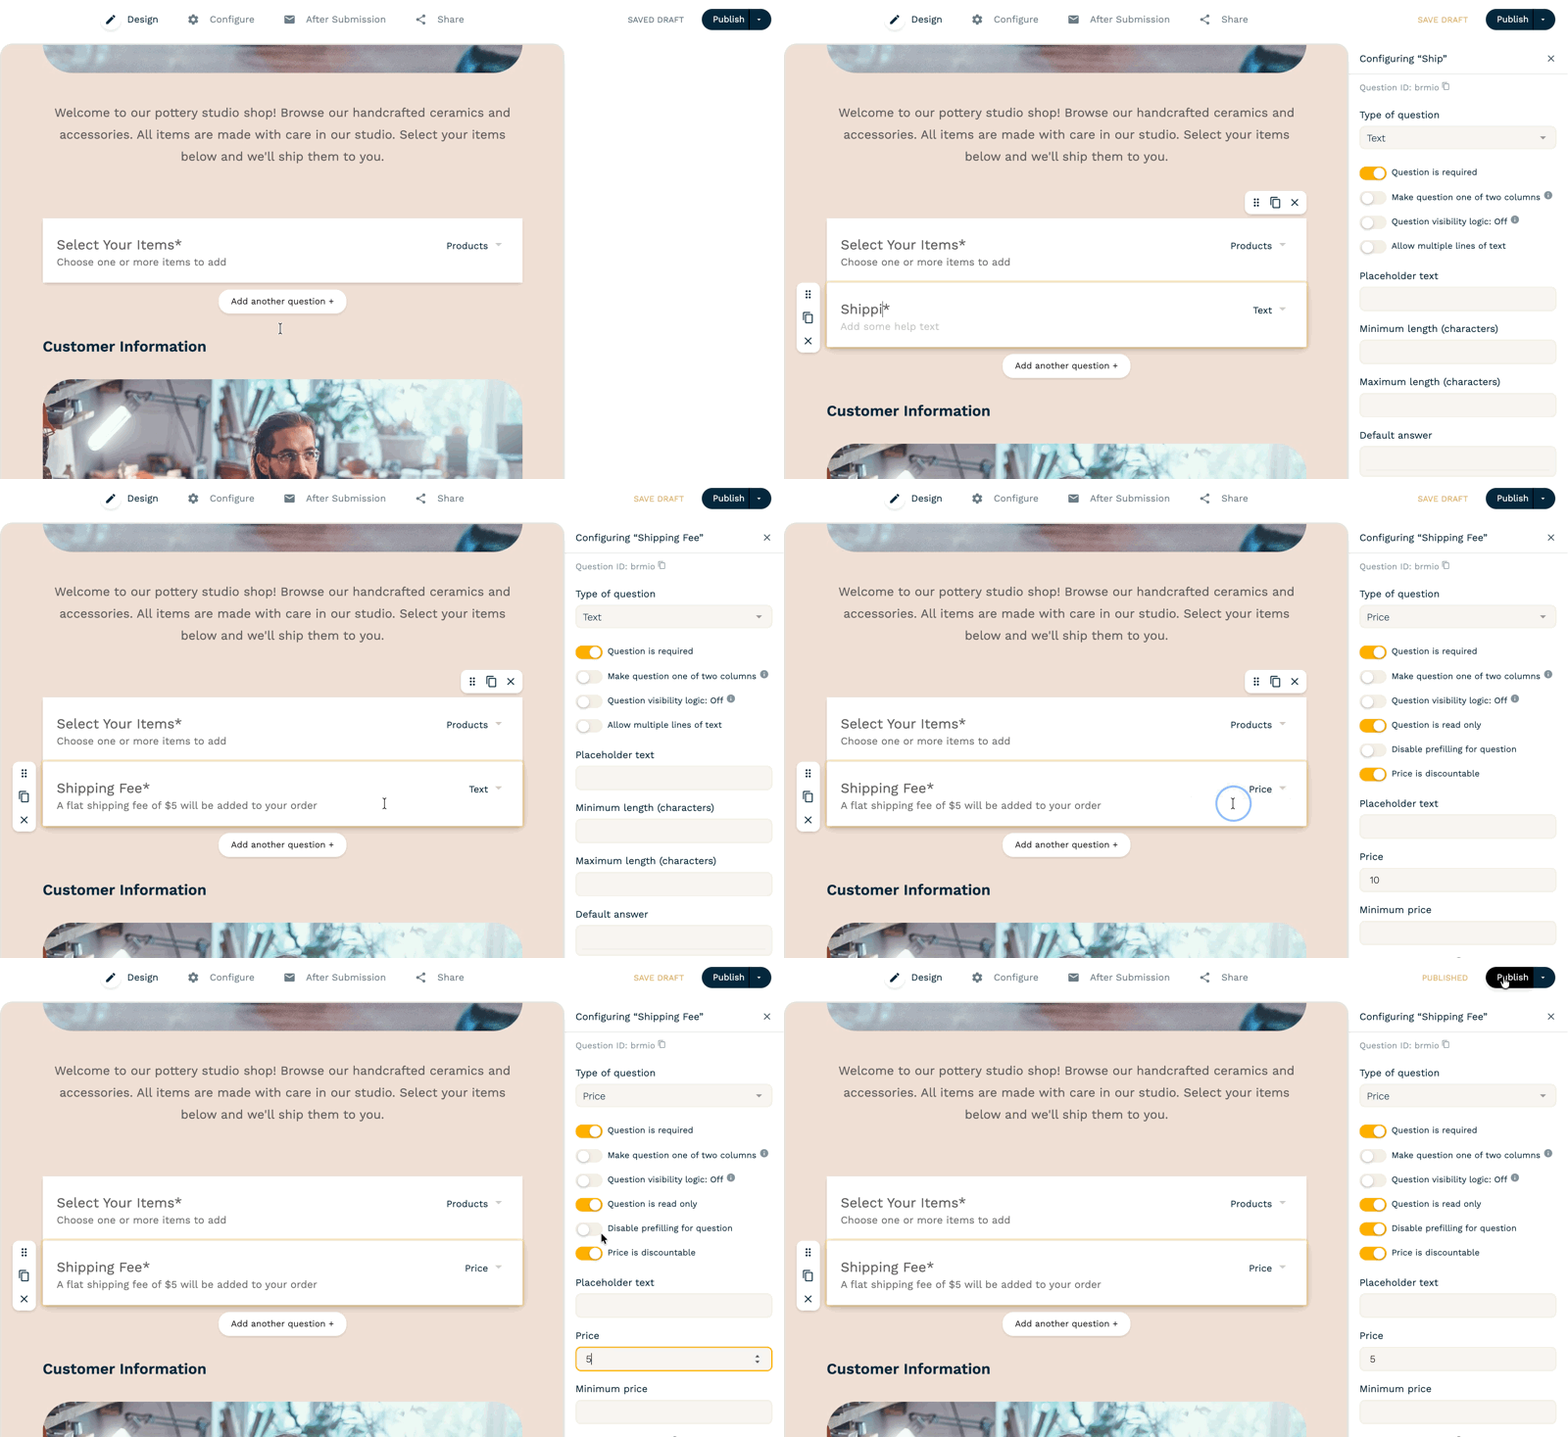
Add a Price field below the Product field.
Set it to a fixed amount, for example, $5 shipping.
When you hit Preview form, your form total should now reflect: product price + flat shipping fee. Test your form to make sure your pricing works as intended.
Optional: Adding tax or processing fees
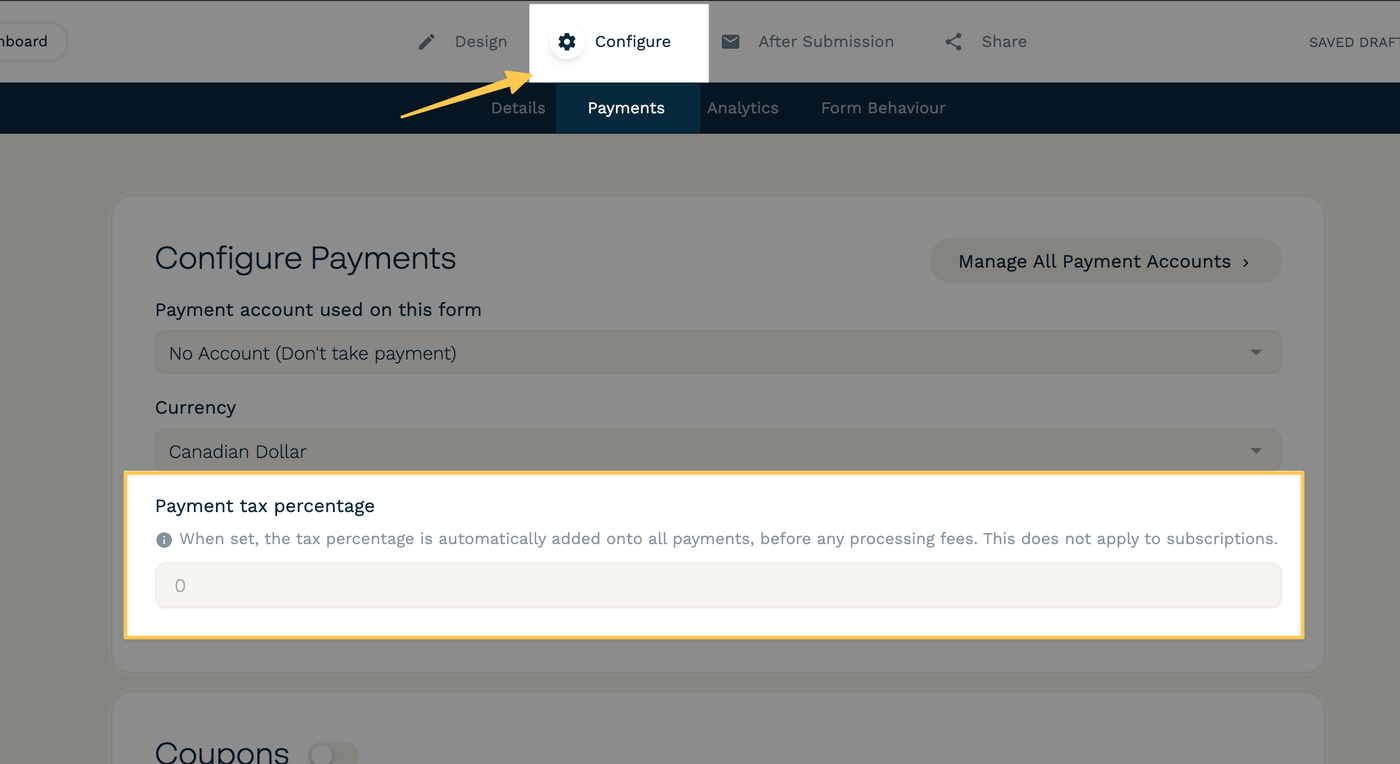
If you need to charge tax, Paperform's payment configuration has a built-in tax option.
See the full article on charging taxes and fees. You can also add various processing fees as a fixed or total amount if you so choose, under Custom Pricing Rules.
Open your Price or Product field's settings.
Enable the built-in tax setting and enter your applicable tax rate.
This will calculate and display tax automatically on top of the item price, and it'll carry through correctly to your invoice later in Step 3.
Now that your form pricing is working as expected, we add the checkout. This is how you turn a quote form into a payment form. Paperform supports Stripe, Square, Business PayPal, and Braintree. Here is our help article for how to add a payment gateway, or follow along below.
You can start accepting online payments with these simple steps:
In your form editor, navigate to Configure → Payments and connect your payment account using the dropdown menu provided.
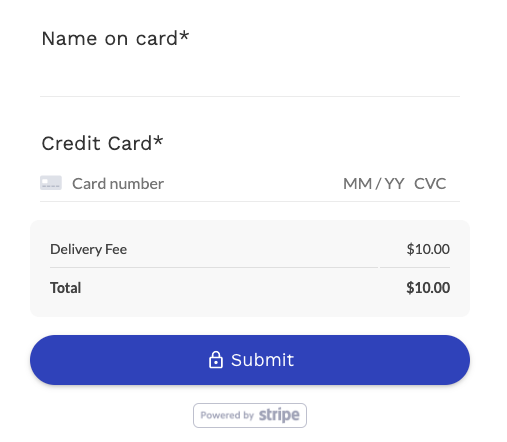
Once you publish these changes, respondents will be shown the checkout page after they hit the submit button. Make sure you run through this and test the form with your specific connection to make sure it is all working as expected.
Applying discounts/coupons
If you'd like to offer discounts, Paperform supports coupons. This isn't covered in depth in this guide, but it's worth knowing the option exists if you want to layer in promotions later. Read more about how to configure coupons.
Step 3: Set up an email confirmation
What happens after checkout? After payment is taken, the user will be shown a success page. In addition to this, you have a number of options to let your respondent know their payment has been processed. You can choose to send the client a confirmation email, include Paperform's built-in receipt article, or build a Custom PDF invoice attachment — or both! Stripe also allows you to automatically send a Stripe-generated receipt upon payment.
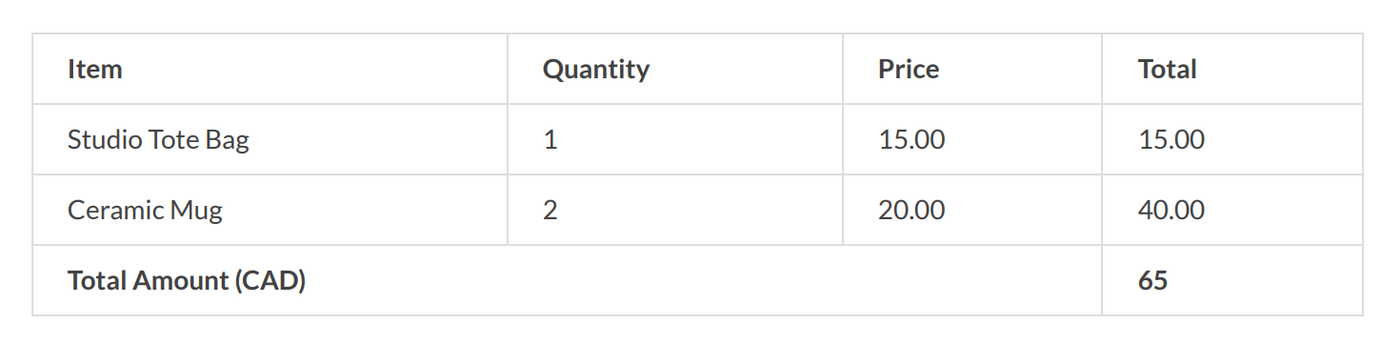
Below is an example of Paperform's built-in receipt, which you can enable in a Custom Email or Custom PDF.
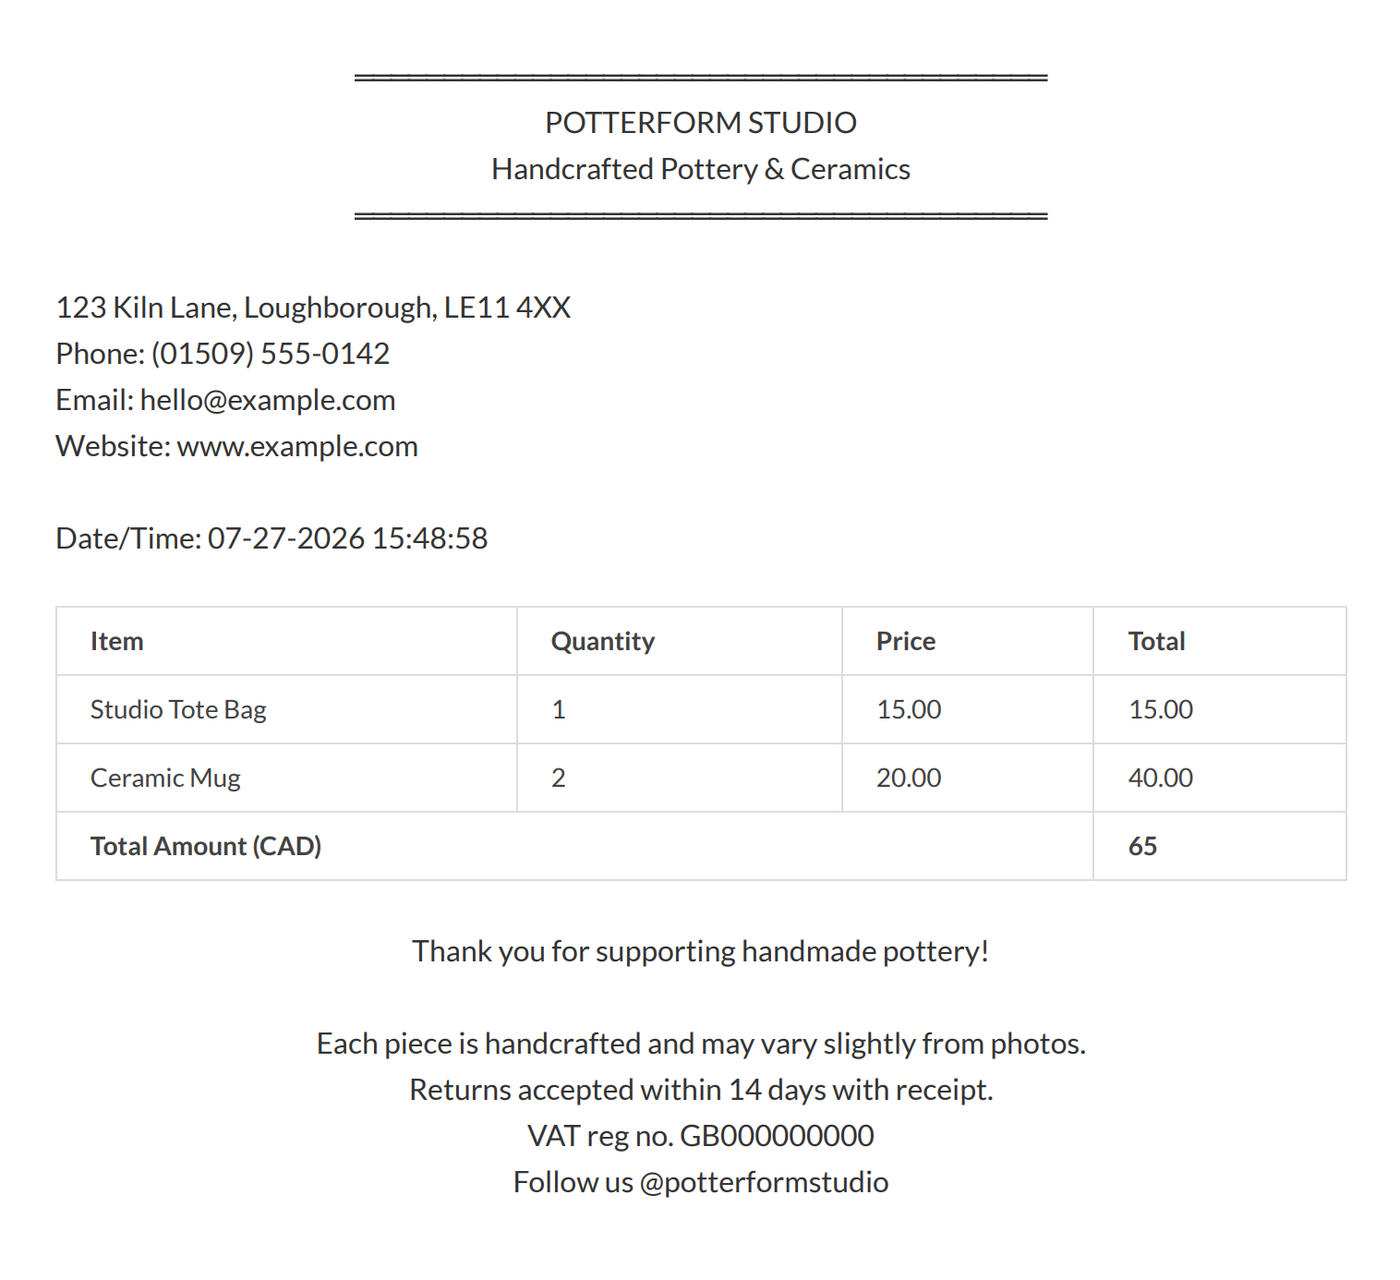
Below is an example of a Custom PDF invoice you can create and attach to your confirmation emails.
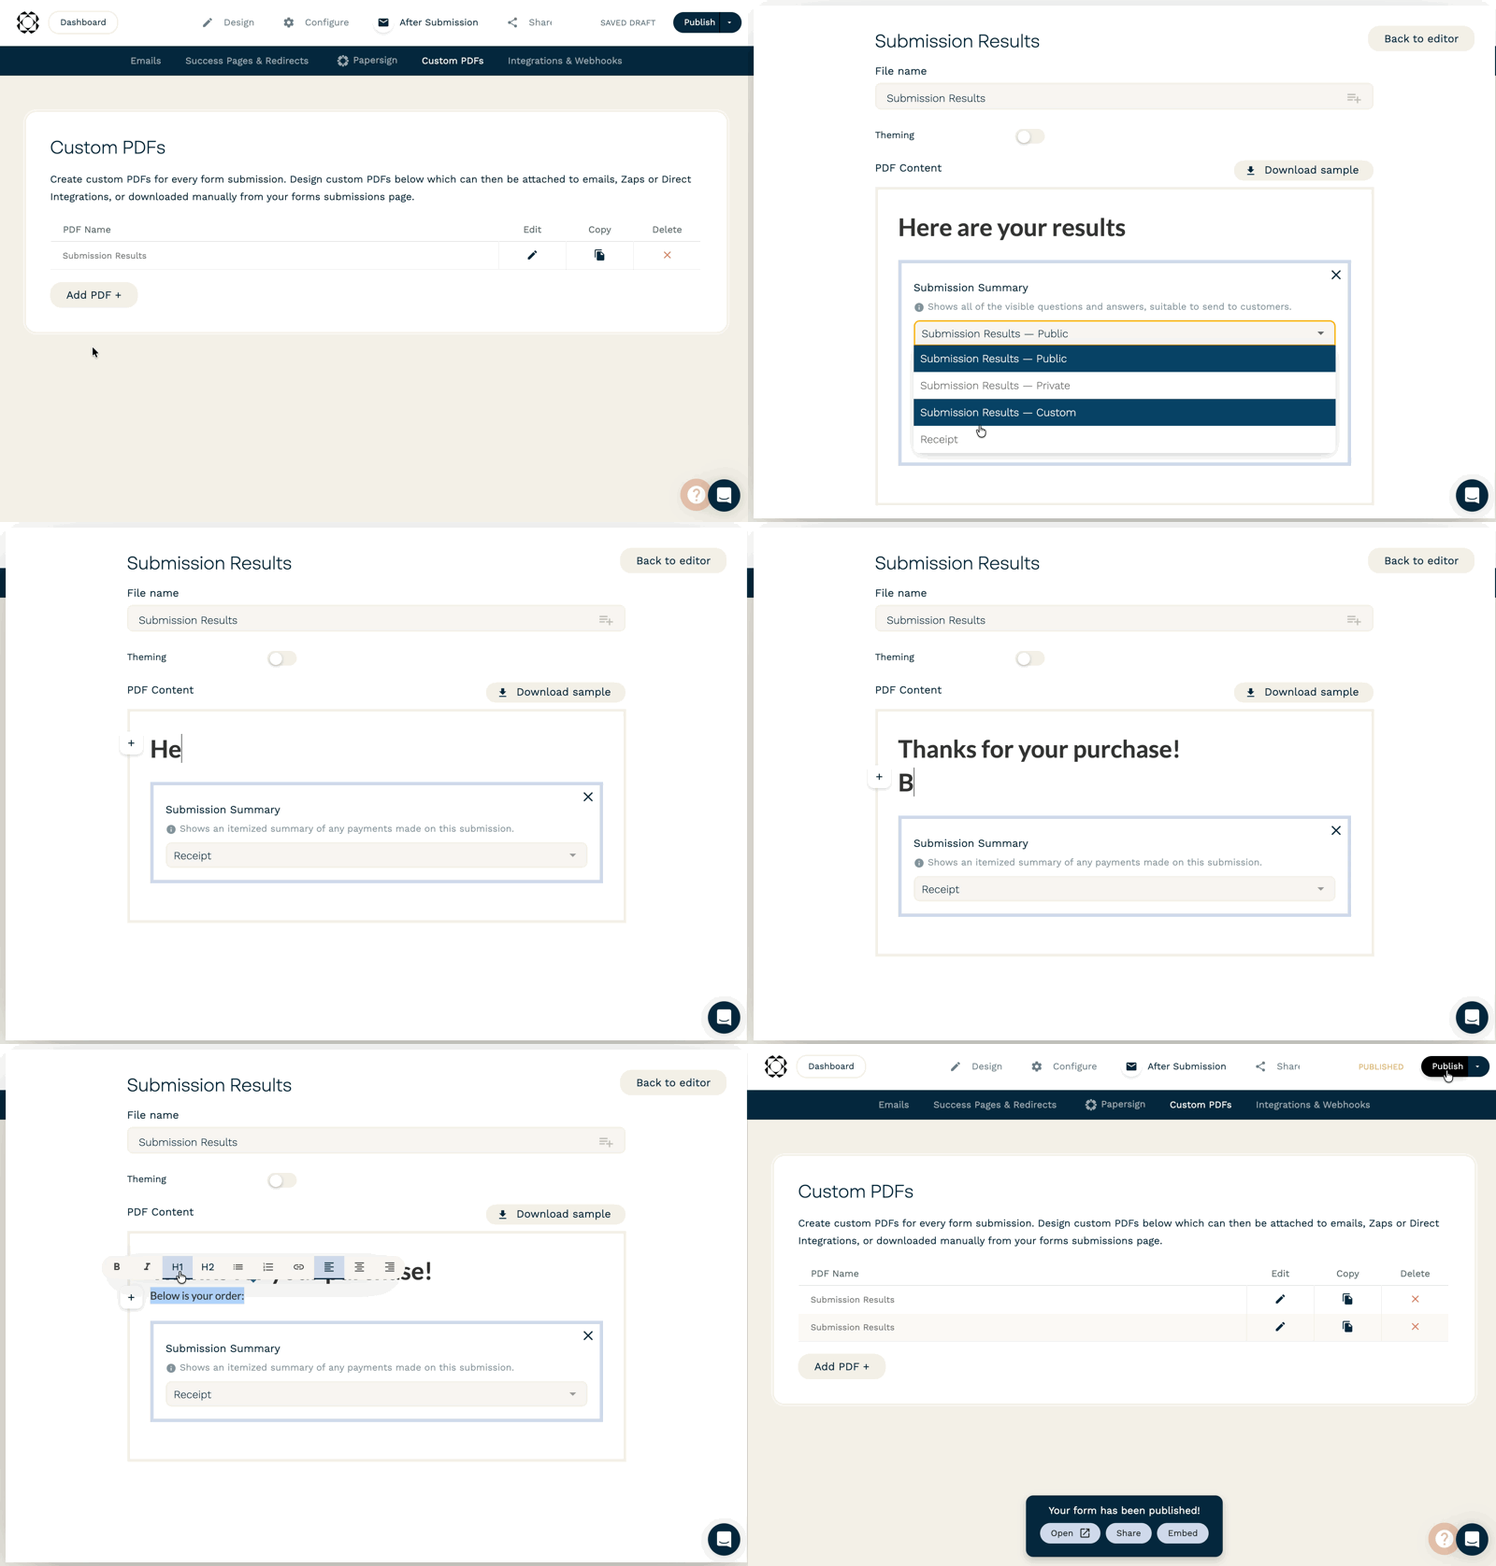
To create a Custom PDF invoice, first draft a new PDF in your form by navigating to After Submission → Custom PDFs. In the PDF editor, select "Receipt" as the Submission Summary type. Above and/or below the receipt, enter your shop details as desired.
Make sure you hit Publish to see any changes.
To send the custom PDF in an email, go to After Submission → Email and create a new email draft. Read our full article on how to draft a custom email. In the To field, pipe your form's email address question so it pulls in your respondent's emails. Then, give the email a subject and a short message. Scroll to the bottom of the draft and under "Attach PDFs", select your custom PDF from the dropdown.
Voilà! Now, the Custom PDF invoice you created will be automaitcally sent to your respondents after they submit and checkout.
Again, remember to publish the form.
Step 4: Your first purchase
Now to test it all out! Open the live form and make a purchase — most payment gateways have a sandbox or test mode option that allows you to test the purchase without making a real payment. Whether you've set up the payment account in test mode or live mode, go ahead and submit the form. You should see the checkout screen appear.
Now, what happens down the line when you need to update your stock or add/remove new products?
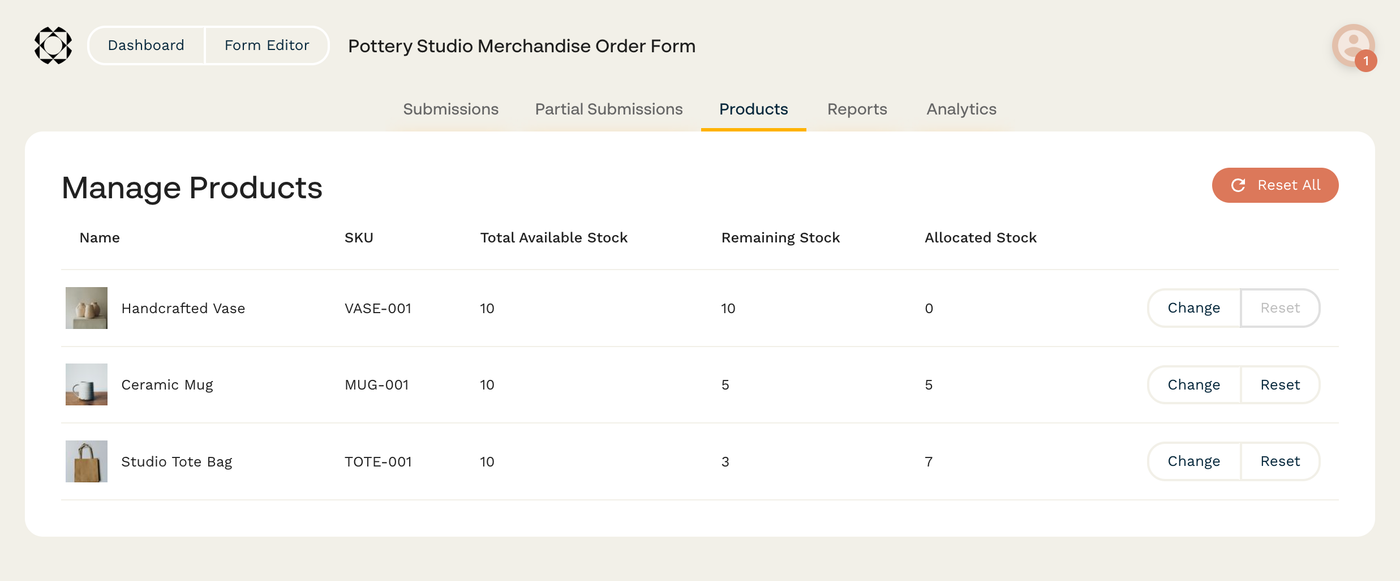
There are two places to manage and keep track of stock.
To add or remove products, as well as set the total stock of each item, you do this from within the product field in the form editor. You can configure "Stock" from within the product field in the form editor.
To see how much of each item has been sold ("Allocated Stock") and how much is left ("Remaining Stock"), you can go to the Submission Dashboard → Products. Read more about how to manage product stock.