All Solutions
Explore all the solutions you can create with Paperform: surveys, quizzes, tests, payment forms, scheduling forms, and a whole lot more.
See all solutions


Connect with over 2,000 popular apps and software to improve productivity and automate workflows
See all integrationsSolutions
All Solutions
Explore all the solutions you can create with Paperform: surveys, quizzes, tests, payment forms, scheduling forms, and a whole lot more.
See all solutionsIntegrations
Connect with over 2,000 popular apps and software to improve productivity and automate workflows
See all integrationsResources
How to set conditional questions in Google Forms
Using conditional logic in forms streamlines surveys and reduces fatigue, but Google Forms can complicate this process with its limited and tricky setup. In this guide, we'll look into how to create conditional logic with Google Forms, its limitations, and ways to overcome them with Paperform - the best alternative to Google Forms.
14-day free trial included. No credit card needed.
What is a conditional question?
A dynamic question, also known as a conditional or branching question, is one that adapts based on the form response it's given. It’s best understood through examples.
Let’s say you’re planning a picnic. You need to know 1) whether or not a friend is coming 2) if they’ll bring a plus-one and 3) what food they plan on bringing.
In a dynamic form, respondents who RSVP “yes” to the first question would be directed to the following questions, while those who answered “no” would not. If they aren’t coming to the picnic, they certainly don’t need a plus one, and they won’t be bringing any tomato sandwiches.
Conditional questions save your respondents time by only displaying form fields that are relevant to them, which can help boost customer satisfaction and response rates. It’s a win-win: your survey respondents don’t have to answer loads of irrelevant questions, and you don’t have to sift through irrelevant data.
How to create conditional questions in Google Forms
Branching questions are not one of the available question types in Google Forms. To add conditional logic, you’ll need to split your form into sections and add display conditions to each section.
It sounds a little more complicated than it is. Let’s break it down step by step.
🤯 New to Google Forms? Check out our ultimate guide to Google Forms to become a pro in no time.
1. Create a form
To get started, choose a blank form or select one of Google Forms’ premade templates. For this example, we’ll be creating a new student intake form for a pottery class.
Google Forms is an excellent free form builder, but it lacks customisation options. You can alter your background or add a header image, but that’s about it.
2. Create and label your sections
To get started, select Add section from the menu on the right. This will divide your form into sections, which you can then label and move around.
For our pottery class intake form, we need to know 3 main things.
- Whether the student has taken pottery before
- What skills they are familiar with
- What skills they are hoping to learn
We’ll break our form into 3 sections to accommodate these questions: basic information, known skills, and desired skills. To add a label to your section, select Add title from the menu on the right.
3. Add your questions
Once you have your sections, it’s time to add context. Select the desired section and click Add question from the menu on the right. You can choose from multiple choice questions, grid questions, or open text box answers.
4. Add display logic
Once you’ve added all the questions in your sections, you’re ready to add conditional logic. We’ll start with our first question, “have you taken a pottery class before?”
Select the three-dot menu at the bottom of the question field and click Go to section based on answer. This will open up display logic for each answer option listed in your question.
For this example, if a student has not taken a pottery class, they don’t need to answer any of our follow-up questions. So for “no” answers, you can go ahead and select submit form from the drop-down menu.
If a student has taken a class, we need more information. So when a respondent answers "yes" to this question, we want them to Go to section 2: our known skills section.
Continue adding display logic in the same way for all of your subsequent sections. This is where you'll thank yourself for naming sections, especially if you’re working with a longer or more complicated form. It’s much easier to reason through the branching in forms when sections are labelled clearly.
5. Test your form
Before setting it live, you can preview your dynamic form by selecting the eye icon from the top of the page. To test your logic, try answering each question differently to make sure the branching takes you to the appropriate sections.
Challenges of adding conditional questions in Google Forms
While you can add conditional logic to your Google Form, the feature is fairly limited, and the process is tedious. If you’re making a more complex form or one that requires multiple conditions, you’ll run into some roadblocks.
1. Cannot add logic based on questions
The only way to add conditional logic to your Google Form is by dividing it into sections and applying conditions based on those sections.
If you want to add logic on a per-question basis, you need to split each question into its own section. This is a time-consuming process and isn't realistic for branching forms with more than two or three questions.
2. Conditions are difficult to understand
Conditional logic is best understood when it’s written out in plain English. If you have taken a pottery class before, then you can tell us about the skills you learned. Unfortunately, Google Forms doesn’t do this. There is no way to “translate” your branching questions into if/then statements.
Instead, you’ll need to reason through the conditions in your head, constantly referring back to the question and the relevant section. This might not be a problem for simpler forms, but once you get into more complicated forms (where logic is most useful) it’s easy to get lost.
3. Cannot set and/or conditions
The conditional logic available in Google Forms is extremely basic. There is no way to create branching questions based on multiple conditions, or conditions that use and/or.
Take our pottery class intake form, for example. Let’s say a student is experienced in glazing and throwing, but not sculpting.
Ideally, you would direct them to a class that focuses on sculpting only. But because you can’t set conditions using and/or in Google Forms, there’s no way to do this.
You also can’t set conditions based on what an answer isn’t. For instance, you couldn't have a student directed to a throwing class when they don’t select “throwing” as a known skill.
4. Tedious setup
Conditional logic is designed to make your life easier. But when you have to divide and label your form into multiple sections, work through the logic in your head, and manually input a destination for every answer option, is it really worth the trouble?
Form a better life now.
Add conditional logic questions with Paperform
Where Google Forms offers basic logic that is difficult to use, Paperform offers advanced logic that’s intuitive and easy to set up—even for beginners. We give you all the tools you need to create beautiful dynamic forms and make them easy for anyone to understand.
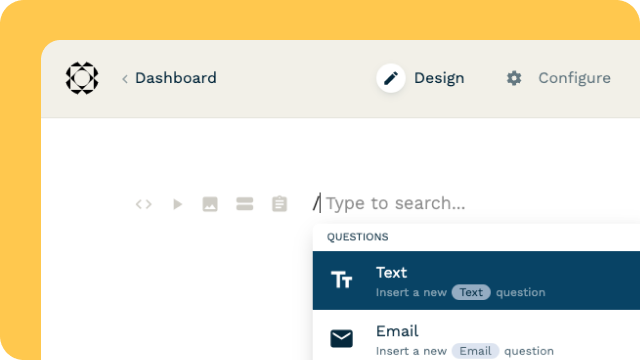
To get started, choose a blank form or pick from one of our 650+ templates, each one designed with a specific purpose in mind. Once you’re in the form builder, adding any of our 25+ field types is a breeze. Click anywhere in the field and select Add question from the menu on the right, or use our slash commands to make it even faster.
To add conditional logic to a field, simply hop into the configuration menu and toggle Question visibility logic: on. This will open up an easy-to-understand menu that displays your conditions in plain English.

Add all the questions you need, set your display conditions on a per question or per page basis, and start gathering valuable data. It’s that simple. And Unlike Google Forms’ logic, you can easily set multiple conditions (including and/or and is/isn't) for more thorough or advanced forms.
Take our skills follow-up question, for example. When a student is interested in glazing and throwing, they’ll be directed to a mixed skills pottery class. If they express interest in glazing but not throwing, they’ll be directed to a class on glazing only. Check it out.
Thanks to Paperform’s easy-to-understand configuration menu, creating advanced logic conditions doesn’t have to be intimidating. Our form builder lets you take things one step at a time, making your creations as complex and interactive as you like.
Thinking about making the move from Google Forms? You can easily migrate your forms over to Paperform with our Google Forms import tool.
Use Paperform to create your dynamic forms
Paperform’s display logic is easier to use and more complex than that of Google Forms. But if you want to take your logic even further, you could always make use of our advanced calculations.
This feature allows you to compute unique rates and complete excel style functions based on form responses in real-time.
When you make your dynamic forms with Paperform, you're not just getting a form builder with intelligent features and a beautiful design. You're unlocking an entire digital suite of tools designed to make your work (and life) easier.
- Automated emails: Send thank you emails to every respondent. Use answer piping to thank them by name, or reference a particular answer they gave.
- Integrate to automate: Use direct integrations to connect with apps like monday.com and Notion, or integrate with Zapier to unlock over 5,000 integrations with your favourite apps.
- Analytics: Gain insights into your form data from our robust built-in Analytics dashboard.
- Accept payments: Process payments with PayPal, Stripe, Square, Braintree and more, all with zero processing fees.
- Powerful design tools: Gather the right data every time with our 25+ field types, including Ranking, E-signature, File Upload, and more.
- Embed anywhere: Host your form as a stand-alone page, share it on social media, or embed it in a website or as a pop-up.
With Paperform, your options are truly limitless. Why not give it a go for yourself? Start a 14-day free trial today, no credit card required.