All Solutions
Explore all the solutions you can create with Paperform: surveys, quizzes, tests, payment forms, scheduling forms, and a whole lot more.
See all solutions


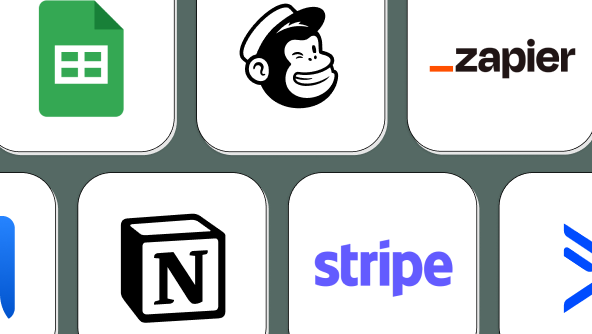
Connect with over 2,000 popular apps and software to improve productivity and automate workflows
See all integrationsProducts
Solutions
All Solutions
Explore all the solutions you can create with Paperform: surveys, quizzes, tests, payment forms, scheduling forms, and a whole lot more.
See all solutionsIntegrations
Connect with over 2,000 popular apps and software to improve productivity and automate workflows
See all integrationsResources
Magazine Subscription Software
An easy process and a beautiful look. Start collecting subscriptions for your magazine today! Centralize your workspace and boost your sales with this simple tutorial.
An easy process and a beautiful look. Start collecting subscriptions for your magazine today! Centralize your workspace and boost your sales with this simple tutorial.
1. Make this template yours.
Go to the template page and click "Use this template." If you do not have a Paperform account, you will need to sign up for a free trial first (no Credit Card details required).
You also can begin a form from scratch. However, using our magazine subscription template is a great way to get familiar with Paperform.
2. Personalize the template.
This template includes a dummy logo and header image. You can easily change or remove this by clicking on the image. A bar with clickable icons will immediately appear above.
Click the 'picture' icon to replace the image with one of your own. If you wish to delete this particular image, click the 'X' icon. You also can change the placement and even hyperlink the image.
Find out more about adding images to your forms

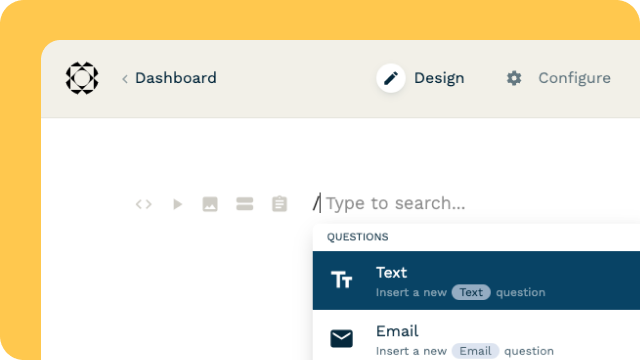
You can add an image, video, break, or question field anywhere on your form by merely clicking the area where you'd like to place it. A small toolbar will appear on the left. From this, you can choose what you want to add to your form by clicking the corresponding icon. Similarly, to add text within your form, simply click on the area you wish and begin typing.
You can also use slash commands to add form elements even faster. Simply type "/" anywhere on your form and select the correct field from a list of options.
Find out more about adding page breaks to your form.
Furthermore, you can easily duplicate, delete, move, or configure any question fields by clicking the correlating icon found on the right-hand side of a question field.

3. Change the look and feel of your form.
Now that you have changed your form's basic settings, it is time to make your form more personal to you and your business.
Your form editor's top right corner is the 'Theme' icon (colored waterdrop icon). Upon clicking it, you will enter your theme settings. From here, you can edit your form and make it feel truly bespoke and branded.
Simple changes such as the font, size, and color of your text can be configured from here, while you can edit your text's appearance in more detail from the 'Typography' tab.

The look and feel of your buttons and questions can be edited from the 'UI Elements' tab, while you can change the background color and even upload a background image from this tab as well.
4. Edit the product field to match your subscription options.
The template comes with many dummy magazine subscription options to show off how products are set up, but chances are you will want to change these.
Go to the configure icon to the right of the "Menu" question, and then click the "Products" tab to see the full list.
Depending on how many products you need to add, you can either use the UI to remove, modify, or add new products manually. You can also utilize the CSV export/import functionality to manage your products in a spreadsheet.

5. Put through a test submission
Click the 'view" button to go to the live form. Fill in the form and submit it. You can access submissions via the dashboard.
Find out more about what results and reporting look like on Paperform.
6. Connect a payment account.
Before you can start taking payments, you'll need to select a payment source under Configure > Payments.
If you don't have any payment source connected yet, you can set one up by clicking "Manage Payment Accounts" and following the prompts on one of the support payment providers (Stripe, PayPal Business, Braintree or Square).

7. Set up an automatic after submission email.
You'll probably want to send an email to the person who submitted the form when you had received their order. You can set this up under After Submission > Emails. The process is straightforward and easy.
Find out more about after submission emails.

8. Connect your magazine subscription form to Google Sheets.
Head to your Google Sheets account, and create a new spreadsheet. Write column titles for all of the questions you would like to have in the sheet (e.g., Order, Name, Email, Delivery or Pickup, Address, Total Paid).
Go to After Submission > Integrations & Webhooks, and select Google Sheets > "Add Row to Sheet." Follow the prompts to connect your Google Sheets account and select the appropriate sheet and map over the desired columns' answers.
Click the "Send Test" button to test the integration with the last submission.

9. Finalize your magazine subscription form!
Before setting your form live and beginning to accept orders from excited followers and supporters of your magazine, you'll want to do the following:
- Edit the title, description, cover image, and custom URL under Configure>Details.
- Customize the submission page message under After Submission > Success Pages & Redirect.
You're done! You can get the URL or embed code of the online subscription form under the form editor's "Share*"* menu.
Happy form making!