What are loops used for?
Sometimes certain step(s) need to be performed over and over, using different data each time.
For example; let’s say that you have used Paperform to create an online form, where your clients can upload and submit multiple files for a project. You would like to automatically upload all of those files into your Google Drive, with each submission separated into its own folder.
You could begin with a workflow that creates a new Google Drive folder with each Paperform submission:
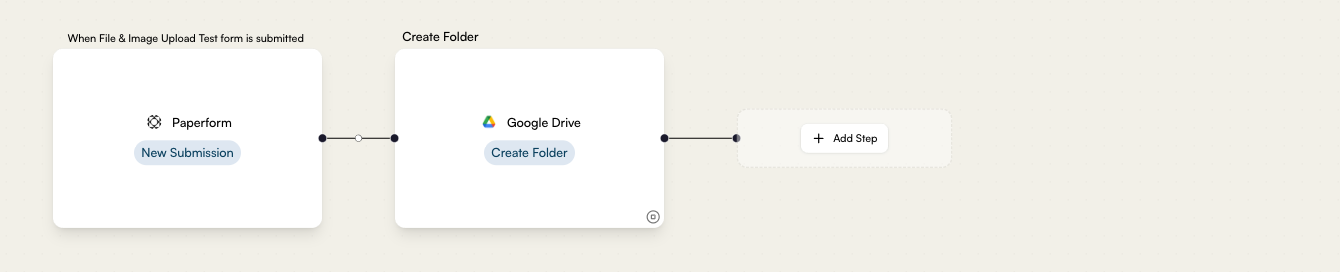 Stepper loop
Next, you would need to upload all of the submitted files into this folder.
Stepper supports another action for Google Drive called “Upload File to Folder,” but it only works for a single file. Our form can accept anywhere from one to ten files with each submission, and so we are going to need a way to repeat this “Upload” step a variable number of times.
This is where Stepper’s built-in “Loop” action comes in:
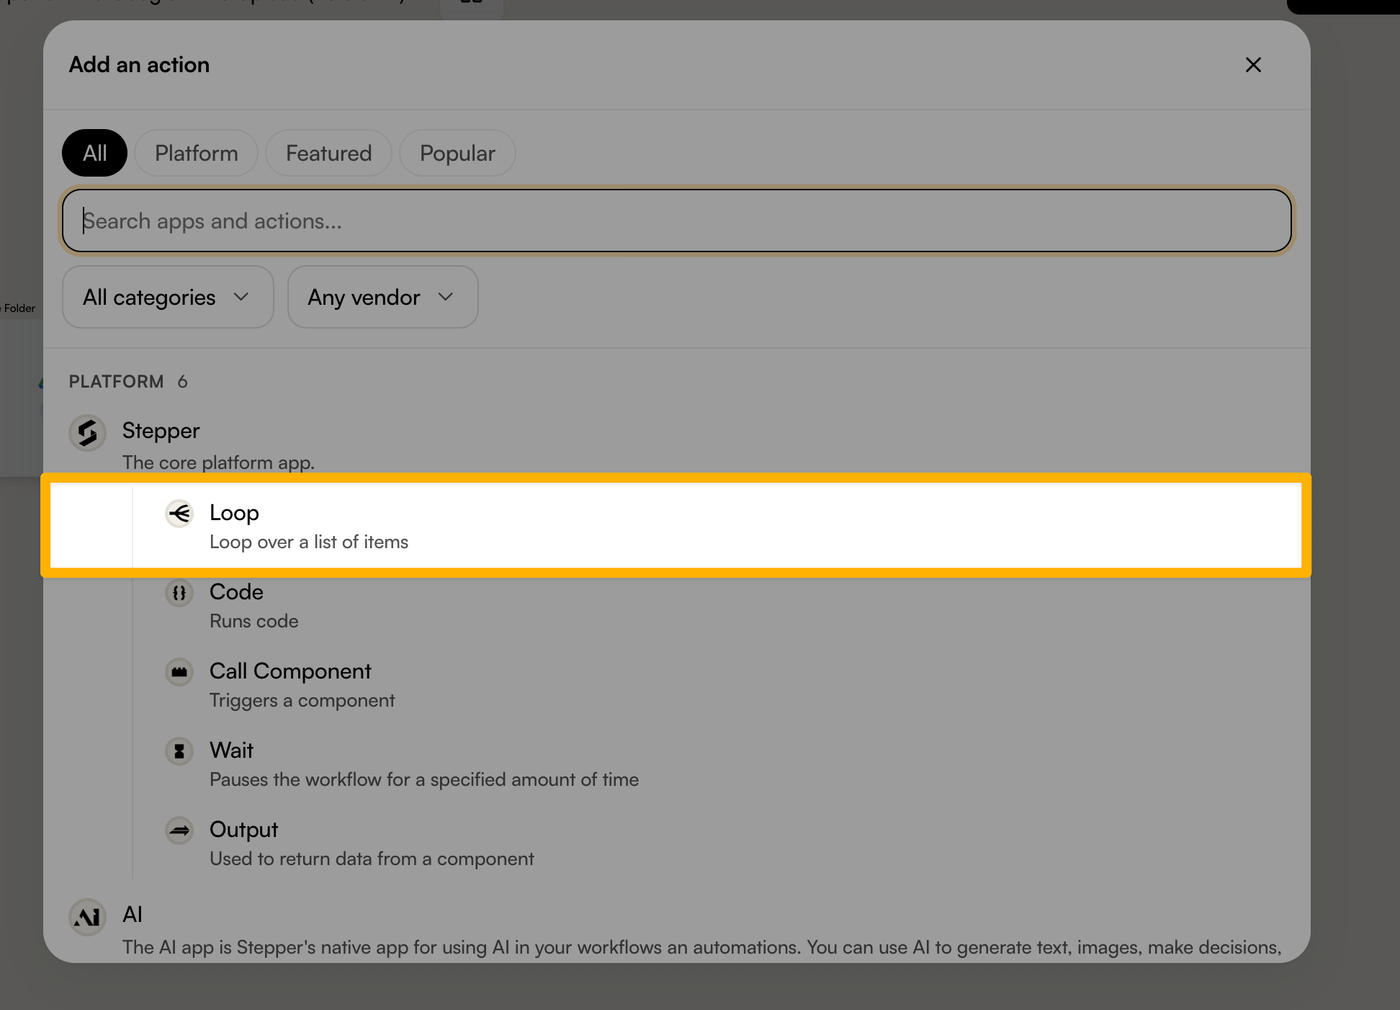
Where do I put the loop step?
Loops can iterate over data collected earlier in the workflow, in order to repeat steps later in the workflow. So, the placement of the loop is important.
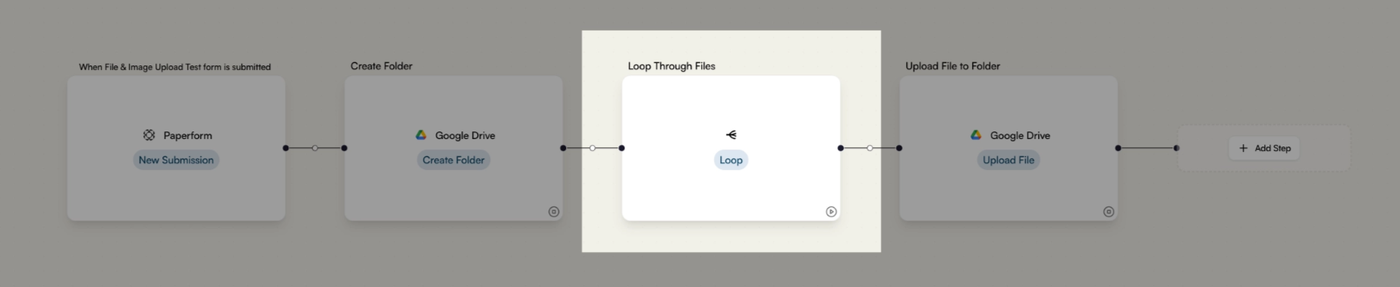
In our case, the full workflow looks like this:
-
Trigger: Paperform receives a new submission.
Receiving the submission triggers the entire workflow, so this step must come first. We will reference some submission data in the following steps, including the loop.
-
Action: Create a new folder in Google Drive.
We only need one folder for the whole form submission, and so this step should come before the loop. We can pull data from the previous step too—perhaps we’d like to label our new folder with the Paperform submitter’s name, for example.
-
Action: Loop over the uploaded files from Paperform.
The loop will be configured to iterate over the files collected in step #1. The number of items (files, in this case) determines how many times the following step(s) in the workflow are performed.
-
Action: Upload a file to the Google Drive folder.
Because this follows the loop step, it will be repeated each time the loop runs
How do I configure the loop step?
Setting up the loop is straightforward; you only need to select the “items to loop over.” However, it can be a little bit tricky at first to know which option to select.
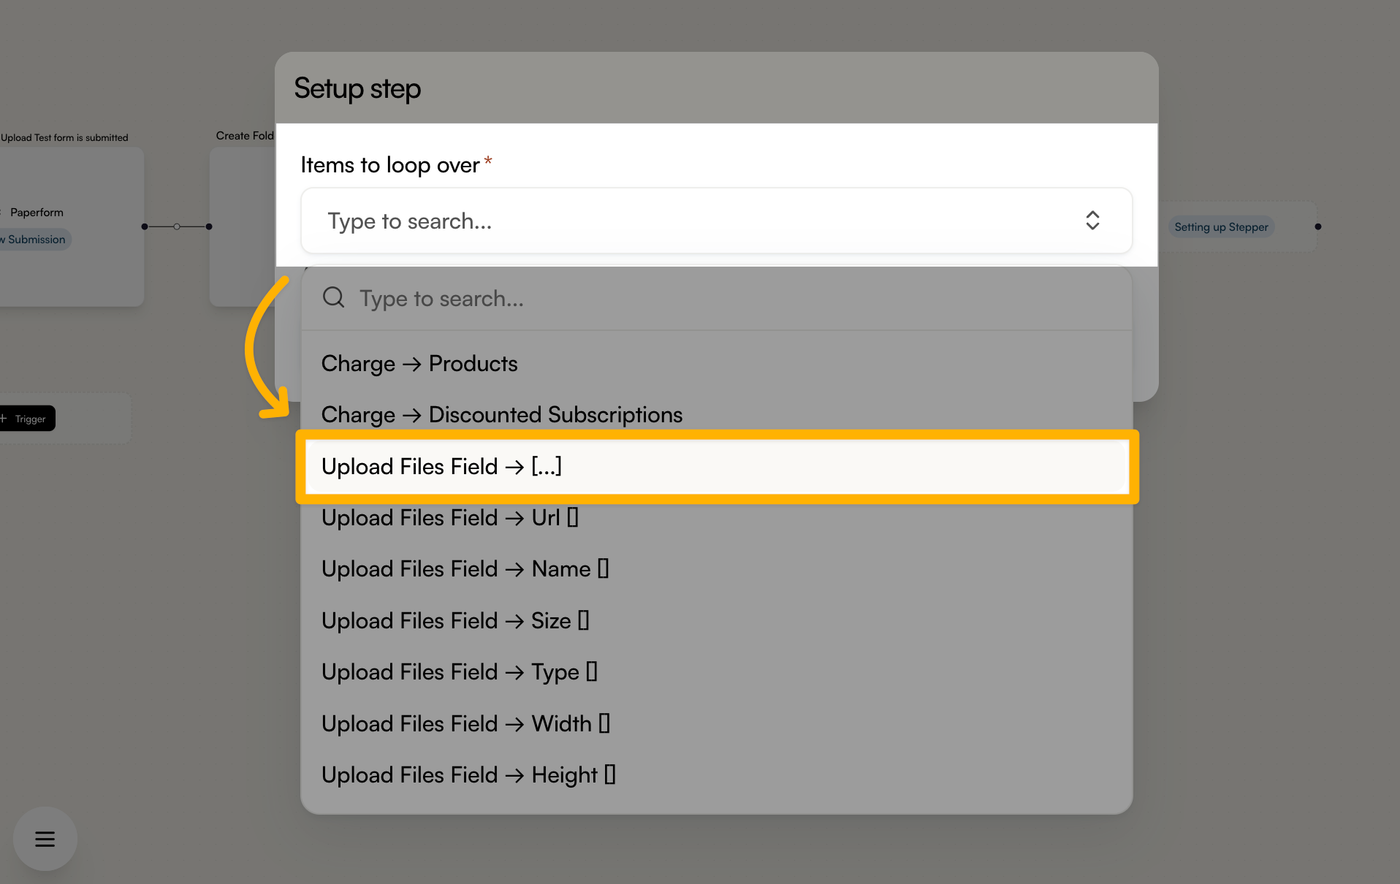
Within this menu, the text represents entire arrays of data—that is to say, items that contain other items. To understand why we selected this option, let’s go back to our Paperform step, and take a look at the example data from a previous submission.
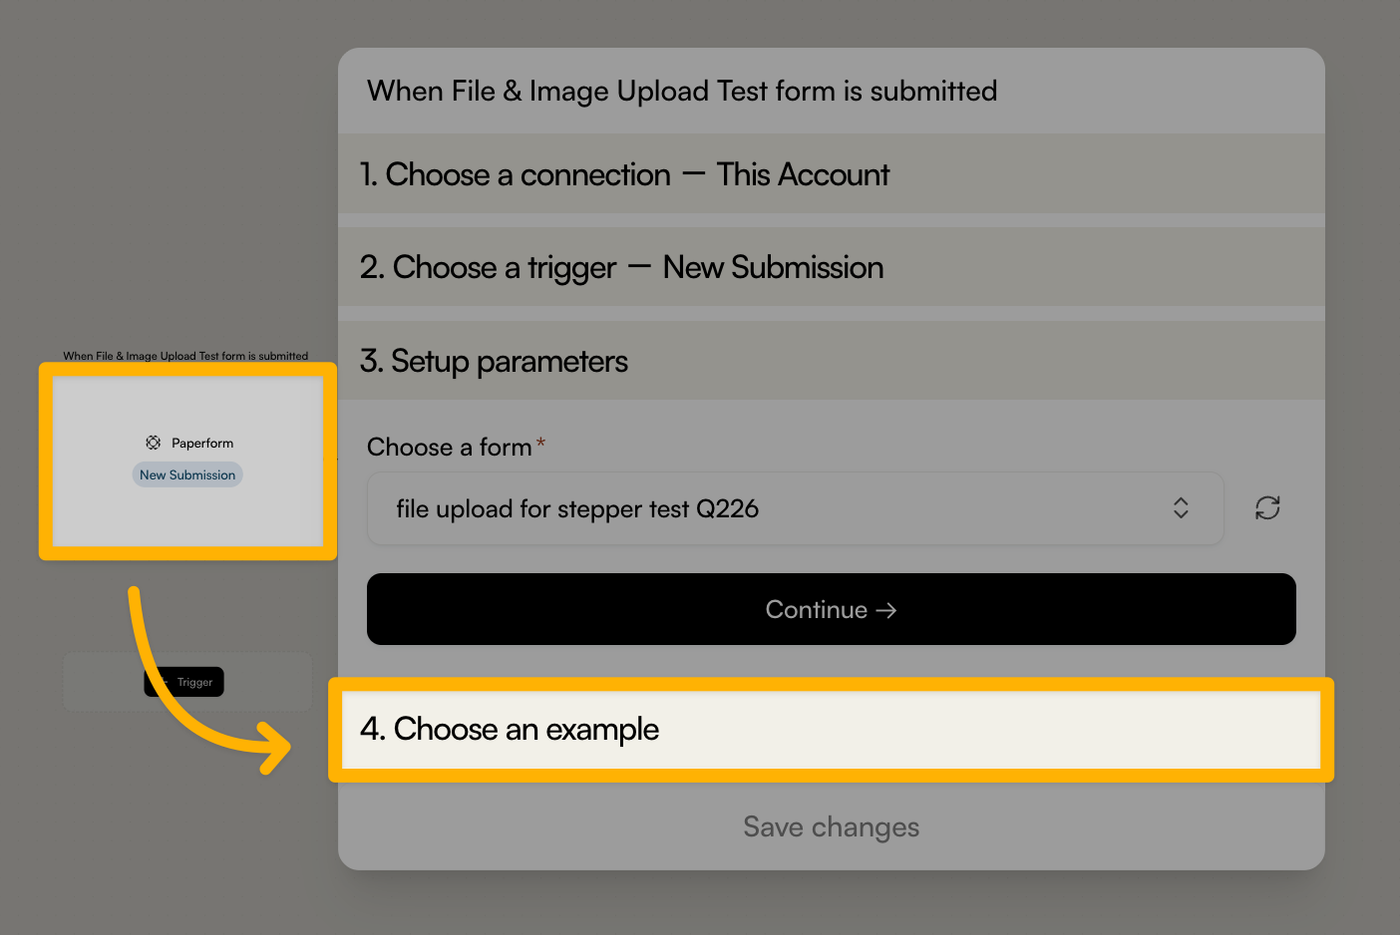
Here, we can see a submission containing two files. Each file includes multiple points of data (including its URL, file name, and other info). The numbers 0 and 1 represent the full array for each file.
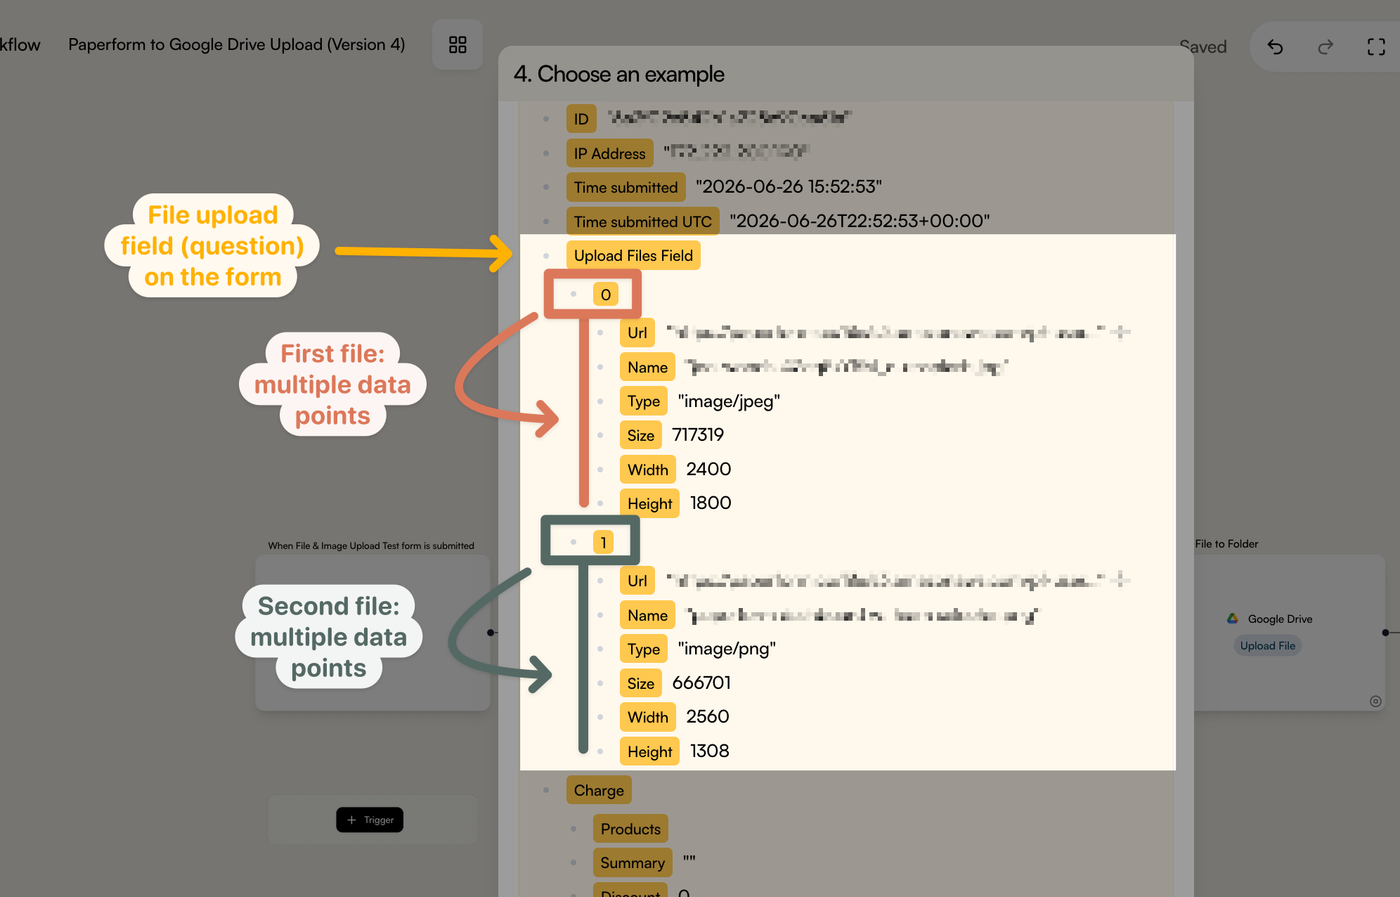
When the files get uploaded to Drive at the end of this workflow, we will want to pull both the files’ URLs and their names through from the Paperform submission. That’s why we selected the full arrays for each file (
Upload Files Field → as the “items to loop over.” The array 0 will be the first “item,” followed by 1, giving us access to all of the available data for each file.
You’ll often select an array
[…]option when available, but not always. If you’re unsure which “items to loop over,” it can help to examine the example data from your root step, and then try to find the specific data that you plan to use as the basis for the loop.Remember that you can always reach out for help, via the live chat or at support@stepper.io. Please be prepared to share screenshots if needed.
How do I configure the repeating actions?
When configuring any actions that follow the loop step, consider which settings should change each time the loop repeats, versus what should stay consistent. Pull data directly from the loop step only for things that should be different each time.
Let’s open up the parameters for our final Google Drive step, “Upload File to Folder.”
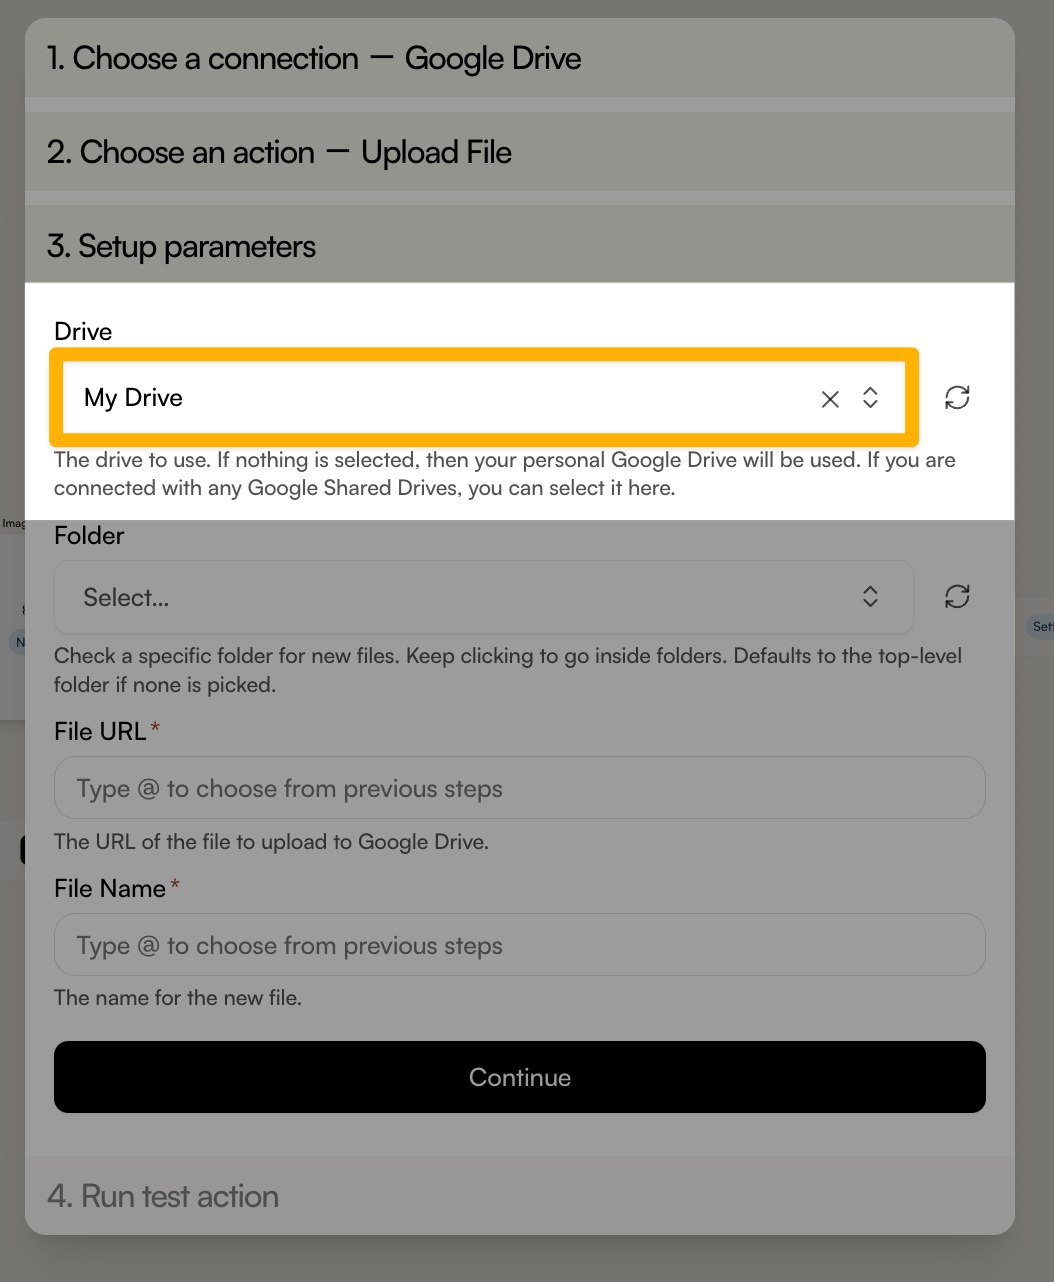
First, we know that the Drive will be the same for each uploaded file, and so we’ll simply select “My Drive.”
Next, the folder. Earlier in the workflow, we generated a folder for the entire submission. While this folder will be different each time the workflow runs (i.e. for each submission of the form), it’s going to be the same folder for each item in the loop (i.e. each uploaded file from a given submission).
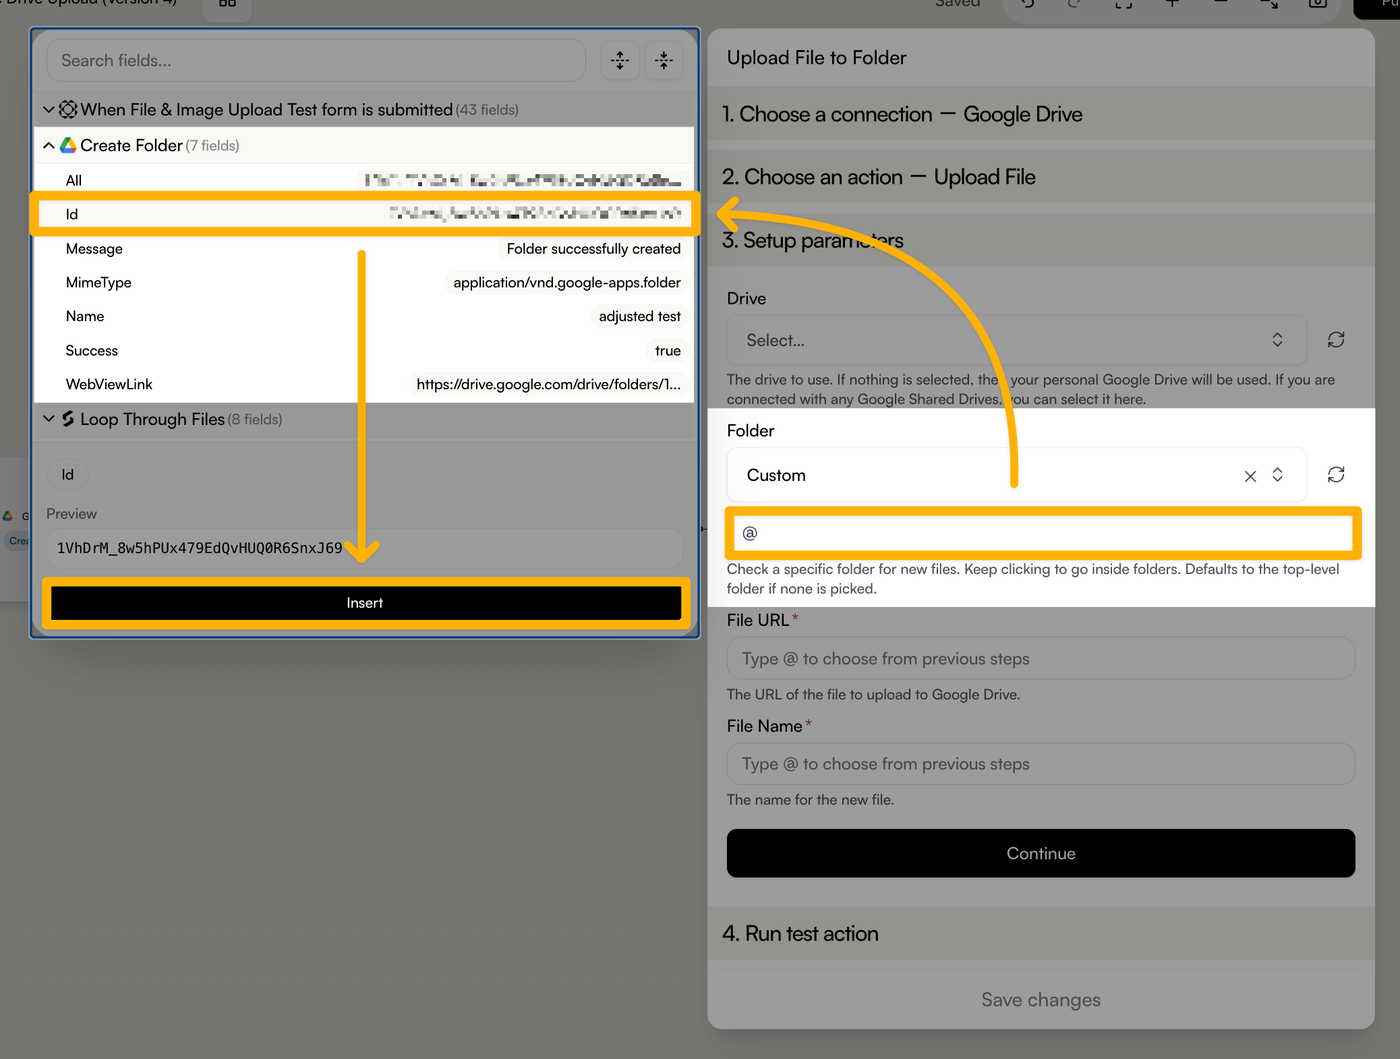
So, we don’t need to select anything from the loop step just yet. Instead, we’ll find the ID for the folder created back in step #2.
In order to select the folder from a previous step, we can first choose the “Custom” option, and then type the “@” key. This opens a menu, where we will find our “Create Folder” step, and then insert the new folder’s ID.
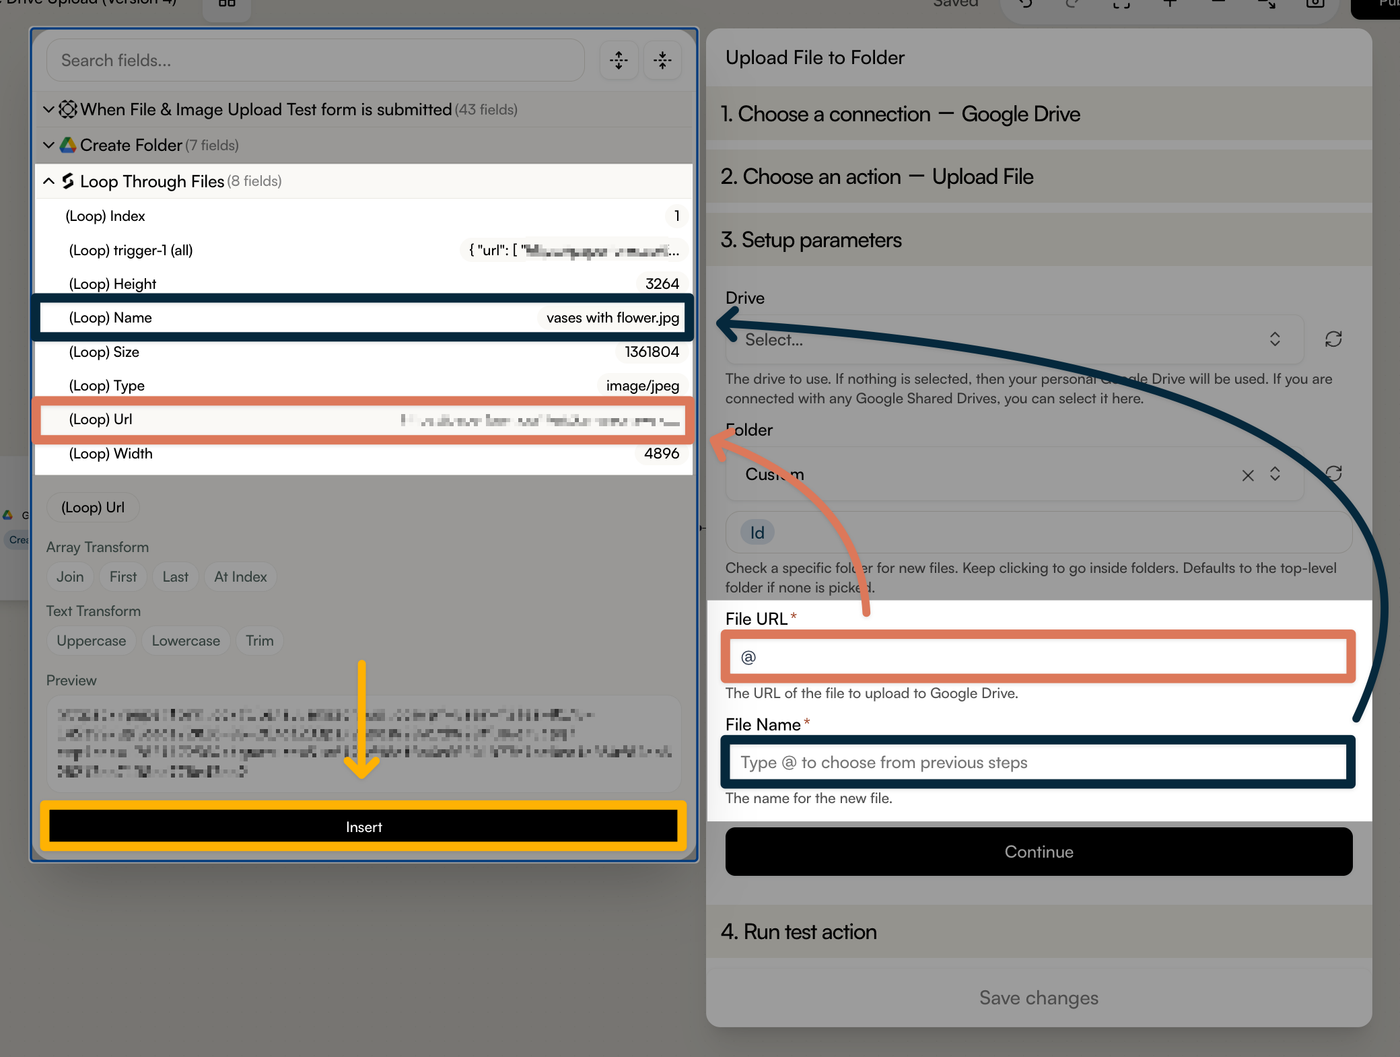
Finally, the File URL and File Name. These are both going to be unique to each file, and so this is where the data from our loop step comes into play.
Pulling the URLs and names from the loop step (rather than the Paperform step) tells Stepper to use the first item the first time, then the second item next, etc. We’ll use the value “(Loop) URL” for the File URL, and “(Loop) Name” for the File Name.
With all four steps configured, we can finally publish the workflow and test it out. A couple of minutes after sending through a new Paperform submission, we should find a new folder in our Google Drive, containing all of the files that we uploaded to the form.
Using Stepper AI
In most cases, you’ll begin with describing your ideal workflow to Stepper’s AI and have it build as much of the workflow as it can for you. In that case, you can simply use this guide as a reference for anything isn’t working. The AI can usually configure the big picture on its own, but it may get caught up on a specific detail, such as the “items to loop over” selection for your specific use case.
If you have any questions, you can reach us via the in-app chat or at support@paperform.co.