Between university, work, and general life admin, we've all wasted too many hours signing documents the long way — printing them, signing them, scanning them back into the computer.
It's tedious.
It's frustrating.
It's inefficient.
Creating a digital signature and adding it straight into the PDF is much easier, and faster. We've covered how to do that with Word, Docs, and, even Excel. Depending on the device or tool you're using, it can be a real hassle.
But if you're a Mac user you're in luck. You can create your personal signature, and sign PDF documents, with the built-in "Preview" app.
How to electronically sign a PDF on Mac
1. Double-click on a PDF document to open it in the default "Preview" app. (We'll assume you have one. If not, you can create one in any word processor).
2. Open the Markup tool by clicking the "pencil in the circle" icon. This will open a new toolbar below the existing toolbar, with options to markup the document.
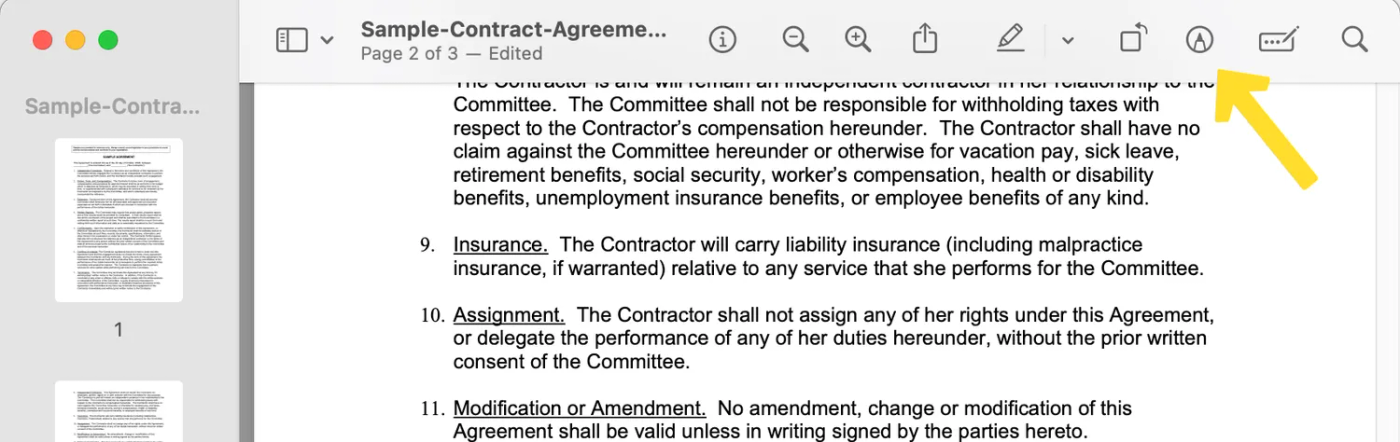 (Source: Apple/Mac OS)
3. Click the Sign button (it's the one that looks like a signature. Funny that.)
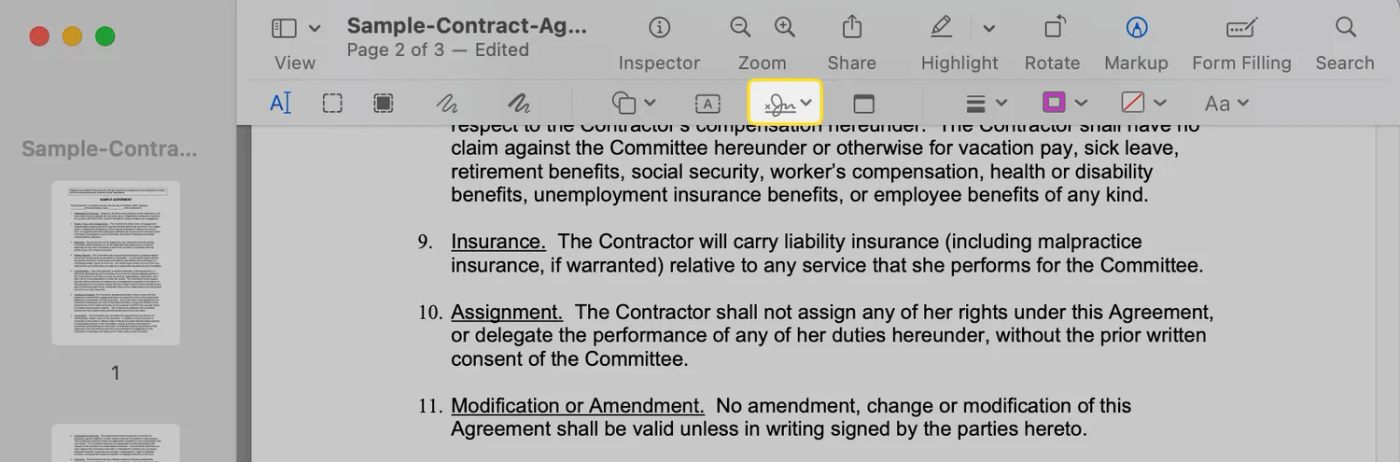 (Source: Apple/Mac OS)
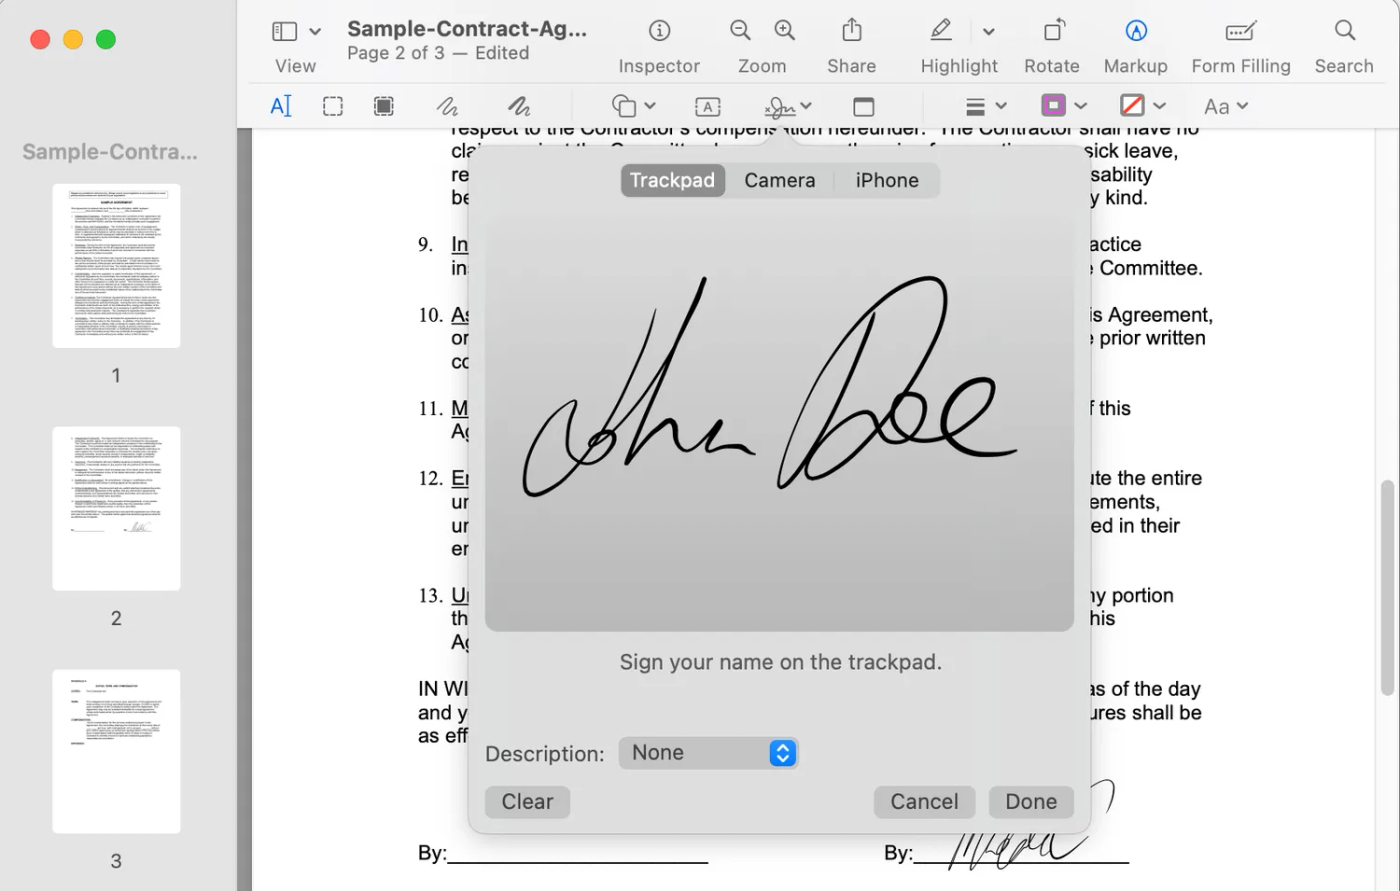
4. Create your signature. Here are the three options to choose from:
- Use the trackpad on your Mac to sign your name with your finger.
- Sign a white piece of paper and hold it up to the webcam for your Mac to scan.
- If you have an iPhone connected to your Mac through iCloud, you can select to sign your name on your phone. Your signature will be immediately imported to your Mac.
Whichever one of these methods you choose (trackpad is easiest), it'll prompt you to create your signature, and press "Done" once you're happy.
 (Source: Apple/Mac OS)
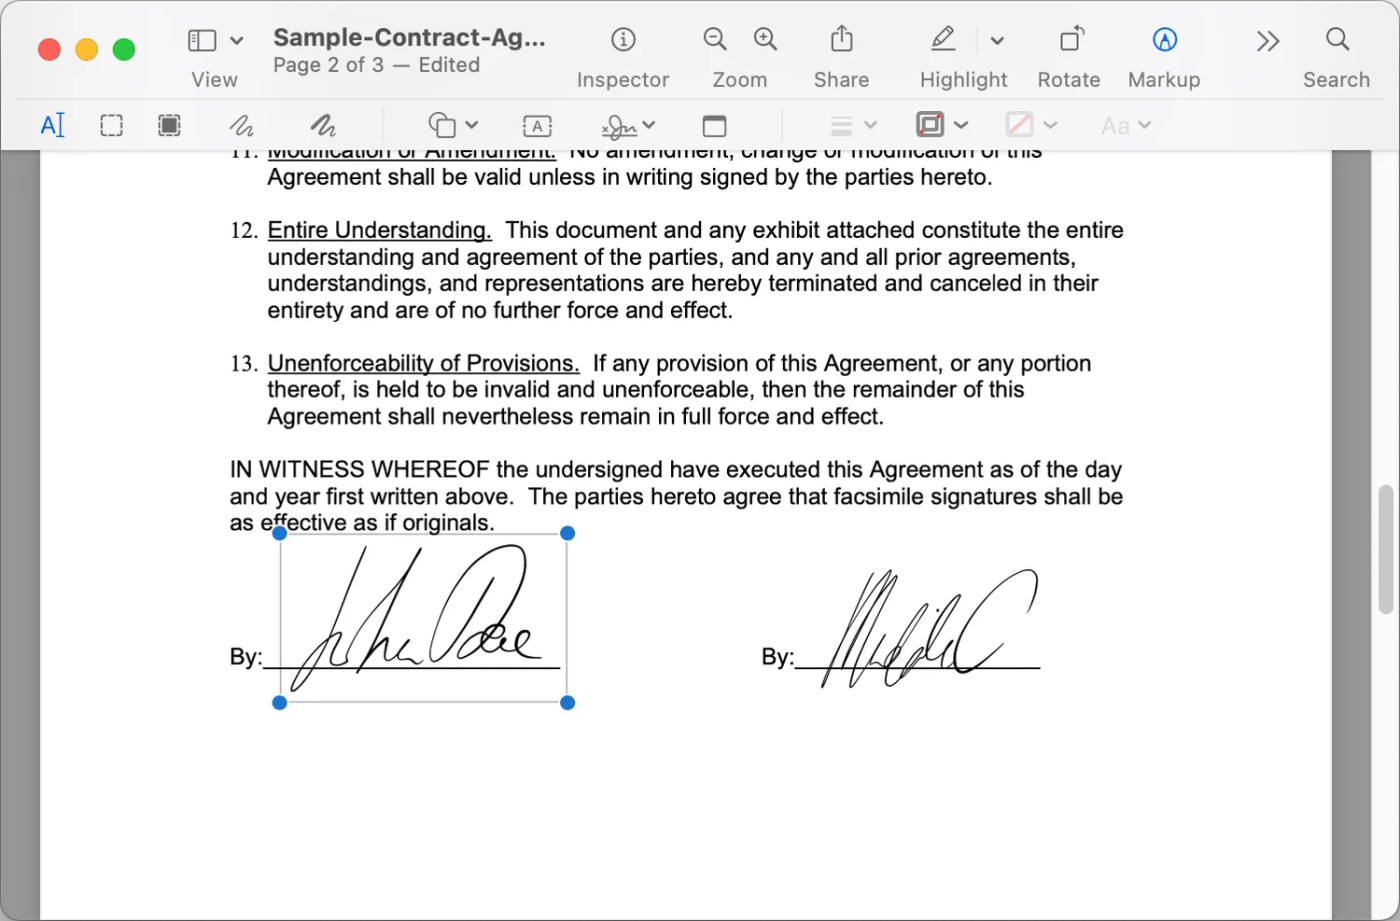
5. Select your new signature from the menu and it'll be added to your document. You can move it anywhere on the page, and drag the box to resize it.
 (Source: Apple/Mac OS)
If you need multiple signatures, you can create as many as you need the same way. "Preview" saves your signatures, so next time you need to sign a PDF, you can skip the tutorial and add your signature directly from the menu.
💡 Tip: Sharing your Mac with other people? You might want to delete your signature to prevent forgeries—just hover over the signature and click the cross that appears to get rid of it.
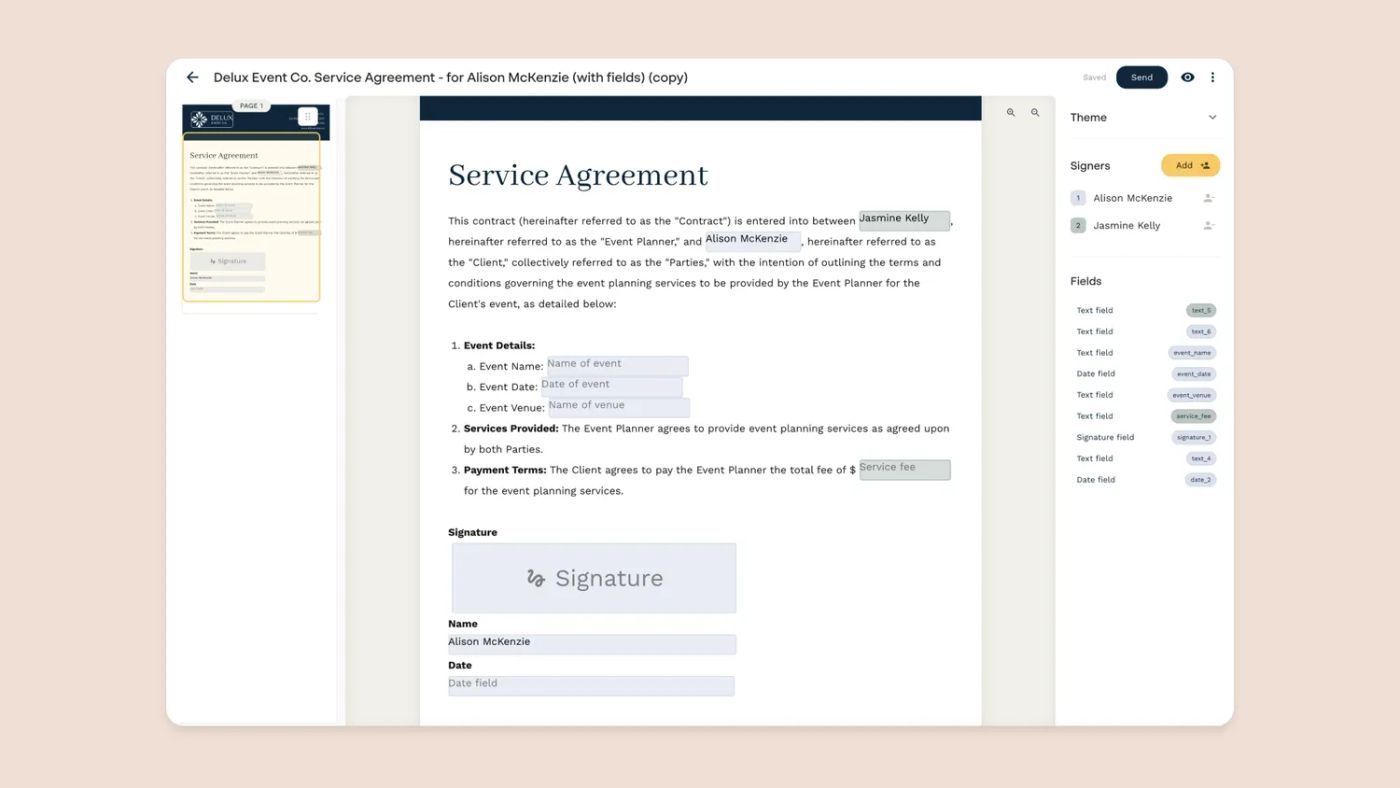
With Papersign you can create, send and sign documents, and monitor their status in one place—whether you're on a Macbook, desktop, iPad, or any other device.
Edit PDFs, collaborate with your team members, and share signable documents in bulk anywhere in the world. Get started free today.
Related reading