Automate Your Online Cooking Classes With Paperform
Ready to start sharing your skills in the kitchen with others? Use Paperform to create a beautiful landing page, collect signups, process payments, and automate email communications — all in one place.
1. Use the template.
Visit the template page and click "Use this template."
If you do not currently have a Paperform account, you can quickly sign up for a free trial first (no credit card details required).
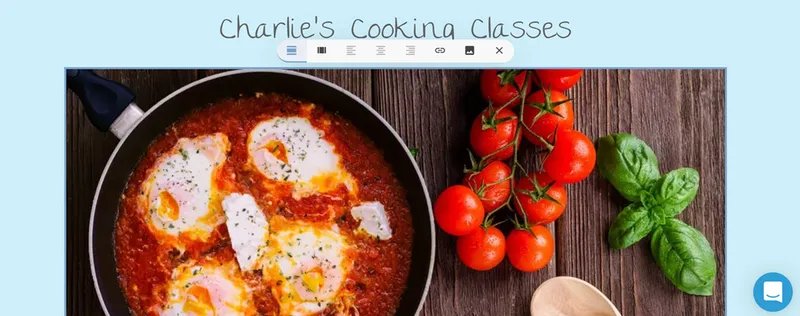
2. Edit the form's name, text, and images.
It is simple to edit or remove the heading of the form by clicking on the text. This process is the same for any body of text on your cooking class booking form.
Likewise, if you wish to edit any of the questions on your template, click the correlating text. If you want to make a body of text shorter or delete it, you can highlight it as though you are working on a Word doc.
This template has a cover image added to give a personal feel to the form. If you wish to replace or remove it, click on the image, and a toolbar will appear above. Click the picture icon to replace the image with a file of your own, or click the 'X' icon to remove the image entirely.

Find out more about adding images to your forms.
You can add a body of text, image, or question anywhere on your online form by merely clicking the area you wish to edit. A small toolbar will appear on the left. From this screen, you can choose what you want to add to your form by clicking the corresponding icon.

Find out more about adding page breaks to your form.
Furthermore, you can easily duplicate, delete, move, or configure any questions on the form by clicking the correlating icon found on the right-hand side of a question field.

3. Change the look and feel of your cooking class booking form.
Now that you have changed your form's basics, it's time to brand it.
In the top right corner of your form editor is the 'Theme' icon (represented by the colored teardrop). Upon clicking this, you will enter your theme settings. From here, you can edit your cooking class booking form and make it truly bespoke.
Simple changes such as the font, size, and color of your text can be configured from here. You can also edit your text's appearance in more detail from the 'Typography' tab.
The look and feel of your buttons and questions can be edited from the 'UI Elements' tab, while you can change the background color and even upload a background image from this tab as well.

4. Set up your subscription sign-up.
Now we need to ensure that you will be receiving payments for your cooking classes!
Firstly you will need a payment gateway account to make this possible. By default, we used a Stripe account to show you how to create a subscription plan for your form.
If you want to achieve this with Braintree, check out how to create subscription plans with Braintree.
You first will want to create or sign in to your Stripe dashboard. From here, head to your products menu on Paperform where you will see the option to create a product. Click the 'Add a product' button to create a subscription plan, follow the prompts, edit the fields to suit your needed subscription plan, and voilà!

Now that is set up, fantastic!
From here, we want to go back into our form editor dashboard so we can connect the subscription. Click on 'Configure'> 'Payments' and connect your Stripe (or Braintree) account.

Now go into the 'Subscription' question settings by clicking on the configure icon that sits on the question's right-hand side. You will now see available plans for subscription; choose the correct plan. Ensure you scroll through the available settings for Credit Cards, Payment Options, and Subscription Settings to be on the safe side.
5. Now put through a test submission.
Click the 'view" button to go to the live form. Fill in the form and submit it.
You can access your form submissions via the dashboard.

6. Organize where to meet for sessions (Google Hangout).
Now that your booking form is ready, we will need to organize where you will meet your students for the live video cooking sessions.
By default, we have used Google Hangouts since it's free and will be readily available to all your students. Another great option would be to use a live Facebook video link or even a paid Zoom account.
Ensure you have a Google Hangouts account and create a video chatroom. Then, copy the URL link of this chatroom to easily send it to your current students and link it into the automatic after submission email we are about the setup.

7. Set up an automatic after submission email.
After a customer has submitted their booking and made their payment, you will need to send them a confirmation email containing details of their session and a payment receipt.
To set up a confirmation email that will automatically send once a customer has submitted their booking form, simply go into After Submission > Emails.
Then click 'Add email' and follow the prompts to create your automatic email. You can even pipe answers from your submitter's responses into this section, such as their email or name.
Find out more about answer piping.
Upon submission, the user will receive their details, a receipt, and the chatroom lesson's link.
8. Connect to HubSpot to keep your student's details in one place.
Keep all your student's details in one easy to read location.
Our integration with HubSpot makes it easier to connect with your online students and keep that relationship blossoming.
You can take control of your emails, reporting, goals, and more. To connect, simply go into After Submission > Integrations & Webhooks, Click on the HubSpot icon, and follow the prompts.

9. Final checklist.
Before making your form live and beginning to accept bookings from excited students, you'll want to do the following:
- Edit the title, description, cover image, and custom URL under Configure>Details.
- Customize the submission page message under After Submission > Success Pages & Redirect.
You're done! You can now fetch the direct URL to your form in the "Share" menu or embed this cooking class booking form on your website.
Bon appétit!