All Solutions
Explore all the solutions you can create with Paperform: surveys, quizzes, tests, payment forms, scheduling forms, and a whole lot more.
See all solutions


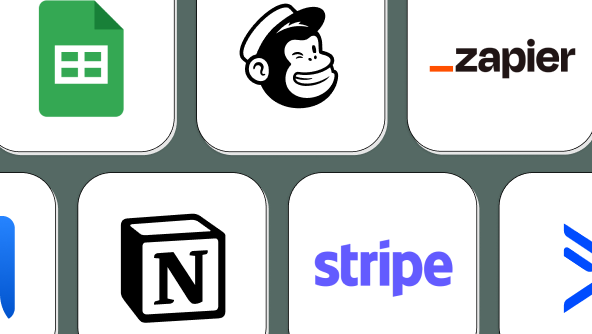
Connect with over 2,000 popular apps and software to improve productivity and automate workflows
See all integrationsProducts
Solutions
All Solutions
Explore all the solutions you can create with Paperform: surveys, quizzes, tests, payment forms, scheduling forms, and a whole lot more.
See all solutionsIntegrations
Connect with over 2,000 popular apps and software to improve productivity and automate workflows
See all integrationsResources
Language School Management Software
Manage student registrations and data, collect payments, schedule classes online — all in one place.

1. Use the template
Go to the enrollment form template and click "use this template".
If you don't have a Paperform account, you will need to sign up for a free trial first (no CC required).
You can also start a form from scratch if you would like, but using templates is a great way to get off the ground and familiarize yourself with Paperform.
2. Change the name, images, and text in your form.
You can easily edit the heading of the form by simply clicking on the text. This is the same for any body of text throughout the form.
Likewise, to edit the text of any of the questions that currently appear in your form, simply click on the correlating text and delete it.
If you want to make a body of text shorter or delete it, you can highlight the text as if you were working in Google Docs or a Word document.
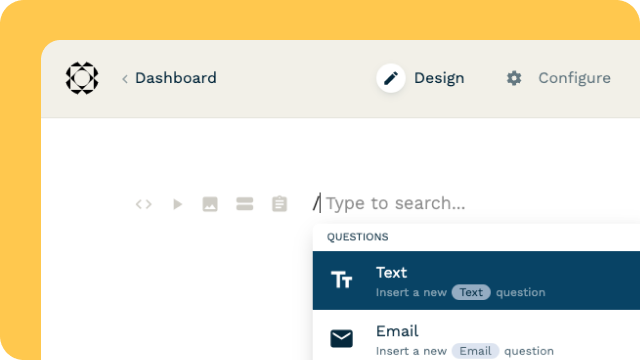
This template has a cover image that sits below the heading name "The FRENCH Fluent Formula". You can easily replace this by clicking the image and choosing the picture icon within the toolbar that appears above (pictured below).
You can also delete the image entirely by clicking the ‘X’ icon that appears in the very same toolbar next to the picture icon. A pop-up prompt will appear, asking if you want to delete the image.

Find out more about adding images to your forms.
3. Change the look and feel of your form.
So you have now changed the basics of your form to suit your business or individual needs. Now, let's look at changing the personality of your form.
In the top right corner of your template editing dashboard is the 'Theme' icon.
Once you click on this you will enter your theme settings. From here you can edit the form to feel more personal. Simple changes such as the font and color of the text can be done from here. You can edit the appearance of your text more detail from the 'Typography' tab.
The look and feel of your buttons and questions can be edited from the 'UI Elements' tab. You can change the background color and even upload a background image from this tab as well.
4. Organize how long your lesson's run for and the price you charge.
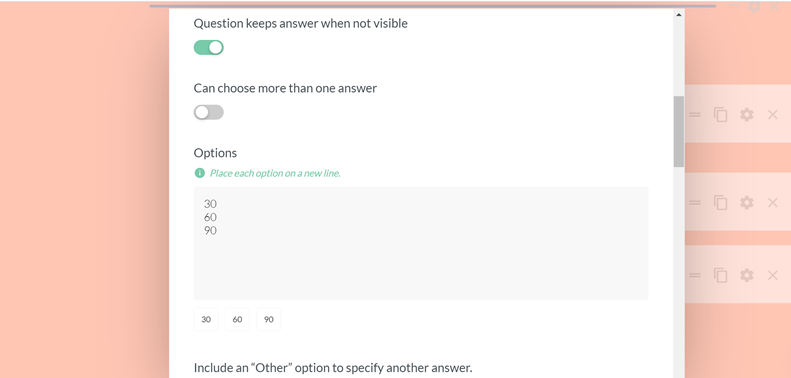
This template provides three lesson lengths for lessons:
- 30 minutes
- 60 minutes
- 90 minutes
You can easily edit, add or remove these by clicking on the configuration icon for the 'Choose the length of your lesson' question. Simply click on the configuration icon to open up the question settings.

Now simply scroll down to where you can see the options and edit freely. You can also add images to each option.
Please be careful with editing the length of your class sessions.
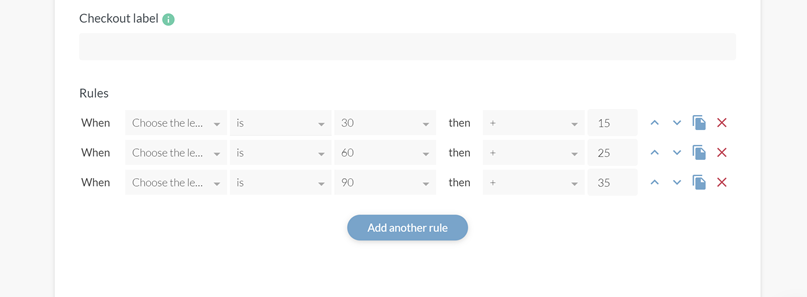
In order for the total price to properly correlate with which lesson length is chosen, you must also edit the custom pricing rules (pictured below).
To enter the 'Custom Pricing Rules' simply click on 'Configure' at the top of your editing dashboard > 'Payments' tab then scroll to the bottom where you will see 'Custom Pricing Rules'.
This is where you can also personalize what you charge per lesson. Where you see below the rule reads 'then + 15 ' — this simply states that when the lesson length is chosen to be '30 minutes', the user will be asked to pay $15.00 before completing their booking.
4. Tailor a personal booking and appointment system to schedule when to meet your students.
At Paperform we have now made it easier than ever to create and control your own Appointment booking system through the Appointments question type.
To ensure your lessons are run efficiently you can also connect a calendar that will keep track of all lessons and stop any double-booking problems you may have faced in the past.

You can configure your general availability manually, add 'blockout dates' for days you are not available, as well as connect the form to your Google Calendar to ensure students don't double-book you. This will also automatically add new bookings to your calendar.
Connecting your calendar is simple:
- Select the configure icon to the right of your Appointments question.
- Click + Calendar to connect a new Google calendar.
- Click + Account and follow the prompts to connect.
- Select the calendar you want to use for your appointments from the drop-down menu.
- And that’s it!
5. Organize your language classes (online video call).
Now that you have customized your lesson availability and are on your way to helping students, let’s look at how simply you can keep your booked customers informed as to what's to come, and remind them of their booking.
When an appointment is made it will appear on your calendar. Google Calendar bookings will have a Hangout Video Call link automatically included, which you might like to use for your meeting.
Google will also automatically send out reminders for this meeting by email.

6. Put through a test submission.
Click the 'view" button to go to the live form. Fill in the form and submit it. You can access submissions via the dashboard.

7. Connect a payment account.
Before you can start taking payments, you'll need to select a payment gateway under Configure > Payments.
If you don't have any payment source connected yet, you can set one up by clicking "Manage Payment Accounts", and following the prompts on one of the support payment providers (Stripe, PayPal Business, Braintree, or Square).

8. Set up automatic after submission email.
After a customer has submitted their lesson booking and made their payment, you will want to send them a confirmation email containing details of their language class and payment.
To set up a confirmation email that will automatically send once a student has submitted their form, simply go into After Submission > Emails. Then click 'Add email' follow the prompts and create your automatic email.

9. Connect to HubSpot to keep your students' details in one place.
Keep all your students' details in one easy to access location.
Paperform's integration with HubSpot, a leader in Customer Relationship Management, makes it easier to connect with your students and keep that relationship blossoming.
To connect HubSpot and Paperform, simply go into After Submission > Integrations & Webhooks, Click on the HubSpot icon, and follow the prompts.

10. Final checklist.
Before making your form live and starting to collect language class bookings from excited students, you’ll want to do the following:
- Edit the title, description, cover image, and custom URL under Configure>Details.
- Customize the submission page message under After Submission > Success Pages & Redirect.
You're done! You can get the URL or embed code of the online order form under the Share menu in the form editor. Happy form making!