Redlining a document involves marking up a contract or legal paper to highlight changes, making it easier for all parties to understand revisions. It's crucial during negotiations, reviewing amendments, ensuring legal compliance, collaborative projects, quality assurance, and addressing client revisions. Depending on the platform, such as Google Docs, Microsoft Word, or PDFs, the process may differ. Best practices include starting with a clean document, using clear markup symbols, maintaining a changelog, open communication, and thorough review before finalization. Papersign is a tool to finalize contracts efficiently after redlining.
Navigating revisions in contracts and legal papers can be a maze. This blog will guide you through the ins and outs of document redlining, helping you manage changes efficiently.
What does it mean to redline a document?
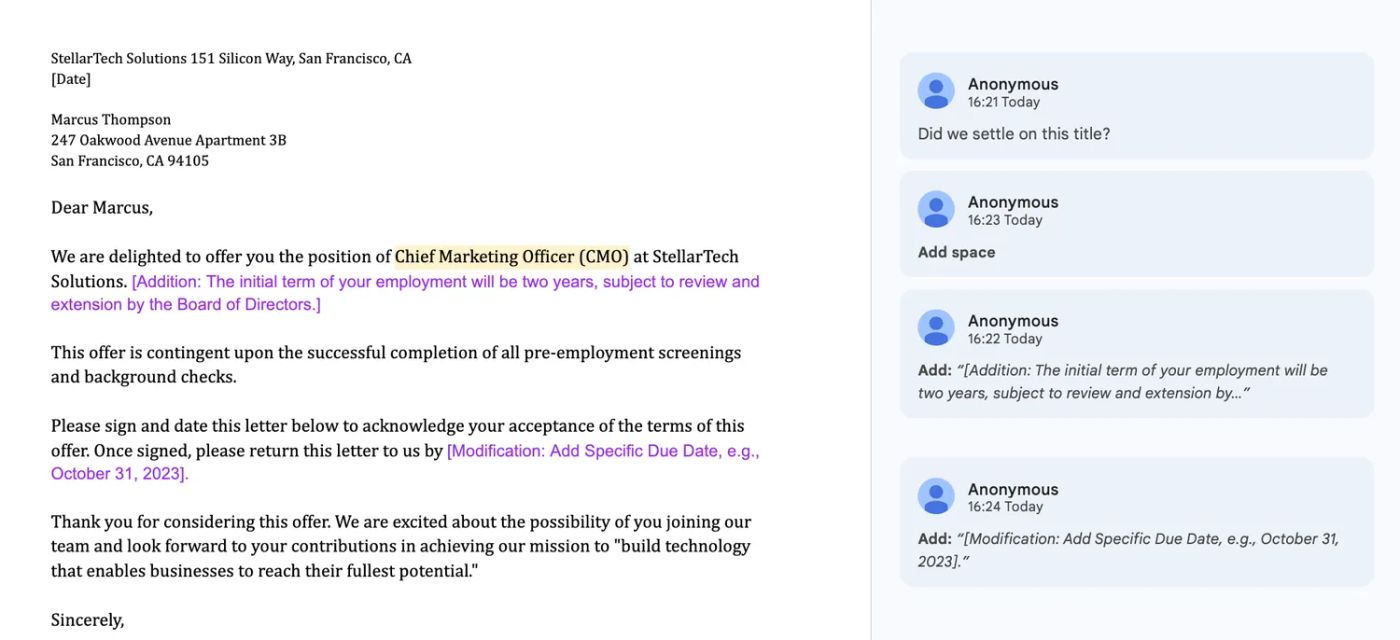
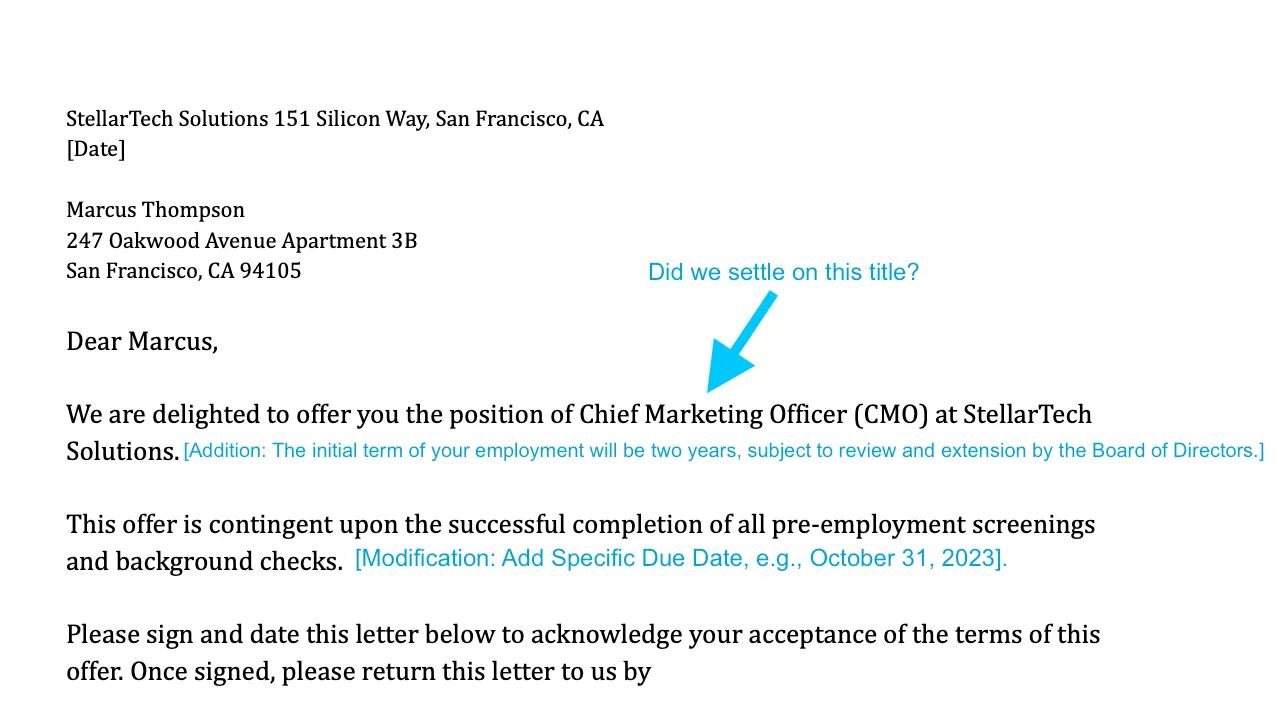
Redlining a document refers to the practice of marking up a contract or legal document to highlight changes, revisions, or corrections. It's a way of visually presenting what has been added, deleted, or modified, making it easier for all parties involved to understand the adjustments.
In a legal context, redlining is crucial for negotiations and revisions, as it offers a transparent way for both parties to suggest changes without altering the original document.
By redlining, you can:
- Identify proposed amendments clearly
- Facilitate smoother negotiations between parties
- Maintain a record of what changes have been suggested and agreed upon
In essence, redlining serves as a roadmap for changes to be discussed, amended, or approved, making it an invaluable tool for anyone dealing with contracts or other legal documents.
When should you redline documents?
Redlining is most effective during certain stages of the document lifecycle, especially when dealing with contracts and legal agreements. Here are some key scenarios where redlining is often employed:
- During negotiations: When you're in the preliminary stages of a contract, redlining allows each party to propose changes to clauses, terms, or responsibilities.
- Reviewing amendments: If a contract is up for renewal or modification, redlining can highlight what's new, offering a quick way to see changes without having to read the entire document.
- Legal compliance: Laws and regulations can change, making some parts of your existing contracts obsolete or non-compliant. Redlining helps in updating the document to meet current legal standards.
- Collaborative projects: In complex projects involving multiple stakeholders, redlining makes it easier to incorporate inputs from various parties while maintaining the integrity of the original document.
- Quality assurance: Before a document is finalized, redlining serves as a final review to ensure that all changes have been properly incorporated and that there are no errors or omissions.
- Client revisions: When dealing with client contracts, redlining enables you to quickly address client feedback and make requisite changes efficiently.
By understanding when to utilize redlining, you can optimize your document revision process, making it easier to focus on the substance of the agreement rather than getting lost in a sea of changes.
How to redline a document or agreement
Whether you're working in Google Docs, Microsoft Word, or dealing with PDFs, redlining is a must-have skill for effective document editing. Here's a rundown on the process depending on your chosen platform.
1. How to redline a Google Doc
 (Source: Google Docs — "Purple"lining?!)
- Open the Google Doc you want to redline.
- Click on the pencil icon in the upper-right corner and select "Suggesting."
- Type your changes, which will appear as suggestions.
- Use the comment feature for additional notes.
- Collaborators can accept or reject the suggestions.
2. How to redline a Microsoft Word document
 (Source: Microsoft Word — Actual redlining!)
- Launch Microsoft Word and open the document.
- Go to the "Review" tab and click "Track Changes."
- Edit the document, your changes will be marked.
- Use the "New Comment" feature for extra notes.
- Changes can be accepted or rejected in the "Review" tab.
3. How to redline a PDF document
 (Source: Apple Preview — "blue"lining!
- Use a PDF editor to open the file (we used Apple Preview)
- Select the "Comment" tab and choose your markup tool.
- Use the tool to highlight text or add notes.
- Use the "Add Text Comment" tool for additional notes.
- Save your redlined PDF and share it with collaborators.
5 Best practices for redlining documents
Redlining a document is about more than just making changes. It's about making those changes clear, efficient, and ready for collaboration. Here are a few best practices to remember next time you pull out that digital red pen.
1. Start with a clean, final version of the document
Starting with a clean slate ensures that everyone is on the same page—literally. This minimizes confusion and makes it easier to track changes from one version to the next.
2. Use clear and consistent markup symbols or colors
Consistency is key when multiple people are reviewing a document. Stick to a set of symbols or colors for edits and comments so that everyone can easily understand the changes.
You don’t have to use red text—use GIFs, emoji, Wingdings, whatever! Just remember to make the meaning clear and consistent.
3. Keep a changelog or summary of major edits
A summary of changes can serve as a reference for those reviewing the document post-edit. This is especially useful for complex documents with multiple rounds of edits.
4. Communicate openly with collaborators about the changes.
Open communication prevents misunderstandings and ensures that everyone agrees on the edits. Use the comment features in your editing tool to discuss changes in real-time.
5. Review all changes before finalizing the document
Before you finalize, make sure to review all changes and comments. This ensures that no accidental edits slip through and that the document is ready for its next steps.
💡 Tip: After all the edits are made, take a moment to review the document for any formatting or layout issues. This ensures that the document not only reads well but also looks professional.
Redline your docs—and finalize with Papersign
Once you've used redlining to finalize a contract, Papersign is your go-to for sealing the deal. It allows signers to reject a document if further edits are needed, ensuring that everyone is on the same page before signing.
With the best practices and tips in this article, you'll be a redlining pro, and Papersign will help you make it official.
Sign up for Papersign free.
Related reading