https://spp.co/blog/client-not-paying-invoice/Getting paid is one of the most rewarding parts of running your own business. But the actual logistics of collecting your money? Well, that’s not nearly as fun.
In all honesty, invoices are pretty simple and straightforward (we promise). However, if you’ve never created or sent one before, figuring out how to write an invoice can feel like yet another daunting task in business ownership.
What’s an invoice number? Do you just pick one at random? What does Net 30 mean? What the heck are payment terms anyway?
You can stop your frantic Googling. We have your guide to sending invoices right here so you can quickly figure out what you need and cut to the best part: getting your hard-earned money.
What exactly is an invoice?
An invoice is a document that you send to a client or customer when it’s time for them to pay you for your products or services. This short but sweet piece of paper gives them all of the information they need to submit payment, including the total they owe and when they need to pay you by.
Your invoice is important for your own record-keeping, but your clients will likely need that paper trail too. Your invoice is an easy way for them to look back and understand what they paid for and when.
In short, think of your invoice as a one-page document that signifies to your client, “Hello, it’s time to pay me!”
What’s included on an invoice?
Your invoice will be short in length (most are kept to one page, unless there are dozens of line items), but that doesn’t mean it’s short on information. Additionally, to streamline the invoicing process, consider using invoicing software or an MS Excel Invoice Template online. This simplifies the creation of professional invoices while ensuring accuracy and efficiency.
Nevertheless, every invoice will include:
1. Your contact information
Near the top of your document, include your business name and logo as well as your:
- Mailing address
- Email address
- Phone number
Doing so means clients can immediately tell who the invoice is from and can also easily get in touch about any questions—without having to search for your business information.
2. Customer information
Your invoice should also list the details of the client or customer that you’re billing, including:
- Contact name
- Company name
- Address
This information typically appears near the top of your invoice in the “bill to” field.
3. Invoice number
This is a unique number that identifies your invoice. It makes it easy for you to log payment (you simply look for the correct invoice number to apply the payment to, rather than having to click through dozens of invoices) as well as for your clients to track their paid bills.
What invoice number should you start with? That’s up to you, but most people choose to start with something logical like “01” or “001.” If you go that route, your next invoice would be “02” and so on.
4. Issue date
It sounds fancy, but this is just the date that you’re sending the invoice—and, for that reason, you might also hear it called an “invoice date.”
This essentially starts the countdown for your payment terms. So, if you expect payment within 30 days, that means it’s due within 30 days from the issue date that appears on your invoice.
5. Payment due date
There are plenty of different payment terms you can use for your invoices. Your payment terms are your “rules” for when payment is due. Some popular ones include:
- Due on receipt: You expect the client to submit payment as soon as they receive your invoice.
- Net 15: You expect payment within 15 days of the invoice issue date.
- Net 30: You expect payment within 30 days of the invoice issue date.
You can explicitly spell out your payment terms on your invoice (for example, include “Net 30” with your invoice details). But even if you include the payment terms, it’s smart to also state the payment due date. That makes it unmistakably clear when you need to receive payment.
6. Line items
The bulk of your invoice will be dedicated to your line items—these are the various products or services you’re billing the client for.
Each line should be dedicated to a specific item or service and should include a description of what you’re billing for (for example, one blog post), the date you provided that product or service (October 16, 2023), and how much you’re charging for that specific item ($900).
Your invoice might have only one line item or it could have many. It all depends on how much work you did for that client or customer over the previous invoice period.
7. Total amount due
With all of your line items in place, it’s time to add up those numbers and get the total amount the client owes you.
This should go toward the bottom of your invoice, ideally in larger or bolder font so it stands out. This total should include your line items, as well as any tax the client owes (if that’s applicable to your business).
Those are the basics. But, your invoice could also include other aspects that could be important to your own unique business, such as:
- Accepted payment methods
- Personalized message
- Purchase order (PO) number
Think about it this way: If something is important for a client to know in order to pay you, it’s smart to include it directly in your invoice. That way, there’s no missing it.
How to write an invoice in 5 easy steps
Once you know the main elements of an invoice, creating one isn’t all that hard. You just need to get all of the important information onto a document and send it over to your client.
With that said, there are a few steps you can follow to make the process a little easier (and hopefully save yourself some time cursing at wonky formatting in a document). Here's a simple guide to send an invoice using Papersign:
Step 1: Create a Papersign document
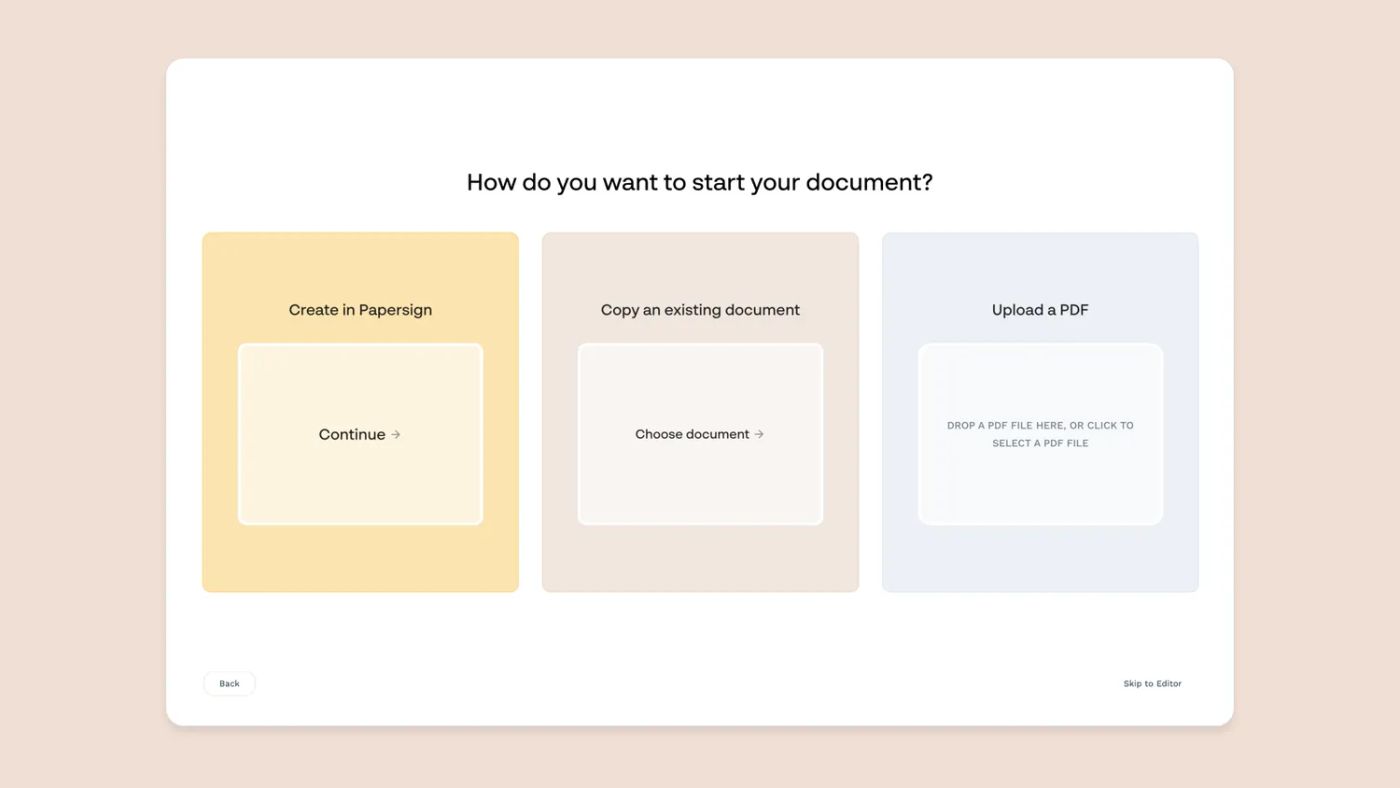
If you haven't already, create an account at Papersign.co (it's free to get started). From the dashboard, click New Document and choose Create in Papersign.
Don't want to build a document from scratch? That's okay too! We've created an invoice template to help you speed up the process.
→ Click here to copy our free invoice template
The foundational structure is already in place, so all you need to do is update the invoice details, add the client billing details, and list the billable items relevant to you. Then, export it as a PDF, and select Upload a PDF instead.
💡 Tip: You'll be prompted to add a recipient. You can either do this now, or add someone later from the Signers menu.
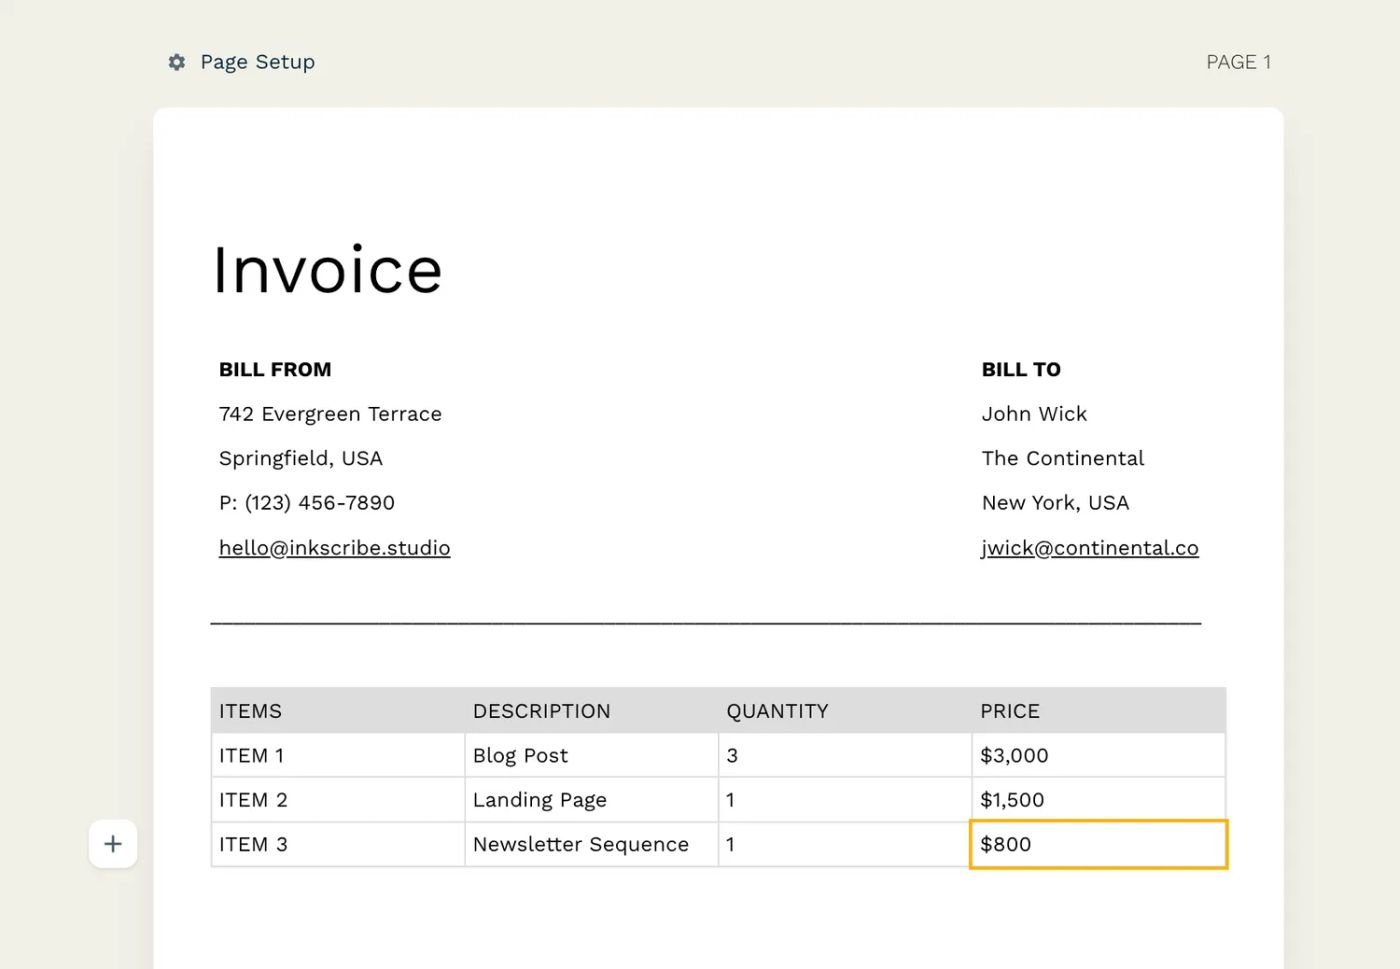
Step 2: Create your invoice document
When you open Papersign's document editor you're greeted with a blank canvas. Just type to get started, then use slash commands, or the contextual menu on the left of the page, to add the fields and content blocks.
If you've used tools like Google Docs or Notion, editing a Papersign document will be very familiar—and simple.
Step 3: Add your branding
Now that you've set up the basic structure of your invoice in Papersign, it's time to customize it for your brand.
By tweaking a few design elements, you can ensure your invoice looks professional and aligns with your brand aesthetic. It can turn a plain, somewhat drab document into something much more professional.
A few tips:
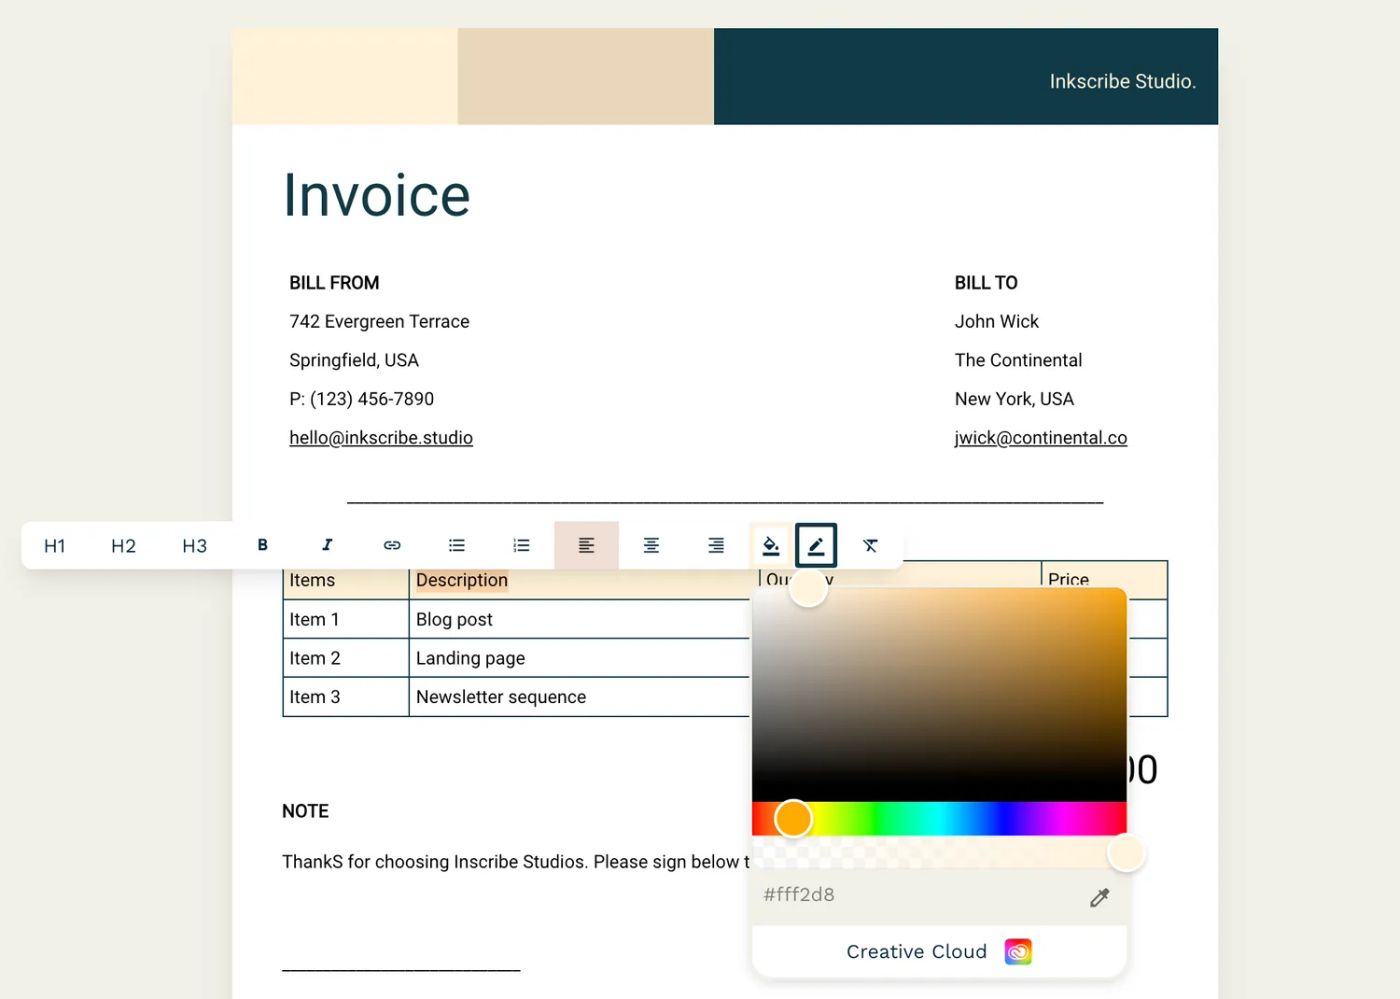
- Select your brand colors in the document
- Add your company name or logo
- Edit the header with brand imagery and/or a visual motif
- Choose a font that matches your brand style
Edit all this and more — including advanced typeface settings — from the Theme menu in the righthand sidebar.
Step 4: Add a signable field
Now that your invoice is well-structured and branded, it's crucial to ensure both you and your client are on the same page about its terms.
Here's where Papersign's signable field comes into play. We hear you—why add a signature field?
1. Tangible acknowledgment: Incorporating a signable field acts as a formal acknowledgment from the client. When they sign, they confirm not only the receipt of the invoice but also their agreement to the payment terms you've outlined. It adds an extra layer of commitment.
2. Avoiding ghosted invoices: Every business owner has faced situations where invoices are left unpaid or ignored. By having the client sign the invoice, you reduce the chances of them 'ghosting' or overlooking it. A signed invoice is a tangible commitment, making clients more accountable.
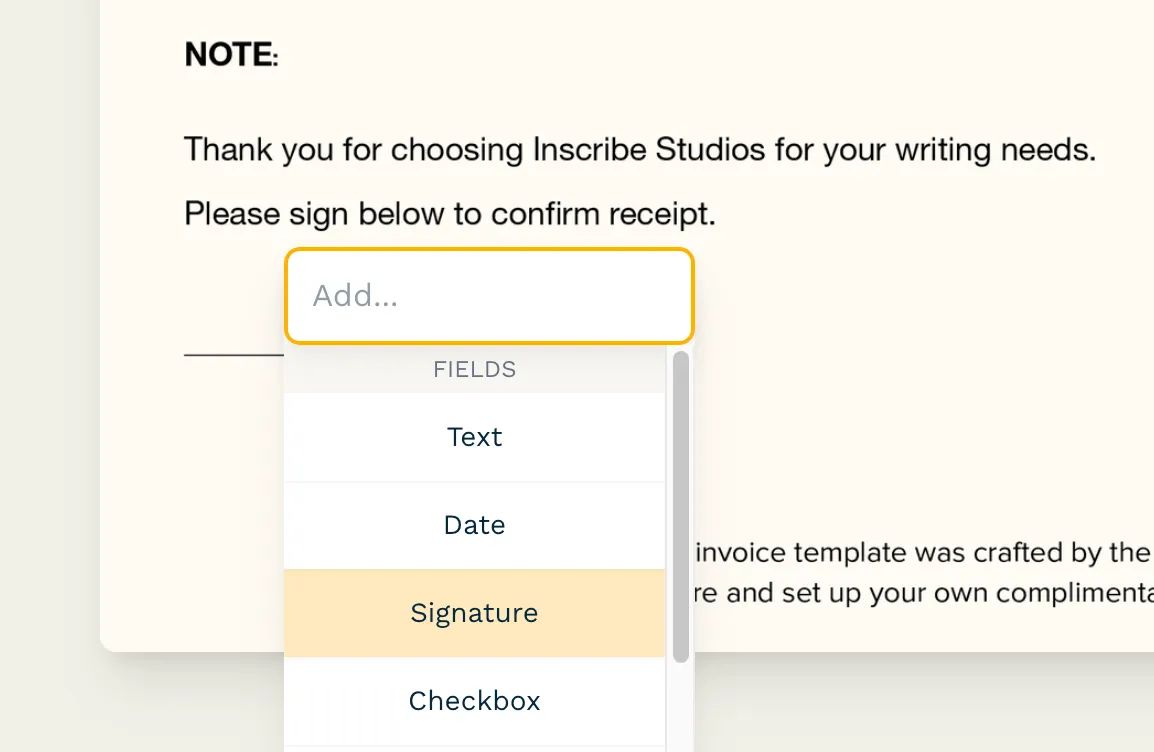
If you've built a Papersign document from scratch, use slash commands to add a signature field. If you've added a PDF of your own, simply click anywhere on the page, and select Signature from the dropdown menu.
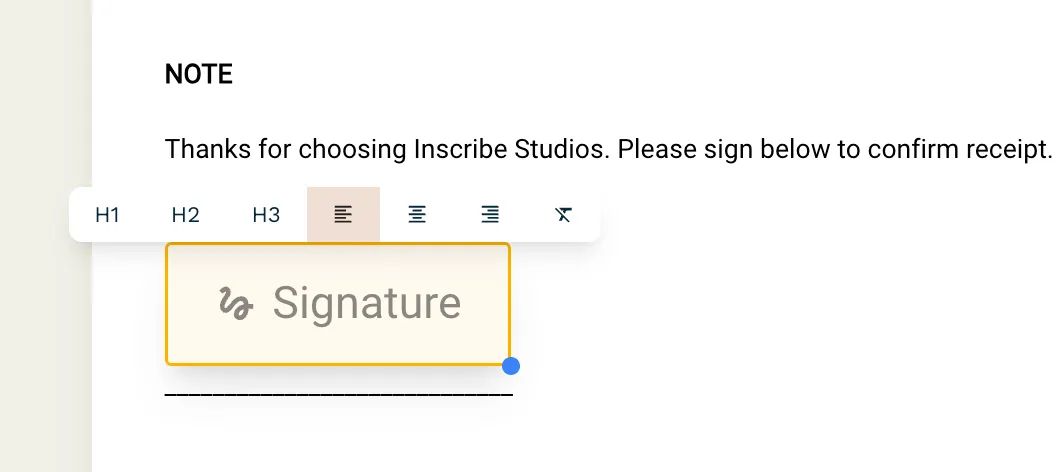
Assign the signature to the document recipient. The field will automatically adjust to the content on the page, but you can also drag and resize it to fit your document.
Step 5: Configure and press send
Alright, your invoice is ready to go. But before we send it off, there are some nifty features in Papersign that'll give you even more control and peace of mind. Let's walk through them:
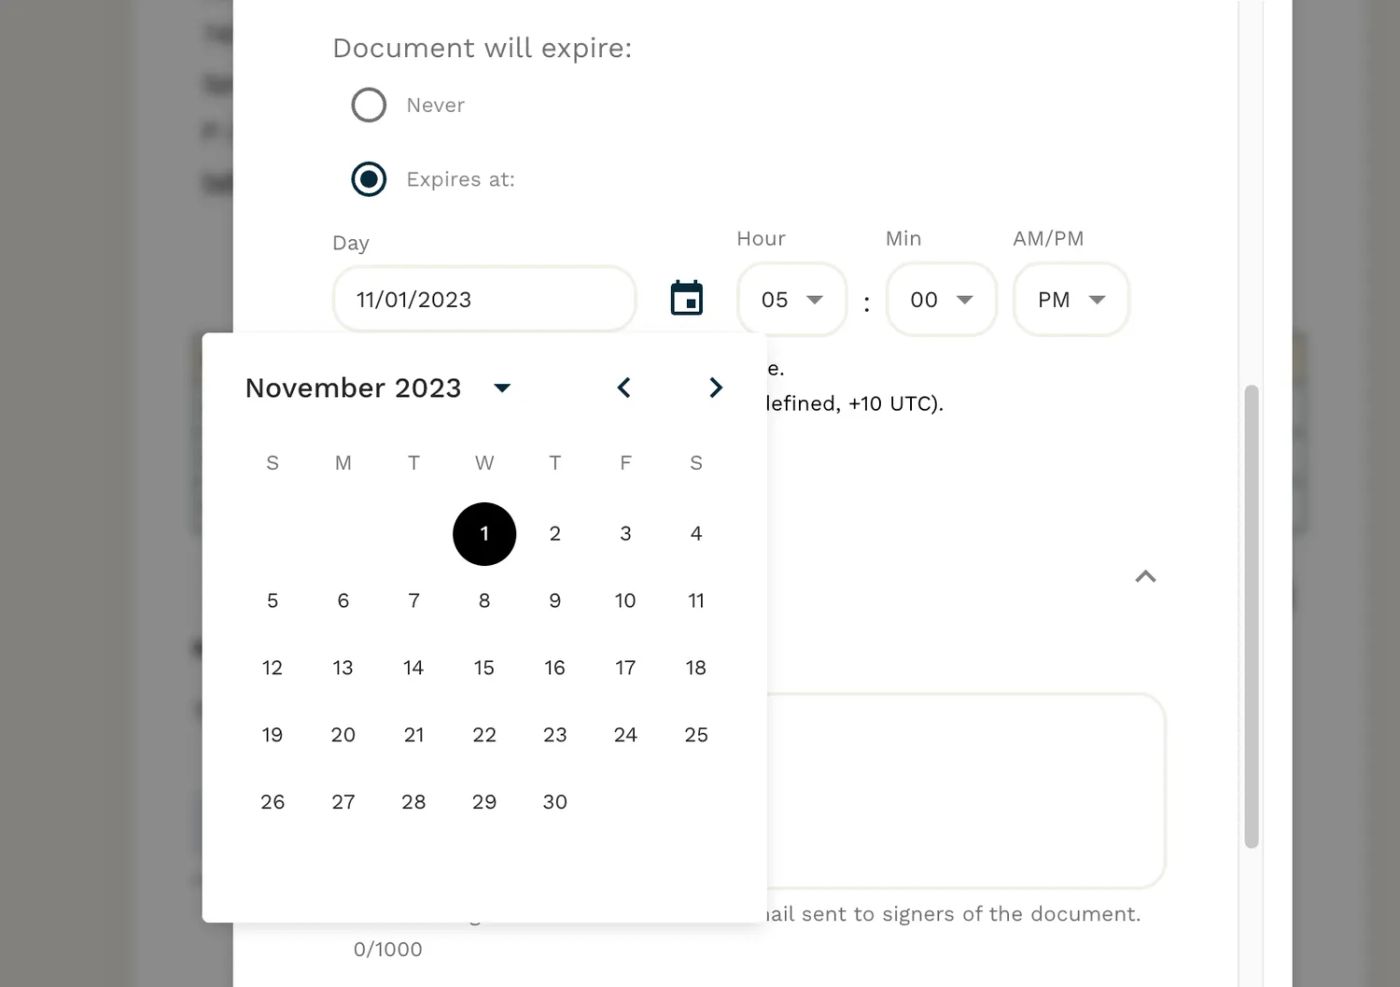
1. Set an expiry date: Maybe you've got promotional rates that won't last forever, or perhaps you just want to ensure timely responses. By setting an expiry, you're gently nudging your client to act promptly.
2. Craft a custom invite message: Personal touches go a long way. When you're sending your invoice, pair it with a bespoke message. Something like, "Hey [Client's Name], I've attached our recent project's invoice. Please review and sign when you get a moment. Thanks!"
3. Need a second pair of eyes? Forward it: Maybe you want your accountant to file the invoice away for safekeeping. No problem! With Papersign, you can easily forward your document to someone else for review or record-keeping.
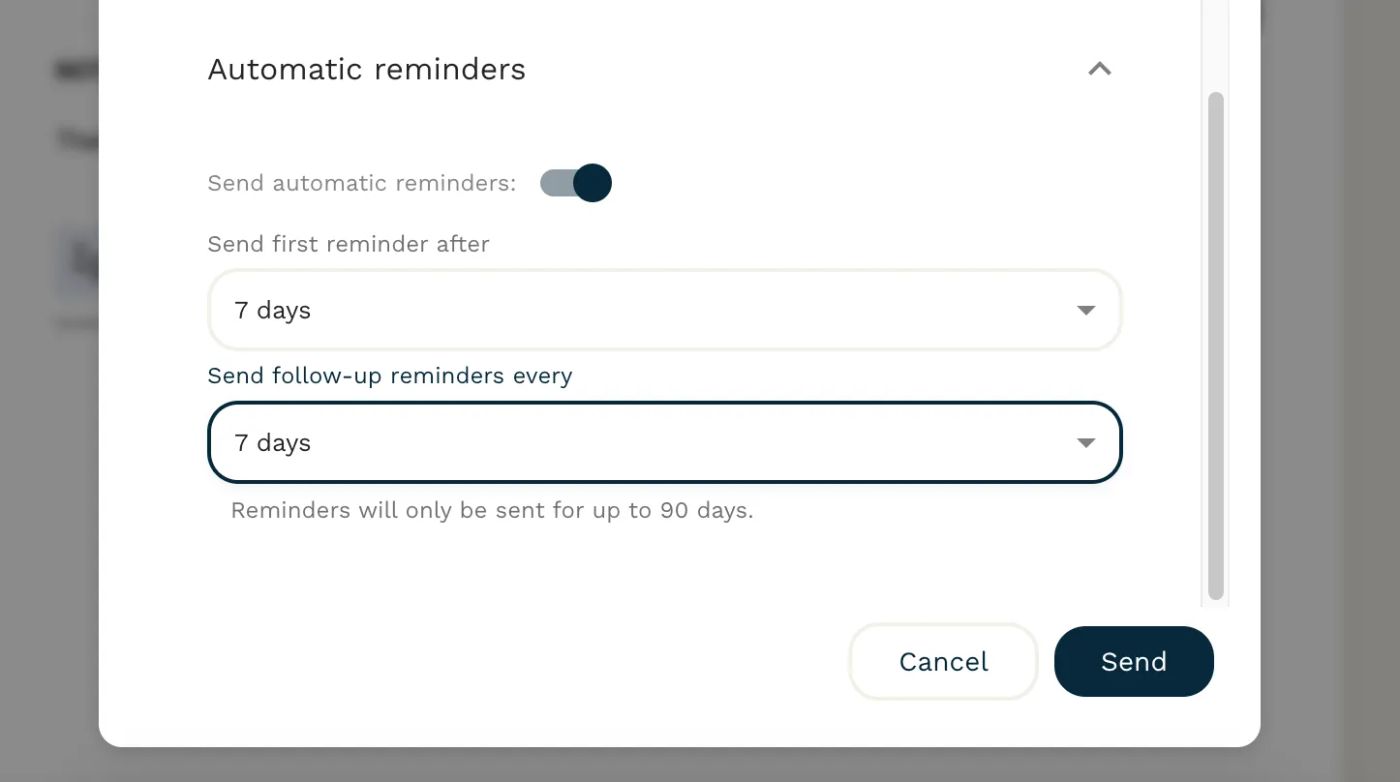
4. Automated reminders: Sometimes emails get buried or overlooked. Set up automated reminders in Papersign to gently jog your client's memory. It keeps things on track without you having to send manual follow-ups.
Using these features ensures that your invoice isn't just sent—it's sent smartly, with every detail tailored to make the process smooth for you and your client.
So what are you waiting for? Sign up for Papersign free.
5 invoicing best practices to get paid on time
You pulled together your invoice and sent it off. The hard part’s done, right? Well, sort of.
Unfortunately, getting your invoice out the door doesn’t always mean you can wipe your hands of it. When nearly nine in 10 businesses report that their average invoice will be paid after the due date, you might need to do a little extra legwork to make sure you get your money on time.
Starting to break a sweat? We don’t blame you. Here are five tips that will hopefully prevent you from having to chase down late payments.
1. Agree on payment types and terms upfront
Your invoice will clearly state when your clients or customers need to pay you. But there’s another important question you need to answer: How should they pay you?
Do you take ACH transfers? PayPal? Checks? All of the above? Something else?
Before you even get to the point of invoicing, talk with your clients about the payment methods you do and don’t accept. While you do so, provide all of the necessary information (or fill out the relevant paperwork) to get that sorted out ahead of time. You can even make this a standard part of your client onboarding process so you don’t forget.
When you do send your invoice, you’ll already be set up to accept payment without any excuse for problems or delays.
2. Include a personalized note
The point of your invoice is to collect your well-deserved payment. But if you do it right, it’s also an opportunity to strengthen your relationships with your clients.
You can do that by including a personalized note—whether it’s directly on your invoice or in the email you send along with your document.
Even a couple of quick sentences that express your gratitude or share how much you enjoy working together can transform your invoice from a procedure to a meaningful point of connection.
3. Keep track of specialized requests
Particularly if you do work for larger clients, they might have specific requests for things you need to include on your invoice—like a PO number or the currency, as just a few examples.
If and when a client asks you to include that on your invoice, make a note or create a client-specific template so that information is included on every invoice moving forward.
It’s another way to prevent payment slowdowns and keep your client’s accounts payable department happy. Plus, demonstrating that you can keep track of those little details goes a long way in reinforcing your reputation as a polished, reliable business owner.
4. Determine your invoicing cadence
Invoicing at a consistent time can also help you get more prompt payments, especially with recurring clients. They’ll start to understand when to expect your invoice and can get into a steady rhythm of paying you.
Do you send an invoice when the project is completed? Once at the end of every month? Weekly? Every two weeks?
There isn’t a right or wrong answer here. Figure out the cadence that works best for your business and then share that with your clients so they aren’t left guessing about what happens next.
5. Set a reminder to check in
In an ideal world, your clients would pay your invoices as soon as they received them. Unfortunately, reality doesn’t always work that way.
If you have slightly longer payment terms (like Net 15 or Net 30), set a reminder in your calendar for a week or so after sending your invoice to confirm they received it and ask if they have any questions. Just that quick check-in can be a helpful nudge and keep your invoice on that client’s radar.
Get paid with confidence
While creating an invoice is one step, sending, tracking, and ensuring its timely acknowledgment is another. Papersign streamlines this entire process, making it the go-to solution for all your invoicing needs. Sign up free today.
Paperform (“Paperform” or “we”) provides the information, data, links and other materials on this page (collectively, “Information”) for informational and educational purposes only. We do not warrant or represent the accuracy, completeness, currency, or suitability of any Information for any use or purpose. Paperform is not a licensed legal provider nor is it providing any legal advice; the Information should not be so construed or used. Nothing contained in the Information is intended to create an attorney-client relationship, to replace the services of a licensed, trained attorney or legal professional, or to be a substitute for the legal advice of an attorney or trained legal professional licensed in your state/jurisdiction. Before taking any action, including using our services to execute contracts or other documents, You should always first consult an attorney licensed in your state/jurisdiction, in each instance, regarding the issues address by the Information. Please NEVER DISREGARD PROFESSIONAL LEGAL ADVICE OR DELAY IN SEEKING IT BECAUSE OF SOMETHING YOU HAVE READ IN THE INFORMATION.
Related reading