All websites need a contact form. It’s a fundamental law of the internet, like how all marketers have to write long, asinine Twitter threads. 🧵👇
If you don't have a contact form, how else will folks get in touch with you about your products and services? Share feedback about your content? Send you life-changing offers?
The problem is that WordPress, the platform that fuels roughly a trillion websites and blogs on the net, doesn’t include a built-in form builder. Go figure.
So in this guide, we’ll show you how you can easily create a contact form and add it to your WordPress site in under five minutes.
Why do you need a contact form?
The spoiler’s in the name. Contact forms allow people to get in touch with you, which is something that's important whether you're a Silicon Valley tech startup or a newbie freelancer building a web portfolio.
The only other alternative to a contact form is linking your email address somewhere. Sure, this is technically an option, but there are a few reasons why you shouldn't use your email address.
❌ It looks unprofessional. Appearances matter. A simple contact form looks much more professional than your email address slapped onto a webpage or linked in your footer.
❌ It’s not secure. Sharing your email address on your website is an open invitation to spammers. Your address will soon find itself added to junk mail lists.
❌ It’s unintuitive. Visitors have to copy your email and paste it into their email platform or click the link and invariably open Apple or Windows Mail, which adds an extra step to the process (increasing friction).
❌ It’s ineffective. With just an email address, you can’t take advantage of any of the benefits contact forms offer, like integrations, better organisation, CAPTCHA and more.
Contact forms help you avoid all these problems. They’re the most effective, efficient and professional way people to get in touch with you online (and for you to capture emails and other important data). Why? Well, they:
✅ Simplify communication. No need to open an email app or switch tabs. Visitors just fill in the fields, press enter and the message is sent wherever you need it to go, whether you want email notifications or to manage messages in a third-party tool.
✅ Look more professional. A well-designed contact form looks much more professional than a hastily-added email address. It shows folks you take your business—and their enquiries—seriously.
✅ Organise data. With custom fields, you can categorise information however you wish and set up automated workflows to keep track of all your written communication.
✅ Give spam protection. Spambots scrape emails from websites. A contact form doesn’t reveal your email, so you won’t have to worry about being asked to send money to any Nigerian princes.
✅ Retain privacy. A contact form gives you more control over who can contact you and the type of messages you receive.
✅ Offer advanced functionality. Paperform has advanced features like automating processes (e.g. add leads to your Mailchimp email list), custom success pages, and can even take payments with PayPal.
So we’re in agreement. Your website needs a contact form like a birthday party needs cake. Now let’s take a look at how you can use Paperform to add a snazzy contact form to your WordPress site easily.
Why is Paperform the best WordPress plugin?
There are more than 1,600+ WordPress contact form plugins. So why should you use the new kid on the block? We get it, change is hard. But it's simple.
Paperform’s plugin offers an entirely new experience you won’t find on veteran WordPress form add-ons like JetPack, Contact Form 7 and WPForms (and, let's be honest, you certainly won't find it on WPForms Lite).
Paperform is the no headache WordPress form solution you’ve been looking for. There’s no clumsy drag and drop form builder, no HTML code needed, and no complicated processes to set up what should be basic stuff, like form notifications.
Our form builder works just like a doc—type anywhere to add questions and text, or insert videos, images and even GIFs. And with support for handy Notion-style slash command short codes, it’s even faster to get things done.
Once questions are added, you can build an experience that’s truly yours. Tweak colours and fonts, change UI elements and even translate your forms to multiple languages. We give you all the tools you need to ensure your creations reflect your unique brand and website.
And unlike other WordPress plugins, with Paperform you get access to the same tools you do with our typical form building experience. There’s no ‘lite’ version—just build a form as you usually would, then seamlessly add it into your WordPress website.
💡 Tip: You’ll need to have a subscription to use our WordPress plugin. We don't offer a free version. Not signed up? You can try things for yourself with our free plan; no CC required.
Create a contact form in WordPress in 6 steps
Using Paperform to add a contact form to WordPress is so fast and straightforward, you can do it while enjoying your morning coffee. ☕️
Time is of the essence, so without further adieu, let’s get stuck into the step-by-step guide. Clock’s ticking.
Step 1: Download Paperform's WordPress plugin
There are three ways to get your hands on Paperform’s WordPress plugin:
- Direct download from our website
- Direct download from WordPress.org
- Installation from the Wordpress Plugin Directory
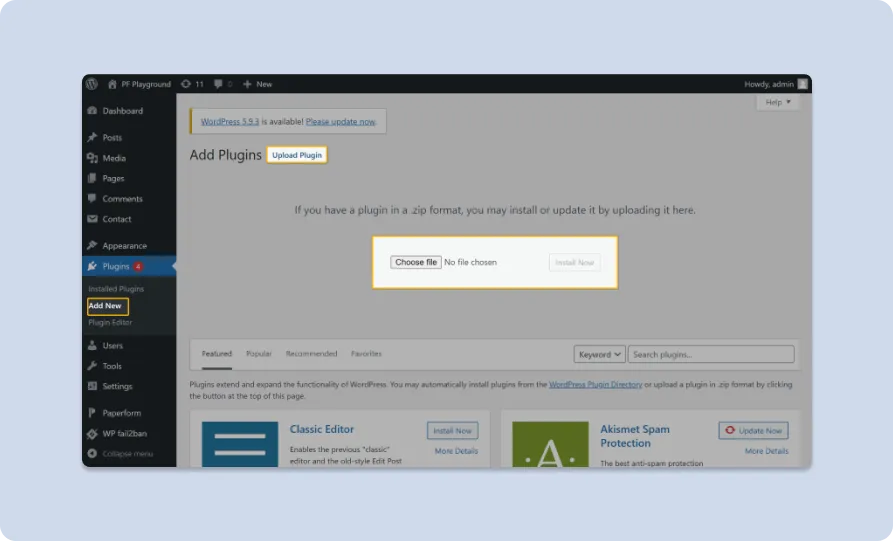
For direct download: Download the .zip file, then go to ‘Plugins’ in your WordPress dashboard. Select ‘Add New’ >> ‘Upload Plugin’, which you’ll find at the top of the page. Install the .zip file.
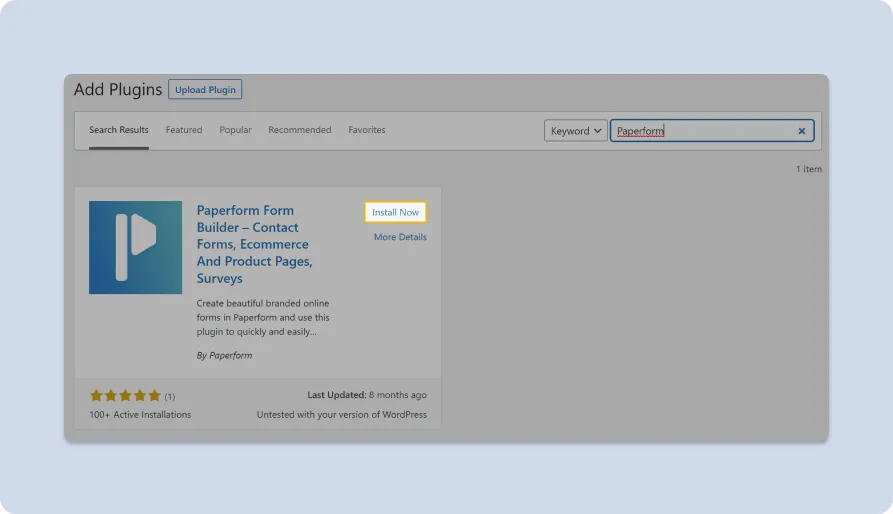
For installation: Go to your WordPress dashboard and select ‘Plugins’ >> ‘Add New’. Search ‘Paperform’ and click ‘Install Now’.
Step 2: Activate the plugin
Whether you’ve chosen direct download or the installation route, activating the plugin from the WordPress Admin console is the same process.
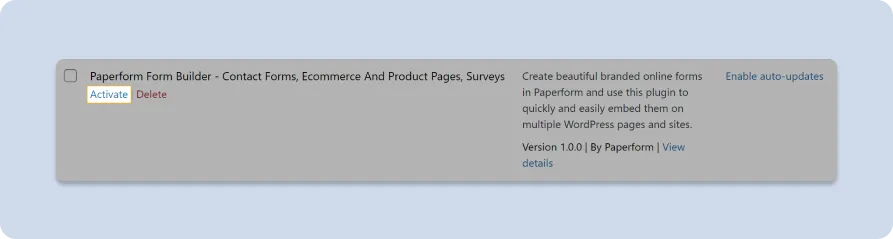
Head to ‘Plugins’ >> ‘Installed Plugins’ in the sidebar of your dashboard. As you may expect, you’ll see a list of your installed plugins.
Scroll through the list or use the search bar to find Paperform Form Builder, then click ‘Activate’. We told you it was easy.
💡 Tip: Sometimes, devices are set up to extract .zip files automatically. Make sure you’re uploading the original .zip, as the file upload won’t work if you try to upload the extracted folder.
Step 3: Build your WordPress contact form
When the WordPress Plugin is activated, all that’s left is to create a shiny new contact form.
As we mentioned earlier in this tutorial, unlike other form builders that shoehorn form creation awkwardly into the WordPress backend, our plugin allows you to create forms in Paperform as you usually would.
If you’re an existing subscriber, you’ll know what to do, so you can skip this section. However, for new customers, head to the Paperform Dashboard and select ‘Create Form’.
You’ll be asked if you want to start from scratch or use a template. Seeing you want a simple contact form, we suggest using a template to speed up the process.
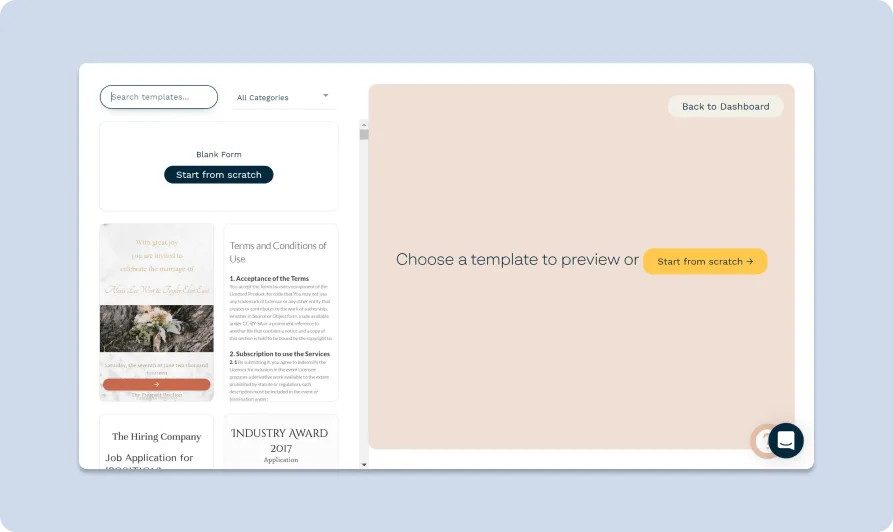
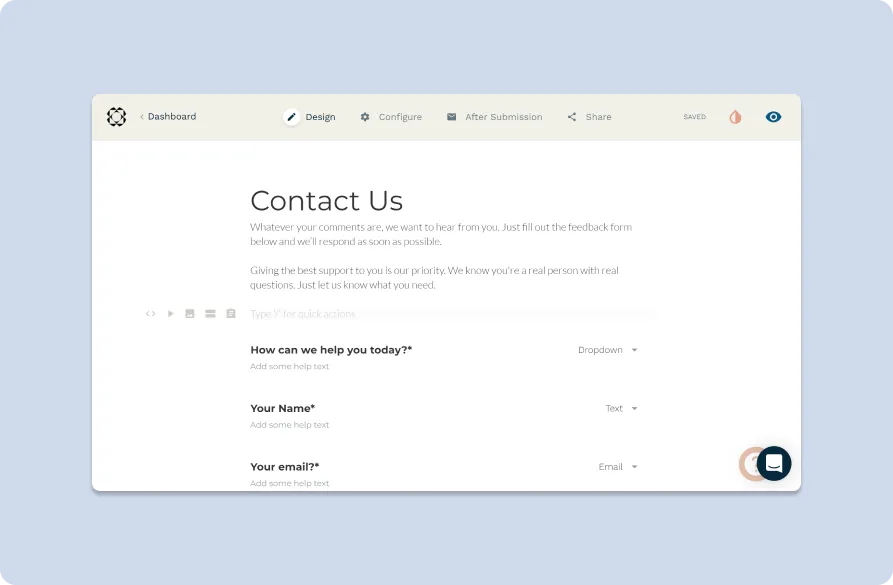
Select ‘Use a template’, search ‘Contact Us’ and click ‘Use’. You’ll be sent straight into the Paperform editor to edit the contact form template to your liking.
By default, there is a title and a short piece of copy, followed by six form fields: a drop-down menu, name, email, subject, message and file upload.
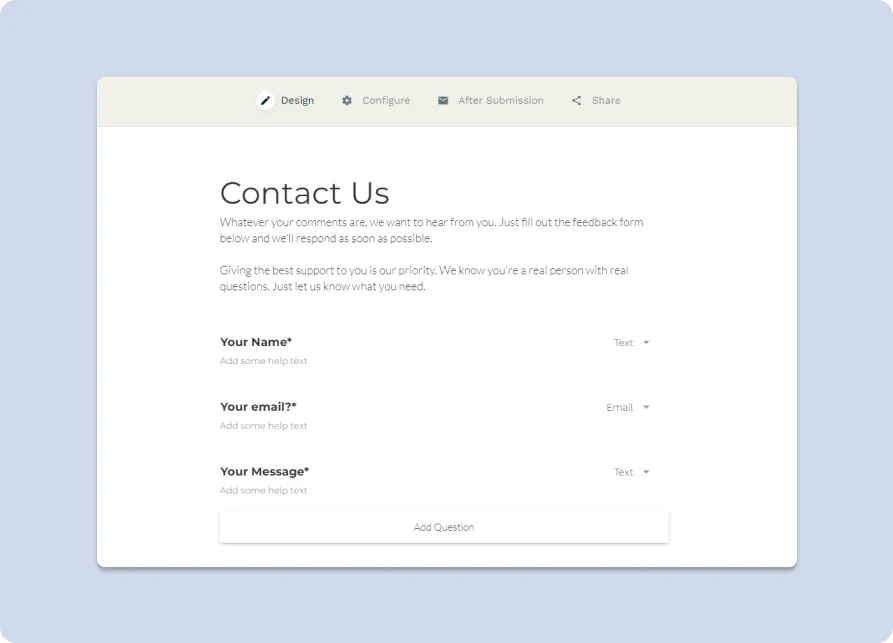
With Paperform there are over 20+ form fields you can add, but most basic contact pages get by with three field types:
- Name
- Message
So we’ll get rid of the other fields to keep things basic. Hover over the field you want to delete and click the ‘X’ that pops up in the contextual menu.
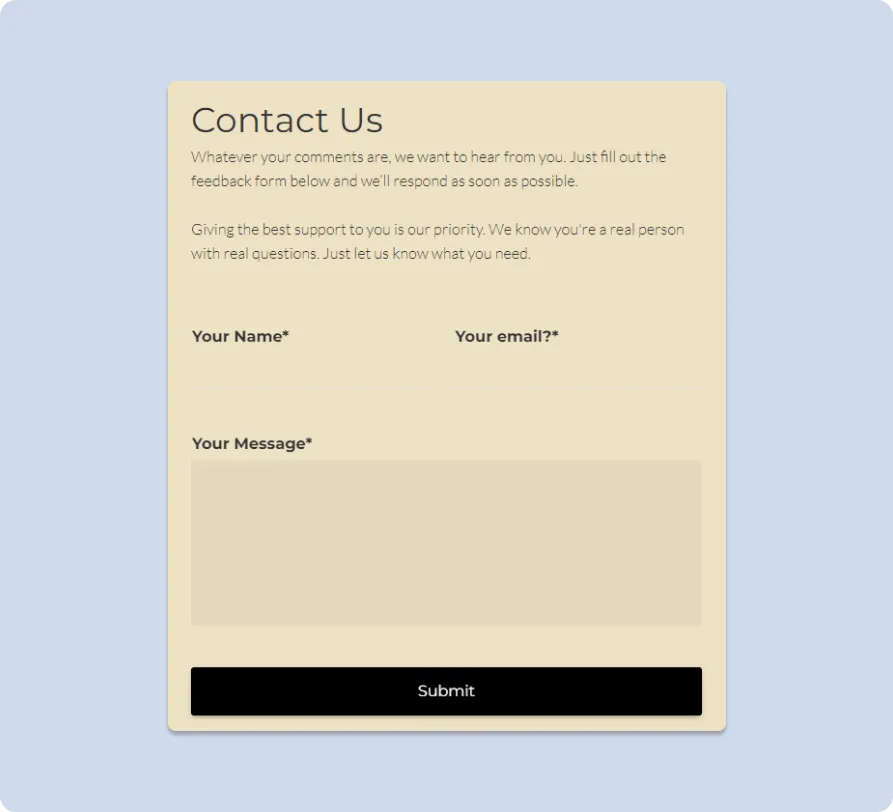
When you’re done, the page will look like this:
You could choose to tweak the copy and heading or remove both and add them later in WordPress. It’s up to you. We’ll get rid of the headers and add that to our website later in WordPress.
There's just one tweak we'll make in this tutorial: changing the background colour to match our site. To get to theme options, click the raindrop icon on the top right of the editor.
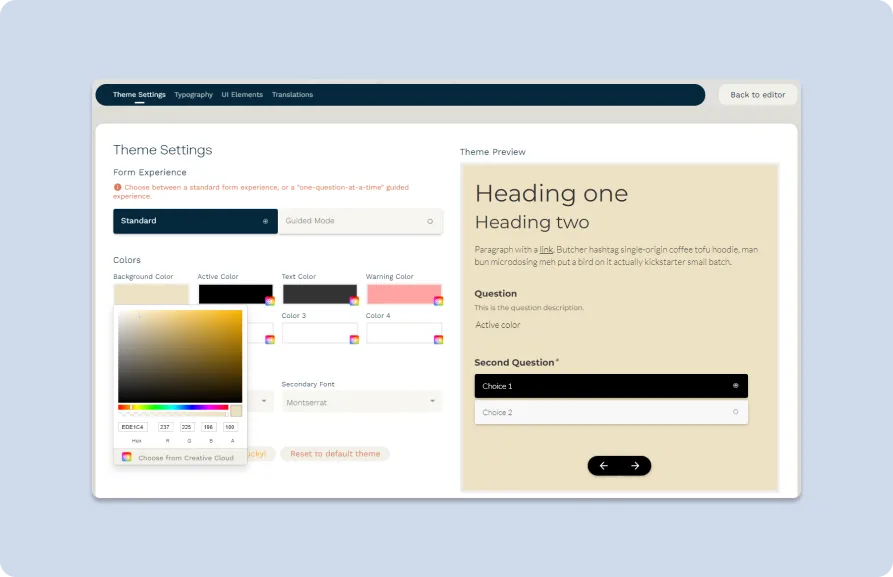
💡 Tip: You can add whatever form fields you feel are relevant. For example, a small business might ask for a phone number, or even an address, or you may prefer visitors to write a subject line to summarise their query quickly.
Step 4: Copy the contact form URL
You can spend hours fiddling with all the design options in the Paperform builder. Then, once you’re satisfied and have your contact form looking all spiffy, there’s just one more thing to do.
Go to the ‘Share’ menu and copy the form URL. That’s it. We’ll need this in the next step.
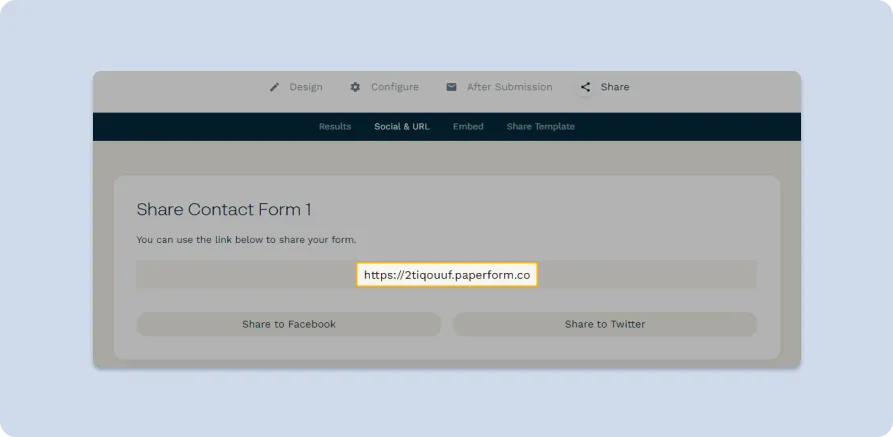
💡 Tip: Don’t like the look of the randomly generated URL? Customise it from the ‘Configure’ menu. Here you can also change the form name and how it appears when shared.
Step 5: Insert your contact form in WordPress
With the Paperform plugin, you can add forms straight from the Gutenberg editor. Let’s assume you don’t already have a Contact page.
From the WordPress dashboard, go to ‘Pages’ >> ‘Add New’. You’ll be taken straight to the page builder and prompted to add a title. We’ll use ‘Contact Us’, but you can make it anything you want.
Beneath the title, you’ll see a prompt to start typing. This is where we can use WordPress’ slash commands to insert our Paperform block. Type ‘/’ and a dropdown menu will appear. Click Paperform.
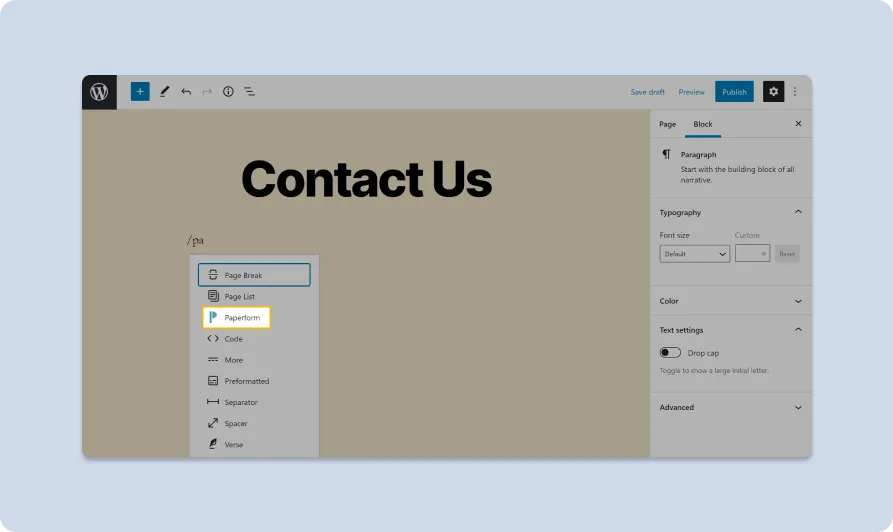
Voilà. The Paperform block is inserted. Your new page should now look like this:
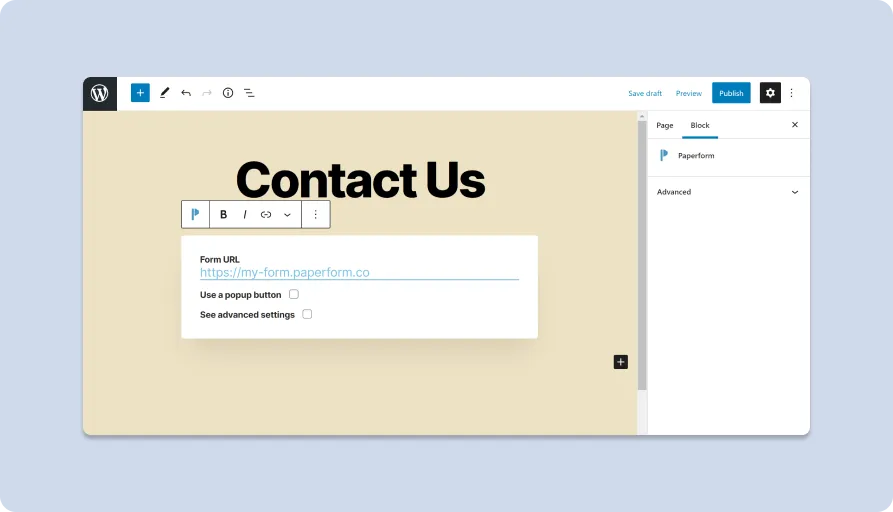
Now just paste your form URL into the field and you’re done. Click ‘Preview’ to see your Paperform contact form perfectly embedded in your WordPress website.
Happy with what you see? From the page editor click ‘Publish’ for your form to go live on your site. All done! 🎉
💡 Tip: Decide that you want to tweak the design to better match your WordPress theme? No worries. Any changes you make to your form will automatically be updated on your site.
Interlude: Popup button
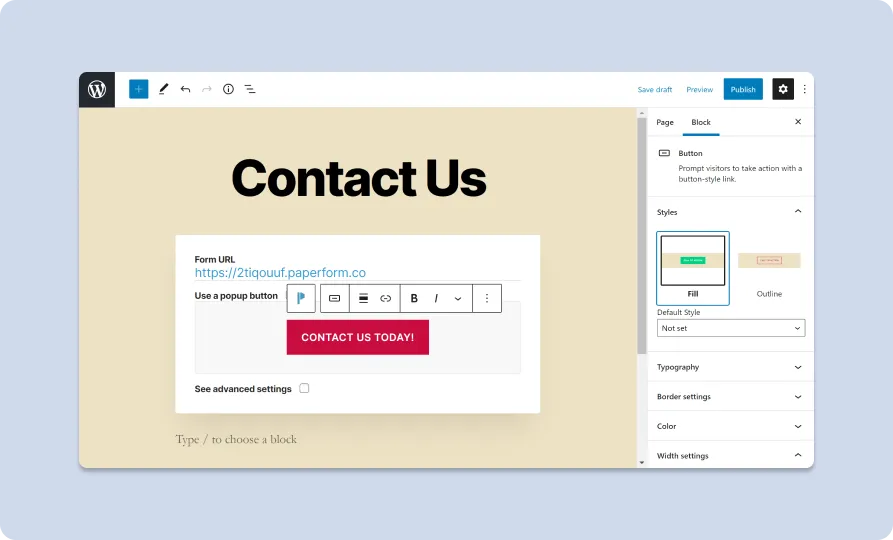
You might have noticed the “use a popup button” checkbox. Nice eye! This is for if you want your form to appear only when visitors click a button.
This option comes in handy when you need a clear call to action (CTA), or any circumstances where you’d prefer your form to be hidden until visitors need it.
Tick this checkbox and you’ll be prompted to add text to your button. There are a bunch of text and appearance options in the sidebar on the right. You can adjust the border, colour and width of your button and even add custom CSS.
When you’re done, press ‘Preview’. The page will now have a user-friendly button that reveals the form when visitors click it, like a genie popping out of an antique lamp.
Interlude: Advanced settings
There’s one more checkbox available in the Paperform Block that provides a few advanced settings for you to play with. Here’s a breakdown:
Lazy Load: Delays the loading of your form until it’s actually needed to improve resources and reduce page load times.
Show Spinner: By default when a form loads there’s just a blank space. If you toggle this on, a loading indicator will appear instead.
Pre-filling Through URL: You can pre-fill form fields to make certain forms faster to complete. Activate this if you want parts of the form already filled out when the user sees the form.
Disable automatic scrolling: This one is straightforward. This stops the form from scrolling by itself.
Scroll Offset (px): Adjust this to change how much of your form is visible on the screen before needing to scroll.
Height (guided mode only): Allows you to tweak the height of your form to adjust the viewing experience on your webpage. For example, it could take up the entire page or appear as a small widget.
Whether you want to control what happens to form submissions, tweak the submit button, set up conditional logic, or use integrations to send data to apps like Notion, Google Sheets, Asana, you can do all that and more from the Paperform editor.
[NEWSLETTER: Looking For More Helpful Articles Like This? | Subscribe to our newsletter to receive inspiring stories delivered to your inbox every few weeks | Subscribe]
Step 6: Send through your first submission
Now we’re right at the finish line. It’s almost time to get out the champagne, but there’s one last thing we need to do: check everything works.
Fill in the form as if you were a visitor, then go to the Paperform Dashboard. Your new contact form should be at the top of your list of forms.
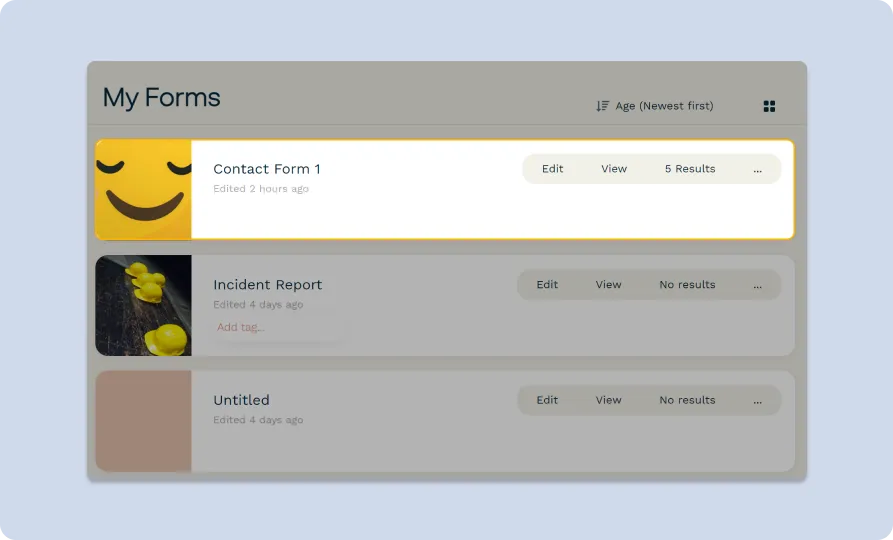
Select ‘[Number] results’ to enter the Submissions Dashboard. There you’ll see a any form submissions. Yours should have the details of the submission you just made and look roughly like this:
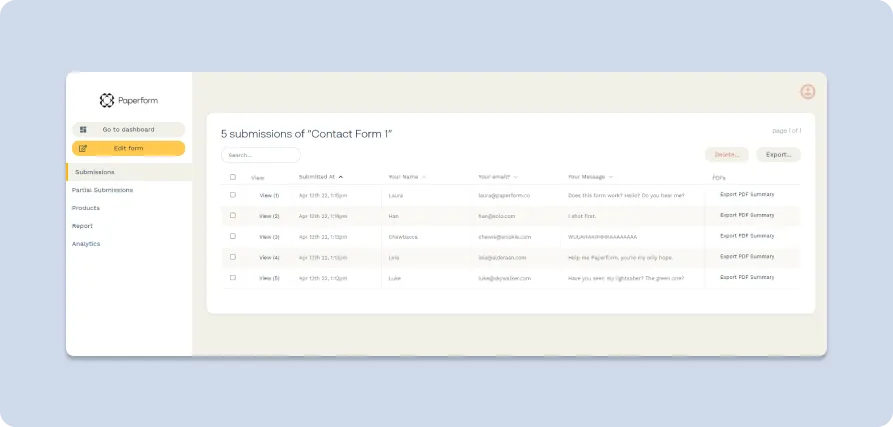
From here you can view your contact form submissions, export them to a spreadsheet or Word doc, or view analytics to track user behaviour (you can even add Google Analytics to your form.)
📚TL;DR
Right, so you want all answers but you don't need us to hold your hand through the process? Fair play. Here's the stripped down process for all the fans of brevity among us.
- Install/Download Paperform's WordPress Plugin
- Activate the plugin
- Create your contact form with Paperform
- Copy the contact form URL
- Insert your contact form in WordPress
- Send a trial submission to check everything works
Can I make more than a WordPress contact form?
Sure can. Contact forms are just the beginning. From surveys and quizzes to custom eCommerce stores and landing pages, Paperform empowers you to build any form for any need.
- Sell products
- Accept payments with PayPal, Stripe, Square and Braintree.
- Take bookings and manage appointments
- Automate email marketing
- Use logic to set up dynamic multi-step forms
- Send data to 3,000+ popular apps with Direct or Zapier integrations
Want to run your own personal training business? Manage your company's order fulfilment process? Start your own subscription course? With Paperform's versatile tools you can do all this and much, much more.
To get an idea of all the crazy use-cases Paperform can fulfil, check out the 600+ form templates in our library. We also have a growing collection of guides on our YouTube page.
Over to you
We’ve given you all the tools you need. So what are you waiting for? Download our WordPress Plugin and get started today.