


Using Paperform and Papersign together, your web form submissions can automatically generate a document and send it out for digital signatures. With a bit of preparation, you'll never need to manually configure and send agreements to customers again. You can:
- Collect signer information in Paperform, fill a new contract with that information, and then send it to the given email address. While a signer's name may appear several times on a contract, they'll only need to enter it once.
- Use Paperform to calculate the total cost of a service, map the result to a Papersign variable, and use answer piping to display it on the contract.
- Use conditional logic to send different documents depending on how the web form is filled out.
Please note that in this article, "form" or "web form" refers to Paperform, and "document" or "agreement" refers to Papersign.
1. Prepare your template document in Papersign
Paperform allows you to map answers to two places in Papersign:
- Signer attributes
- Document variables
As long as each signer is given a valid "Name" and "Email" attribute, the document will be sent. However, you may also want to display Paperform data on the document itself, or use it to pre-fill certain fields.
Papersign allows you to set up a document so that signer attributes and document variables are dynamically added to the page. Follow the Papersign Templates Guide to learn how to prepare your document as a template before setting up the integration.
2. Configure the integration in Paperform
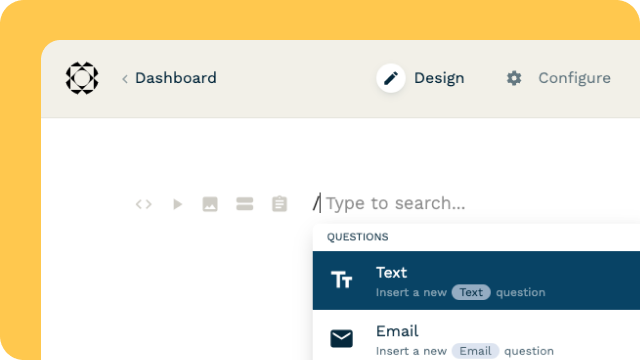
Once your template document is ready, it's time to switch over to Paperform. Edit the form that you would like to connect, then head to After Submission → Papersign.

To create a new integration action, click "Send a document to be signed automatically from new submissions."
Integration title
At the top of the page, you can change the title of this integration action.

This is useful if you plan to set up multiple Papersign integrations for the same Paperform form (e.g. if you plan to use conditional logic to send a different document depending on how the form is filled out). The integration title is only for your own reference, so feel free to leave it as the default if you only plan to connect one document.
Select or create your document
Next, select the document that you would like to connect.

You can select any document from your Papersign account, including draft documents or completed documents from previous agreements. The previous signers' information and original variable values will be replaced with the mapped values from Paperform.
You can also click the "New document +" button to be taken to Papersign to set up a new document to be used in this integration.
After connecting a document, you can click "View [Original Document]" to check it in a new Papersign window.
Set a new document title
This will be the title of the new document that is created by the integration. Consider piping an answer into the title, so that each document that gets generated will have a unique name. You can use the grey + menu to the right to select a question, and its answer will be dynamically added.

3. Map values to Papersign
Next, it's time to map the answers and other values that will be sent from Paperform to Papersign.
Select a question
Under each signer attribute, you can select a question from a dropdown menu. Select a question, and that answer will be mapped to the attribute.

Not all question types will appear in this quick menu, but don't worry—any question in Paperform can be mapped to any attribute or variable. Read on to find out how.
Manually add a value
You may want to use static text for certain signer info, rather than mapping an answer. For example, you could add yourself as a signer for every submission. In this case, select "Manually add a value." This presents a blank line where you can type in text directly.

You can also pipe in answers manually here, using the + icon to the right. This lets you add any answer or value from your form, including the results from calculations, scoring, and pricing. You can also combine multiple answers and static text.

Document variables
If your connected Papersign document uses variables, they will appear below the list of signer attributes. You can use the + icon to pipe in answers from Paperform, type plain text, or leave them blank to keep the values on the original document.

Your document must have variables configured in order for this section to appear.
4. Set up emails and conditional logic
New document owner
Currently, the only option here will be you; the same user who sets up the integration will be the owner of the new Papersign document. In the future, there may be an option to assign the document to another team member.
Email settings

You can add an invite message for a personal touch on signature request emails. Answer piping is also supported here.
The document can also be forwarded to additional email addresses after all parties have signed. These can be static addresses or emails collected in Paperform. All signers and the document owner (your Paperform/Papersign login email) will automatically receive a copy of the finished document, so you don't need to add those addresses again here.
If the document isn't ready...

This setting only comes into effect if there is a problem sending the document out for signatures. For example, if a signer's email comes through in the incorrect format then we won't be able to send the request. In this case, Papersign can:
- Do nothing: no copy is made of the original document.
- Create a draft: a copy of the original document is created and saved as an unsent draft in your Papersign account. You can edit the document to make any corrections and then send it out manually from Papersign.
Use conditional logic
This setting allows you to set a specific condition or set of conditions that need to be met in order for the integration to fire. This can be useful if you only need a signature in specific situations. You can also send different documents to different submitters by configuring multiple integrations and setting up the logic for each one.
Reference our Logic Guide for more information about how to manage conditions.
5. Save and test the integration
The "Send Test" button can be used to trigger the integration using the answers from the most recent form submission. This can be a useful shortcut, but only if you know that those answers will work. If you're not sure, we recommend saving the integration instead and then testing the setup manually by filling out and submitting your form.
If the integration is on and the signature request email doesn't arrive as planned, there may be a problem with the setup. Head back to After Submission → Papersign, then click the cogwheel icon next to the active integration. The "History" page will display error messages if the integration was unsuccessful.

If you're still not sure what's wrong, please feel free to reach out to our support team at support@paperform.co or using the chat widget in the bottom-right corner of the page.
Gotchas
- Papersign documents can only support a fixed number of signers. This means if a variable number of signers are possible from a Paperform submission, you'll need to produce copies of your document that support the various numbers of signers.