When it comes to affordable, user-friendly project management tools, ClickUp is hard to beat. It’s a top notch tool, flexible enough for keeping track of personal to-dos or managing a full-fledged team.
But even ClickUp’s most loyal fans may not know about ClickUp’s Form view, which allows users to create custom forms and surveys within the project manager, and use the data gathered to create tasks on your project board automatically.
There’s just one catch: you have to learn how to use them. In this post, we’ll walk you through how to create a form in ClickUp, and offer a much more customisable, professional alternative.
Summary
To create a form in ClickUp:
- Log in to ClickUp and select +View from the top toolbar.
- Select Form (and sign up for a trial of Unlimited if you don't have it).
- Add form fields using the drag-and-drop form editor.
- Once finished, toggle from Editing to Viewing to preview the form.
- Set the toggle to Active and click Copy link to share the form link.
How to create a form in ClickUp
If you already have an account, just head to the ClickUp workspace you want to create a form for. If you don't, you can set one up in a few seconds—and for free—from the ClickUp homepage.
Click +View from the toolbar running across the top of screen. This will open up a dropdown menu, where you can choose to create task views and pages. Scroll right to the bottom and select Form.
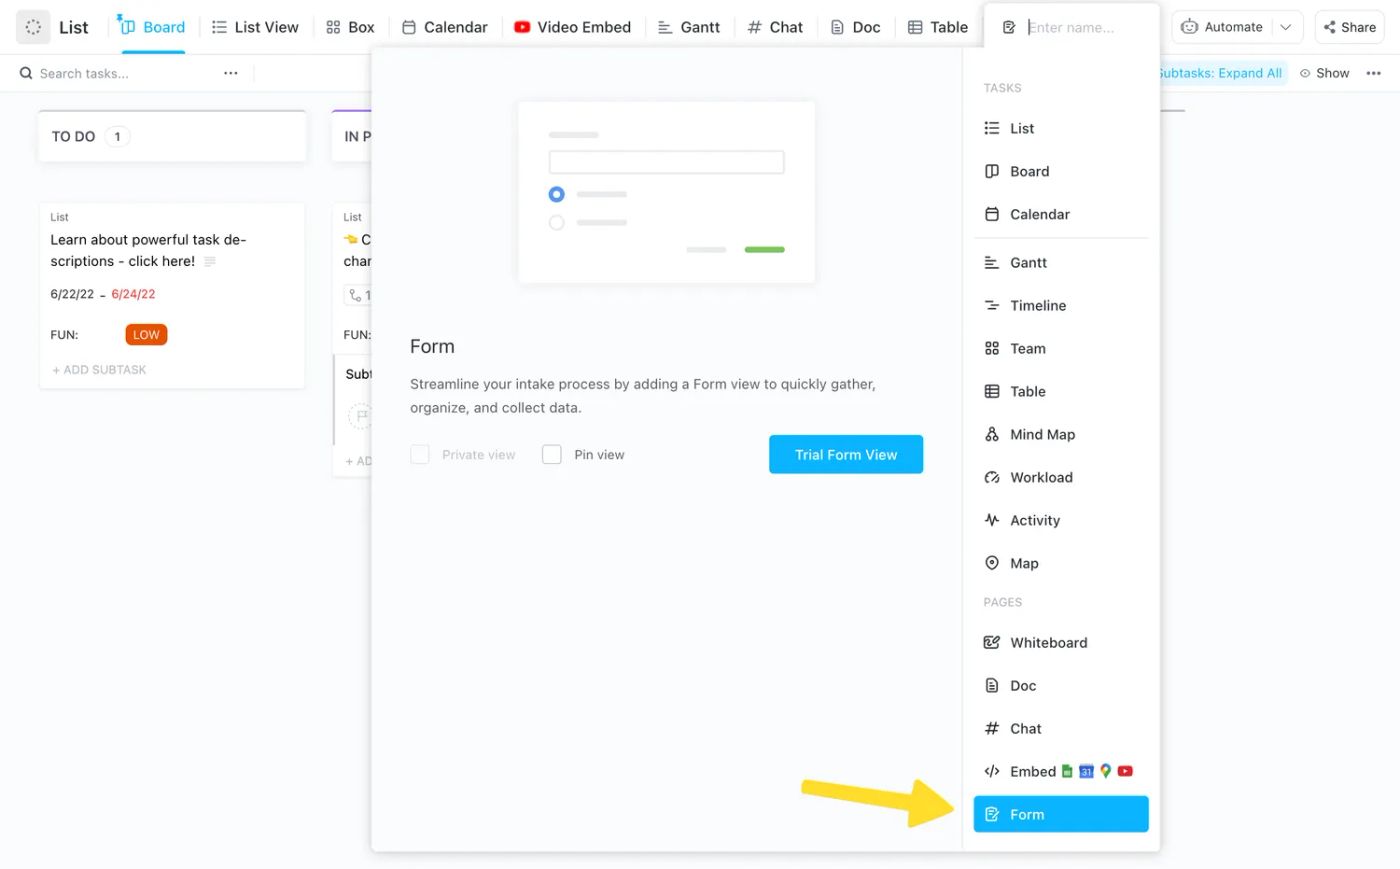 (Source: ClickUp)
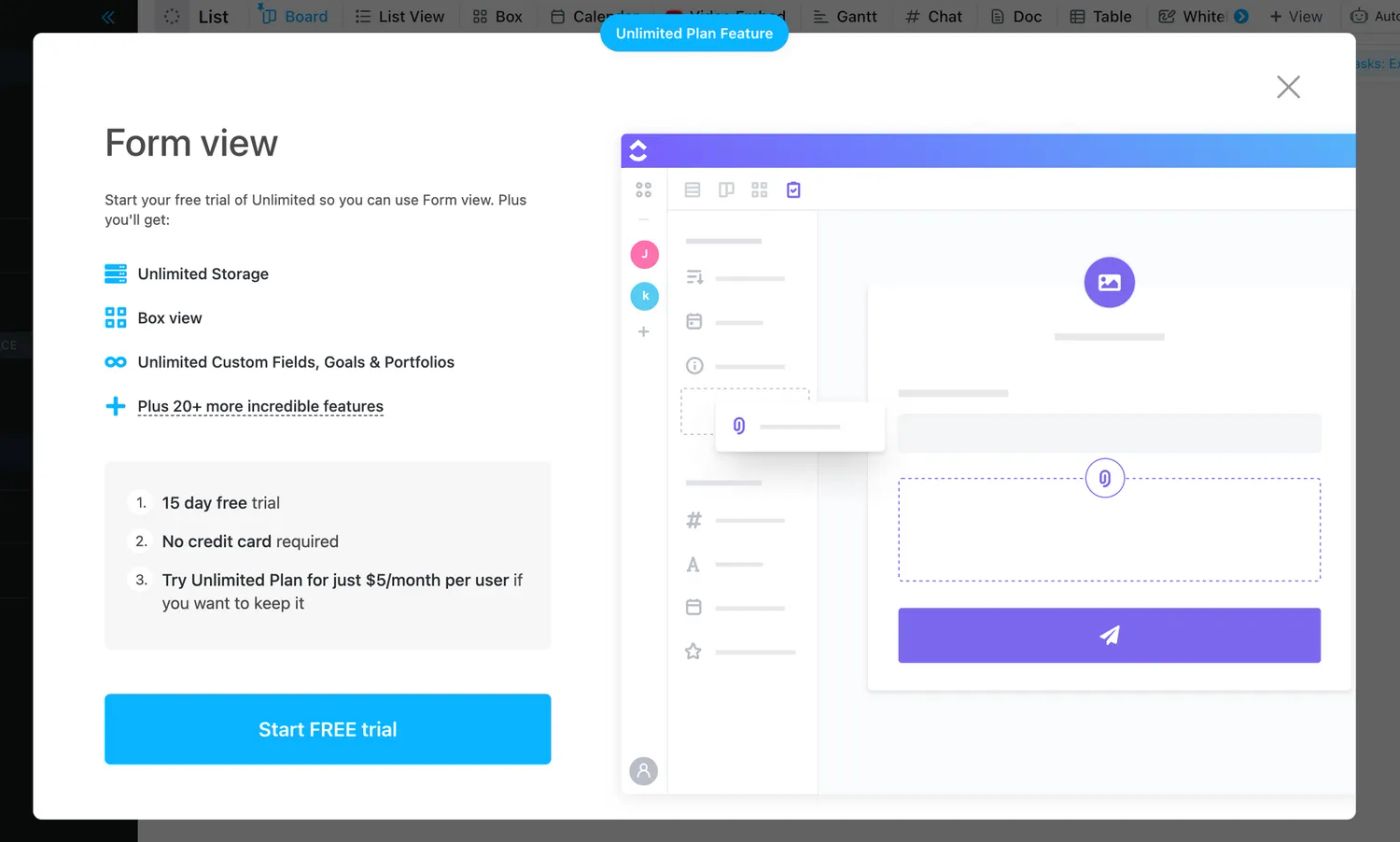
If you're already on the Unlimited plan you'll be directed straight to the editor. But ClickUp forms aren't available to free users_,_ so if you're not a paying customer you will have to start a 15-day trial of Unlimited to gain access. You don't need to enter any card details, though, so you can try it without risking an accidental charge.
 (Source: ClickUp)
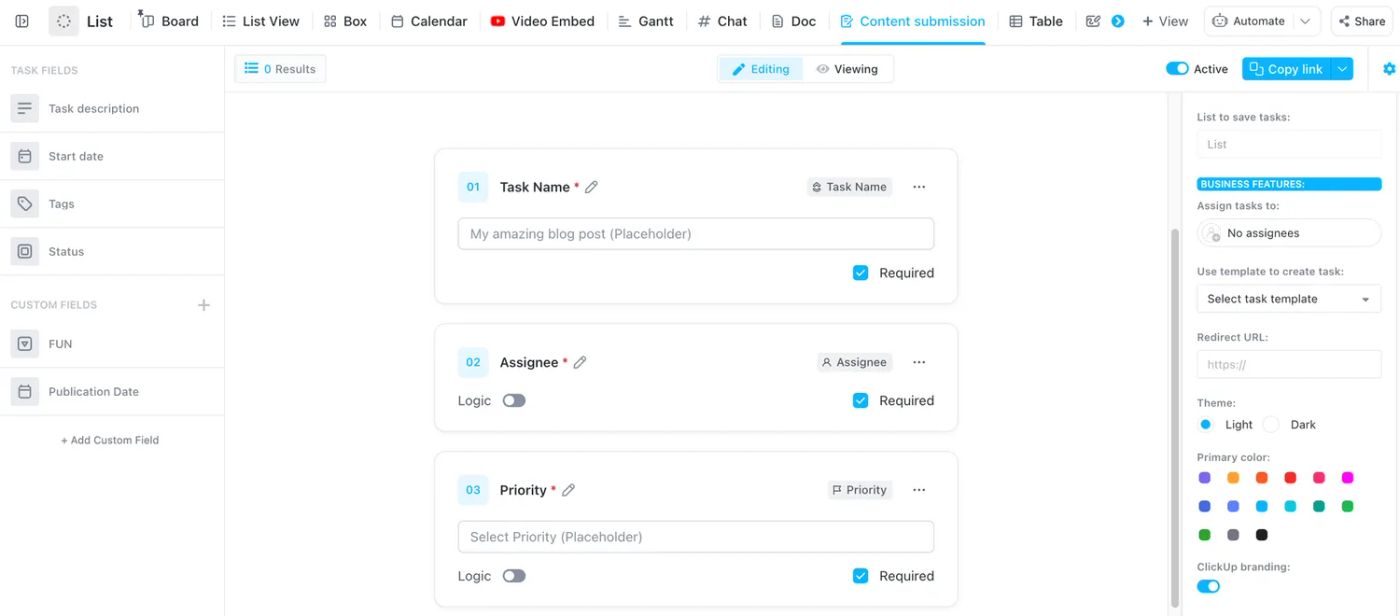
Now it's time to create your form. ClickUp's form editor uses a standard drag-and-drop interface, which allows you to add fields by dragging them into the preview in the centre of your screen.
By default all fields listed in the sidebar are linked to your existing task fields. This is handy, as the task details will update in your main workspace any time someone makes a submission, with no extra manual setup.
 (Source: ClickUp)
You can add additional fields from the Custom Fields section below. Apart from that your options are limited. Unlimited users can't adjust any theme or design elements, which means what you see is what you get—you'll have to subscribe to ClickUp's Business theme to unlock even basic customization.
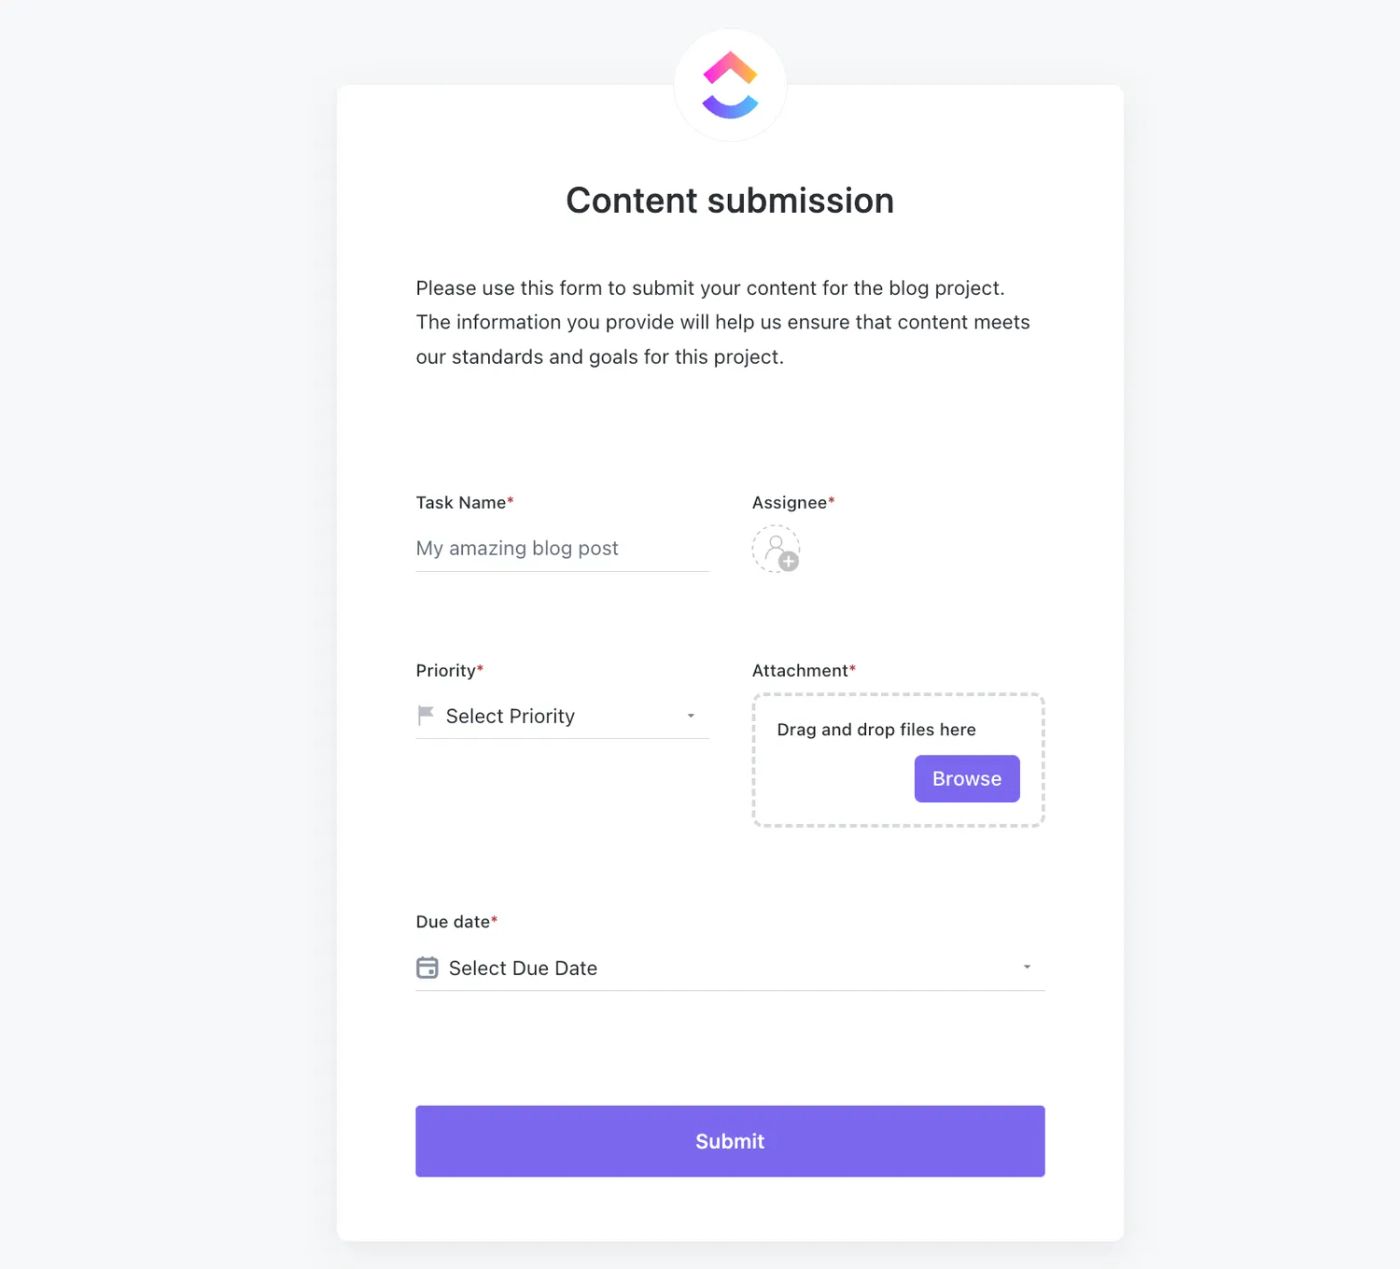
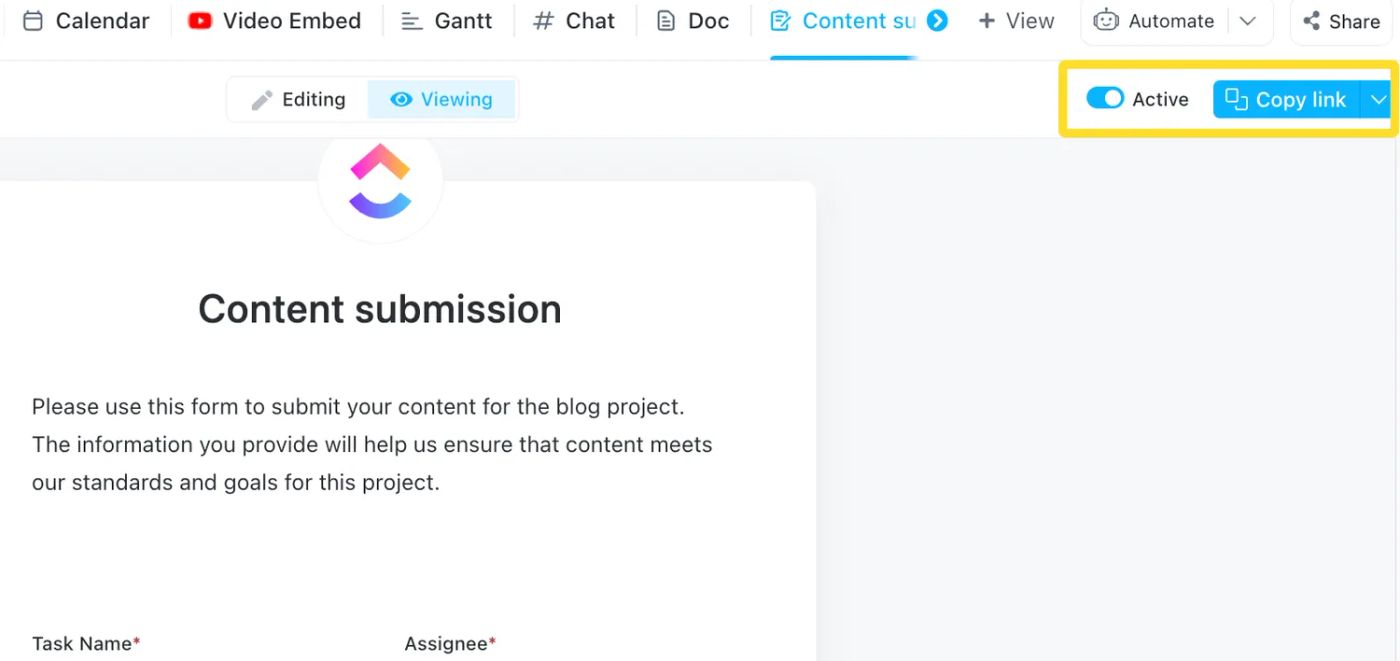
One benefit of ClickUp's barebones default forms, is that setup is quick. Once you have added all the relevant fields, all that's left to do is preview the form. You can do that by switching from Editing to Viewing at the top of the editor.
 (Source: ClickUp)
That's it! Assuming you're happy with the end result, your new (ClickUp branded) ClickUp form is ready to go. Just make sure the toggle on the top right of screen is switched to Active, then click Copy Link to share your form. You can access it any time from the top menu.
 (Source: ClickUp)
[NEWSLETTER]
Challenges of using ClickUp forms
ClickUp’s Form View is a super handy feature, but it’s not without limitations. Here are some of the drawbacks compared to a dedicated form builder:
- Limited form field options: ClickUp forms have a limited set of form fields, and they are more geared towards task management processes.
- Limited form customization: As you've seen above, ClickUp forms are rigid in their design. You can't change any design-related elements unless you're on the Business plan—and even then options are limited.
- Limited built-in features: ClickUp forms offers multi-page forms. and logic, but only to subscribers to the Business Plus plan—which, at $29/user/month is a fairly costly commitment.
- Limited integration utility: ClickUp forms are great if you use ClickUp for all your work. If you want to connect to other tools, then a standard form builder is much more flexible, and adaptable.
- Limited analytics and reporting: ClickUp forms just don't not offer the same level of detail and insight into performance as a dedicated form builder.
The bottom line: ClickUp forms are a great way to easily turn task submissions into ClickUp tasks. If you're a dedicated ClickUp user, already subscribing to the Business plan, then it makes complete sense to use the baked-in forms feature.
But if you're not any of the above, or you're looking for a better form builder that still integrates with ClickUp, then Paperform is exactly what you're looking for.
[CTA: Create ClickUp forms with Paperform | Beautiful, flexible forms that integrate with ClickUp | Get started]
Level-up your ClickUp forms with Paperform
Our ClickUp integration through Zapier gives you the best of both worlds: you get the customization and flexibility of Paperform, and the project management tools you love through ClickUp. The Zap template below will redirect you to Zapier and we'll guide you through the setup here.
Before you start, make sure you've created a form (sign up for a free account if you're a new customer) in Paperform. You'll want to make sure all the form fields align with the relevant fields in your ClickUp workspace.
Once that's done, click the Zap template above and log in to Zapier. Connect your Paperform account, and choose the relevant form to act as your trigger.
 (Source: Zapier)
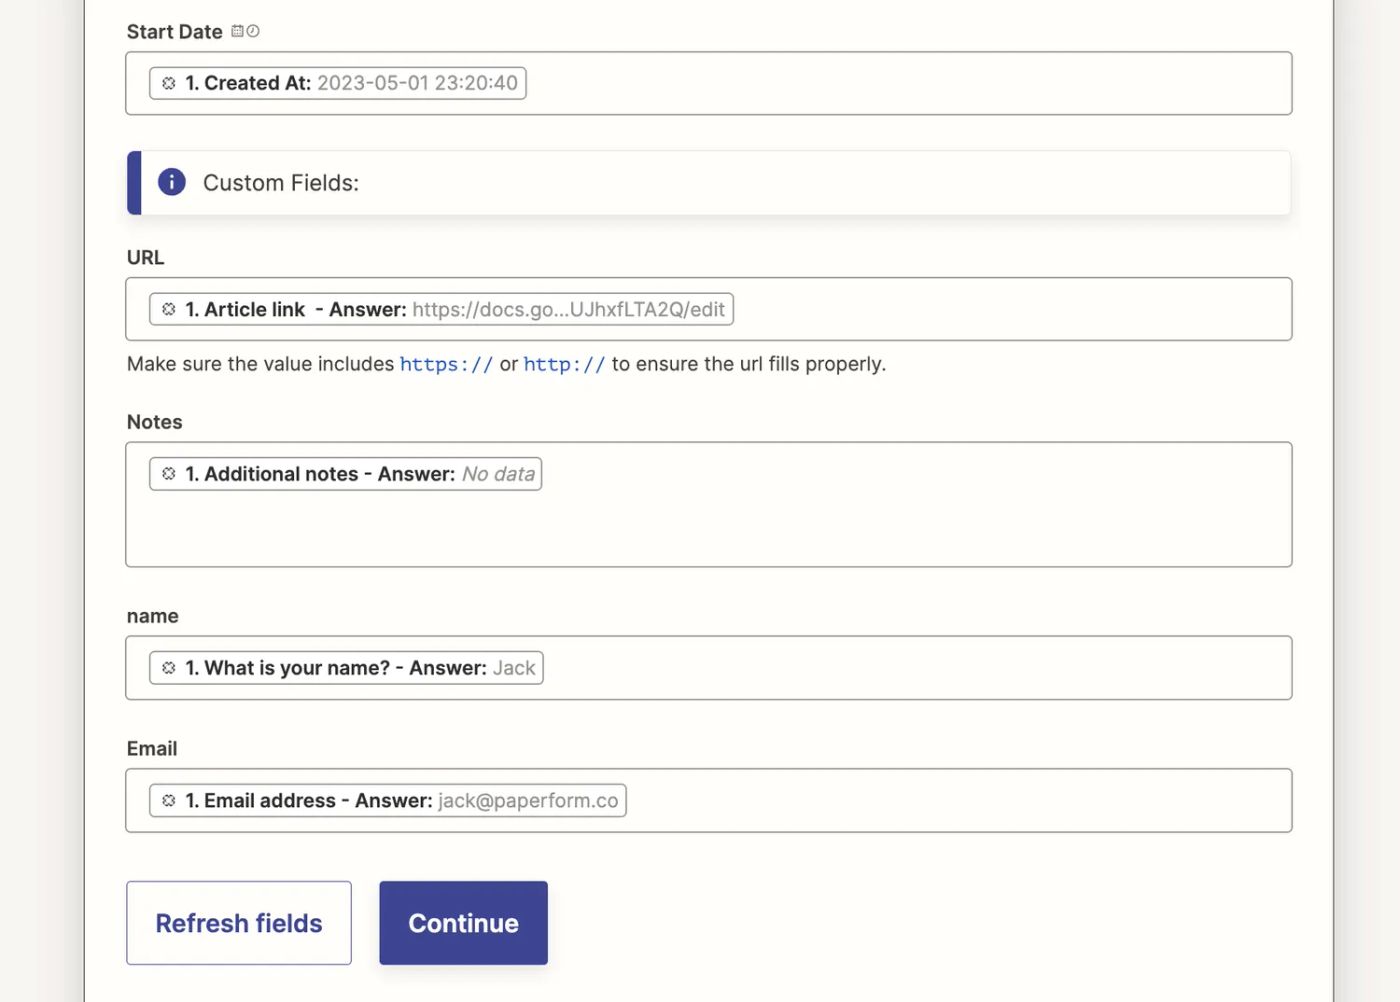
Next step is to connect your ClickUp workspace. Once the workspace is linked, it's time to map the individual Paperform fields to the relevant fields in ClickUp. Here it helps to make sure your fields share similar names, that way you can easily find the relevant Paperform answers to pipe to ClickUp.
 (Source: Zapier)
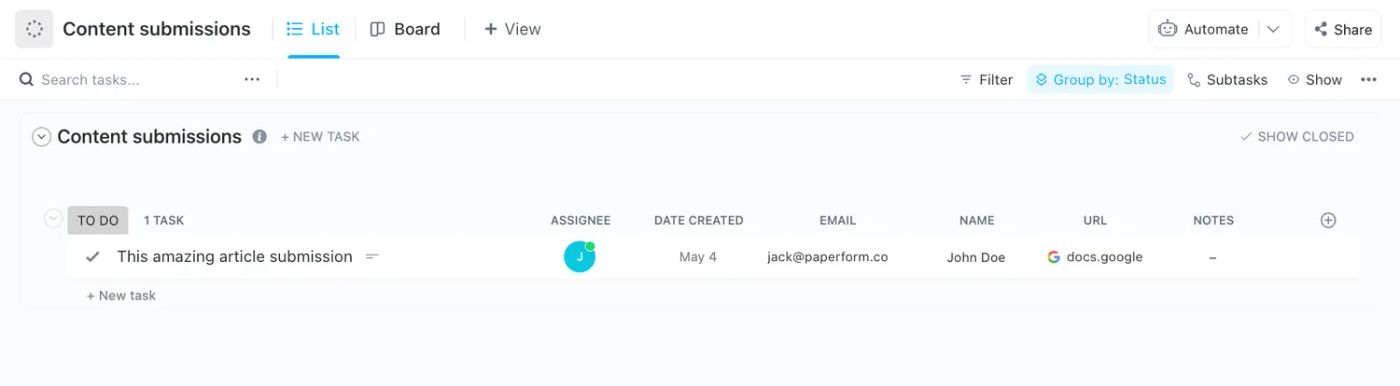
Once all the fields are mapped, just run one final test to check things are working, and you should be good to go! Our example Zap worked a treat, and now a ClickUp task is created any time our content submission form is filled out. We also set it so that these tasks are automatically added to a "to do" list and assigned an editor—pretty neat, right?
 (Source: ClickUp)
All that's left to do is click Publish, and you're on your way to automating ClickUp and _s_aving a bunch of time and manual effort. Existing Paperform subscribers can get started today. Not already a subscriber and want to automate busywork, while building beautiful, branded ClickUp forms? Sign up for a free trial.
Related reading
- 6 ways to automate lead management with Paperform and Zapier
- The 5 best data collection apps in 2023
- The framework for a perfectly balanced to-do list
- How to create a form in Airtable
- Are You Suffering from Toxic Productivity?