Forms can be organized into different workspaces in your Dashboard.
Workspaces are how you organize your work. They now work across Paperform, Papersign, and Stepper, so a workspace you create in one product is available in the other.
If you scroll down in the Dashboard, you'll see a list of forms on your account. Below the search bar on the left is a list of all your workspaces. Your default workspace will be named after your team, and will be designated by a house icon. This is where new forms land when no workspace is picked.
Adding new workspaces is available on specific pricing plans. Click the "Add Space" button to create a new workspace.
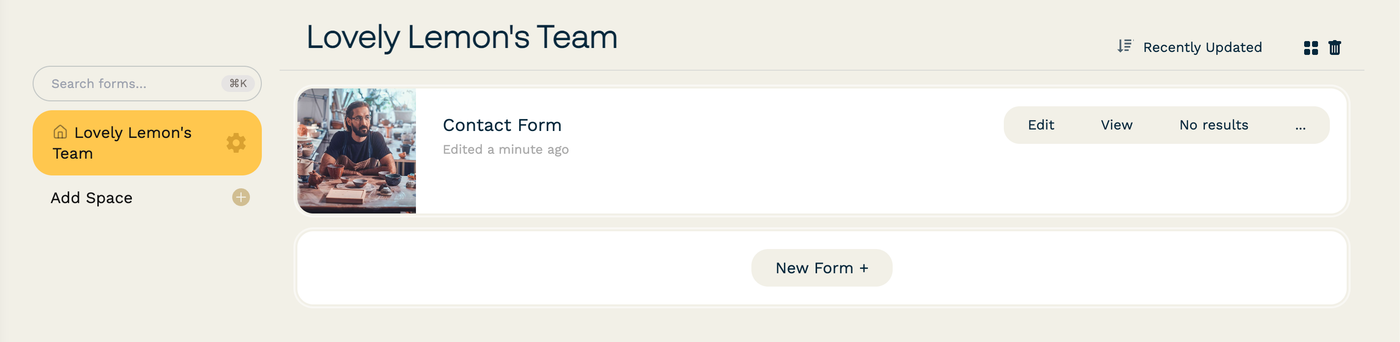
To move a form into a new workspace, drag and drop it in. You can also click the three dots next to a form (...) and then select "Move to..." to choose a new workspace.
Note: Transferring or moving a form between workspaces will not impact any integrations, payment setups, data collection, or any other established features.
Why do I see workspaces I didn't create in Paperform?
Workspaces are shared across products. A workspace you created in Papersign to hold documents will show up in Paperform too, and vice versa. Nothing has moved. Your forms and documents are all exactly where you left them. Share links and submissions keep working as they did.
How are workspaces ordered?
The sidebar displays up to 10 workspaces. If you have more than that, the rest sit under "Show x more" at the bottom of the list. Click it to see them.
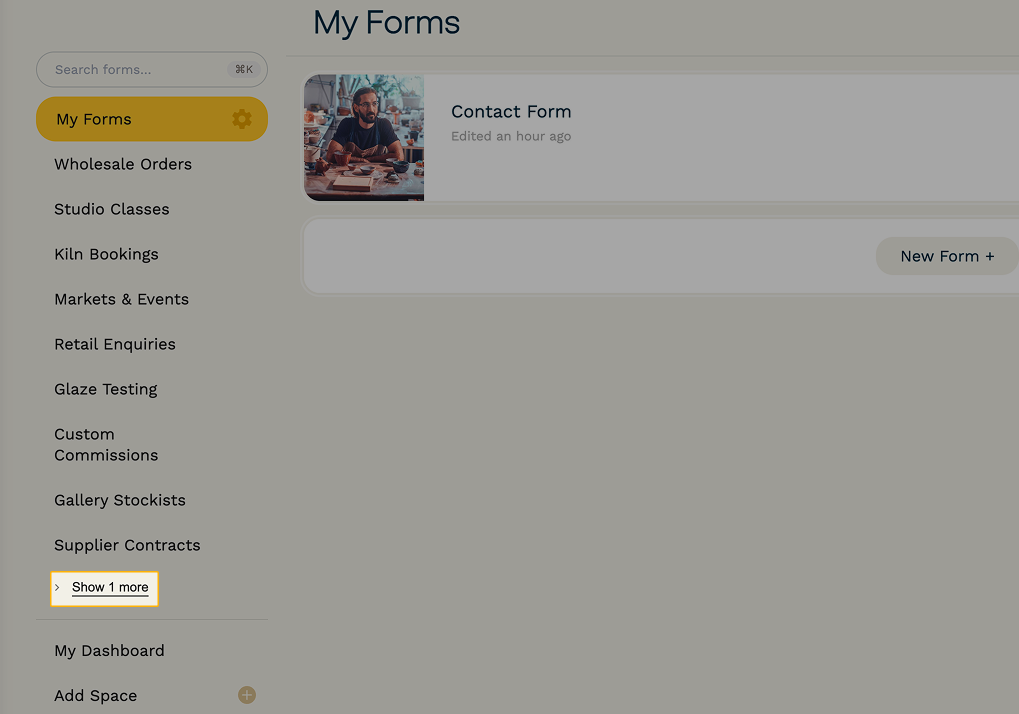
Within those 10, workspaces are sorted so the ones you're most likely to need in Paperform come first:
- Workspaces that contain forms.
- Every other workspace you have access to.
If you have more than 10 workspaces for Paperform, the additional workspaces will appear at the top of the list within “Show x more”, ahead of any workspaces that only contain Papersign documents. A workspace that only holds Papersign documents or Stepper workflows sorts below your form workspaces. As soon as you add a form, it moves up.
Stepper uses the same logic: listing workspaces that contain documents and workflows first, respectively. Papersign by default shows the first pinned space. If no spaces are pinned, the team’s default space is displayed.
How do I manage my workspaces?
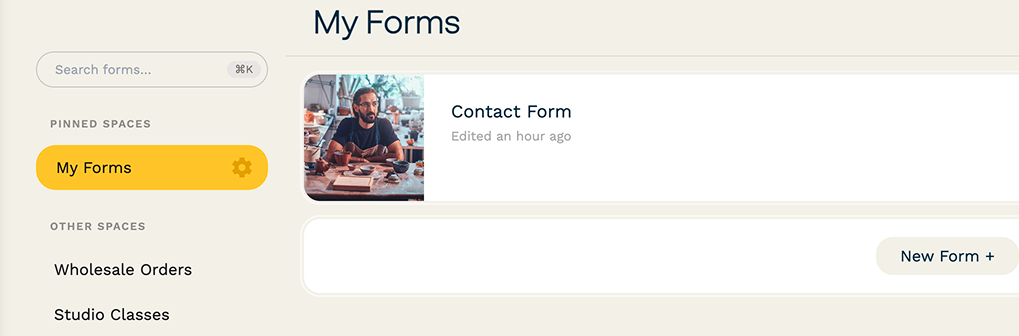
You have the option to rename, reorder, pin, share and delete your workspaces. Most of these are behind the Cogwheel icon next to a workspace's name.
-
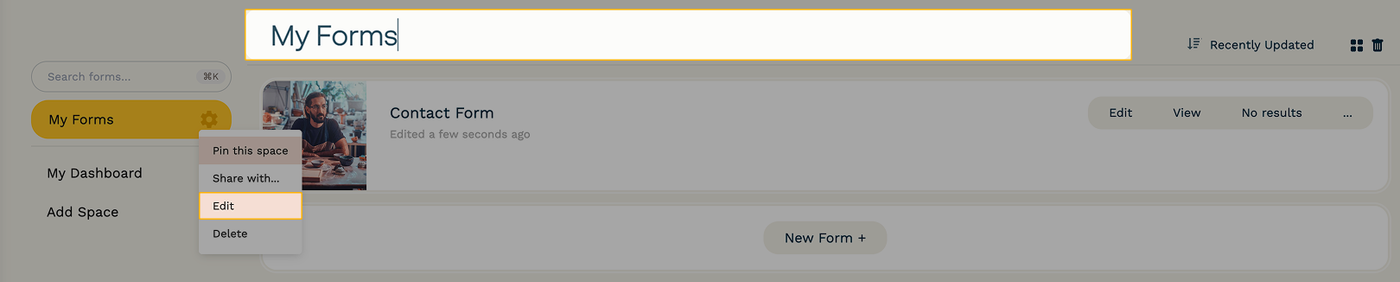
To change the name of a workspace, either click the Cogwheel icon beside the workspace and select "Edit", or edit the name directly at the top of the Dashboard (right above the list of forms).
-
To re-order your workspaces, drag and drop them into position on the left side of the Dashboard. This works in both the "Pinned spaces" and "Other spaces" lists. Like pinning, the order you set applies to Paperform only. Workspaces can't be reordered in Papersign.
-
To delete a workspace, click the Cogwheel icon next to its name then select "Delete". A workspace that contains Papersign documents can't be deleted from Paperform. You'll see a warning instead.
Pinning a workspace
To pin a workspace, click the Cogwheel icon next to its name and select "Pin this space".
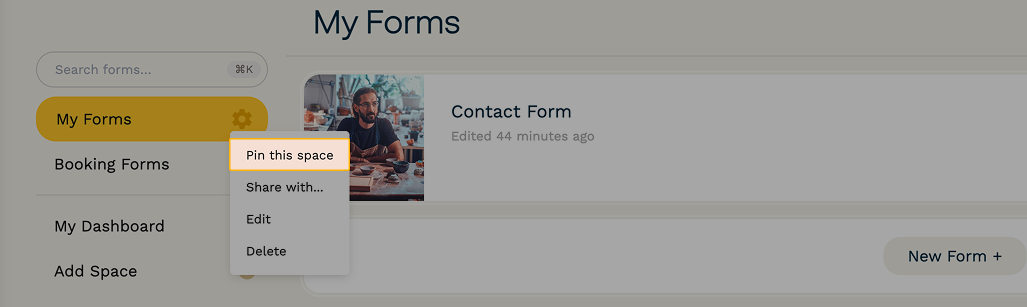
Pinning moves a workspace into a separate "Pinned spaces" list at the top of the sidebar. Everything else is grouped below it under "Other spaces". These two headings only appear once you've pinned something. Before that, your workspaces are a single list.
Team Spaces
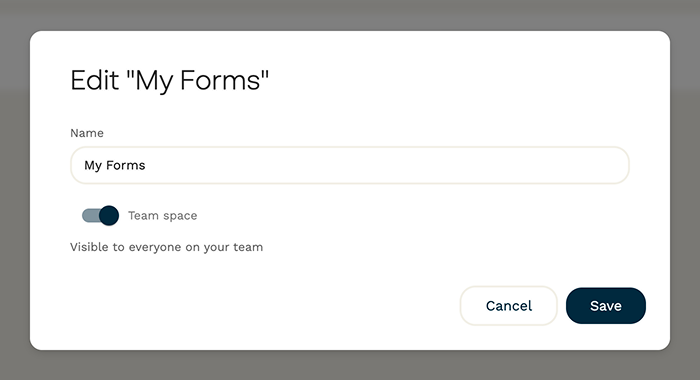
When you create or edit a workspace in Paperform, you can turn on the "Team space" toggle. A Team space is visible to everyone on your team, even if you've only given that person access to one specific workspace.
Note: The Team space setting can be toggled off by clicking the Cogwheel icon beside the workspace and selecting “Edit”.
How do I give someone else access to a workspace?
You can share a workspace with team members by clicking the Cogwheel icon next to its name, then clicking "Share with...".

This will open a pop-up where you can enter a user's email address. If they are already a member of your Paperform team, their name and email will appear on the dropdown.
Click "Share" to add them to the workspace.
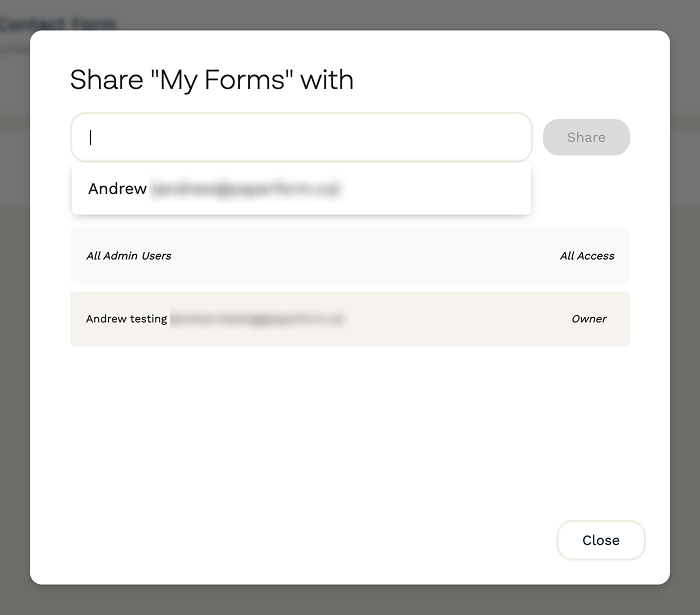
Any users who have already been given access to the workspace will be listed below the search bar (except Admins who have access by default).
Sharing applies to the workspace itself, not to one product. What someone sees inside a shared workspace depends on which products they have a seat for. If you share a workspace with someone who has a Paperform seat but no Papersign seat, they'll see the forms in it but won't have access to the documents in Papersign.
Can I invite someone who isn't part of my team yet?
If the user is not already on your Paperform team, typing their email address will prompt you to "Invite" them.
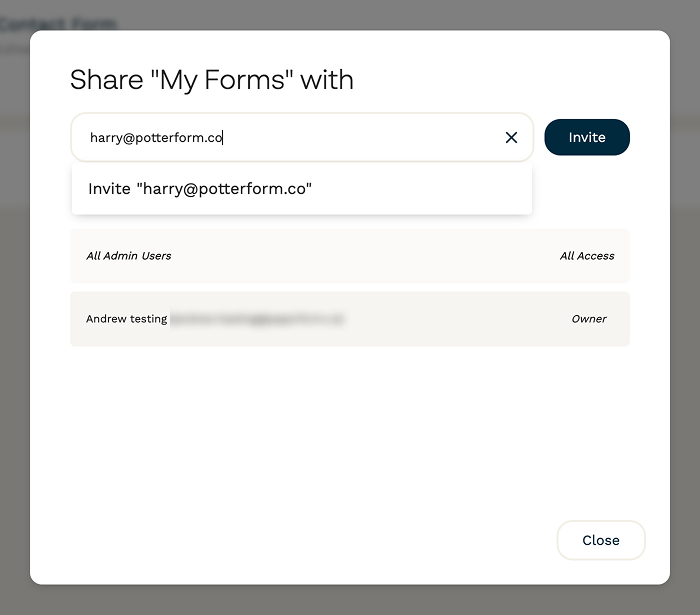
Clicking "Invite" will open up the Invitation Flow modal, where you can set their permission levels.
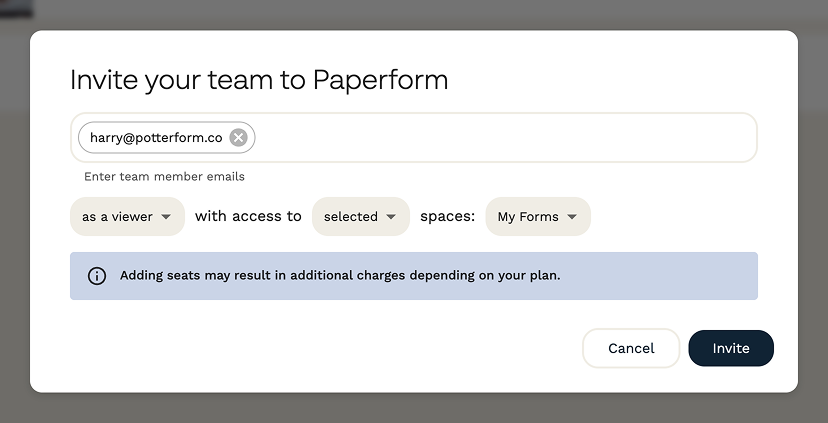
This will send them an invitation via email to join your team. Once accepted, they will be able to view their forms on their Paperform Dashboard.
How do I control what kind of access users have in my workspace?
If a user is already on your team, they will retain the same level of permissions for that workspace. For example, if they are a viewer, they'll only be able to view the forms and submissions in the workspaces you add them to. To manage permissions, follow the instructions in this help article.
Can I use folders in Paperform?
Not yet. Folders let you sort items into sub-groups inside a workspace, and they're currently available in Papersign and Stepper.
Gotchas
- Workspaces are shared across products, but pinning is not. Pin a workspace in each product where you want it at the top.
- While form workspaces themselves can be re-ordered, the order of forms within a workspace is controlled by the filter dropdown found at the top-right of each workspace's form list.
- If you delete a workspace, this also deletes all of the forms inside of it. Make sure to move any forms you want to keep to a new workspace first.
- A workspace can't be deleted while it contains items from another product. If a workspace holds Papersign documents, or Stepper workflows, you'll see a warning rather than a delete option. Move or delete those items first. The same applies in Papersign and Stepper to a workspace that holds forms.
- You must have at least one workspace in your Dashboard.
- If you are a sub-user on a team with user or viewer permissions, you can't make changes to workspaces for the account. Admins and the account owner can use workspaces to determine which users and viewers have access to which forms.