Introduction
For larger organizations, it may be useful to give sub-users their own login credentials to gain access to your team, with specific permissions.
In this guide we’ll cover:
- Concept of teams
- Users and roles
- Managing users
- Instructions for both Legacy and Platform Teams
Check our pricing page to see if your current plan supports sub-users
Teams for all Plans
What is a team?
This section applies no matter which plan you're on.
Teams allow you to invite other Paperform users to access your account and depending on your plan to give them access to your Paperform.
You can use roles and spaces to restrict which actions a member of your team can take.
Creating a team
You can be part of many teams but can only own one team.
If a user only belongs to other users’ teams, they can create a team from the avatar menu. Creating a team will automatically start a Paperform trial for that team:
- Select the avatar icon on the top right and select “Create new team”.
- Select “OK”.
Switching between teams
If you are a part of multiple teams, you can switch between them using the buttons in left sidebar of your dashboard.

Your dashboard only shows the content that belongs to the currently selected team.
Leaving a team
If you are a member of another user’s team, you can remove yourself from it.
- Switch to the team, then click the Avatar icon in the top right → Account Settings → Leave Team.
- Click Ok to confirm.
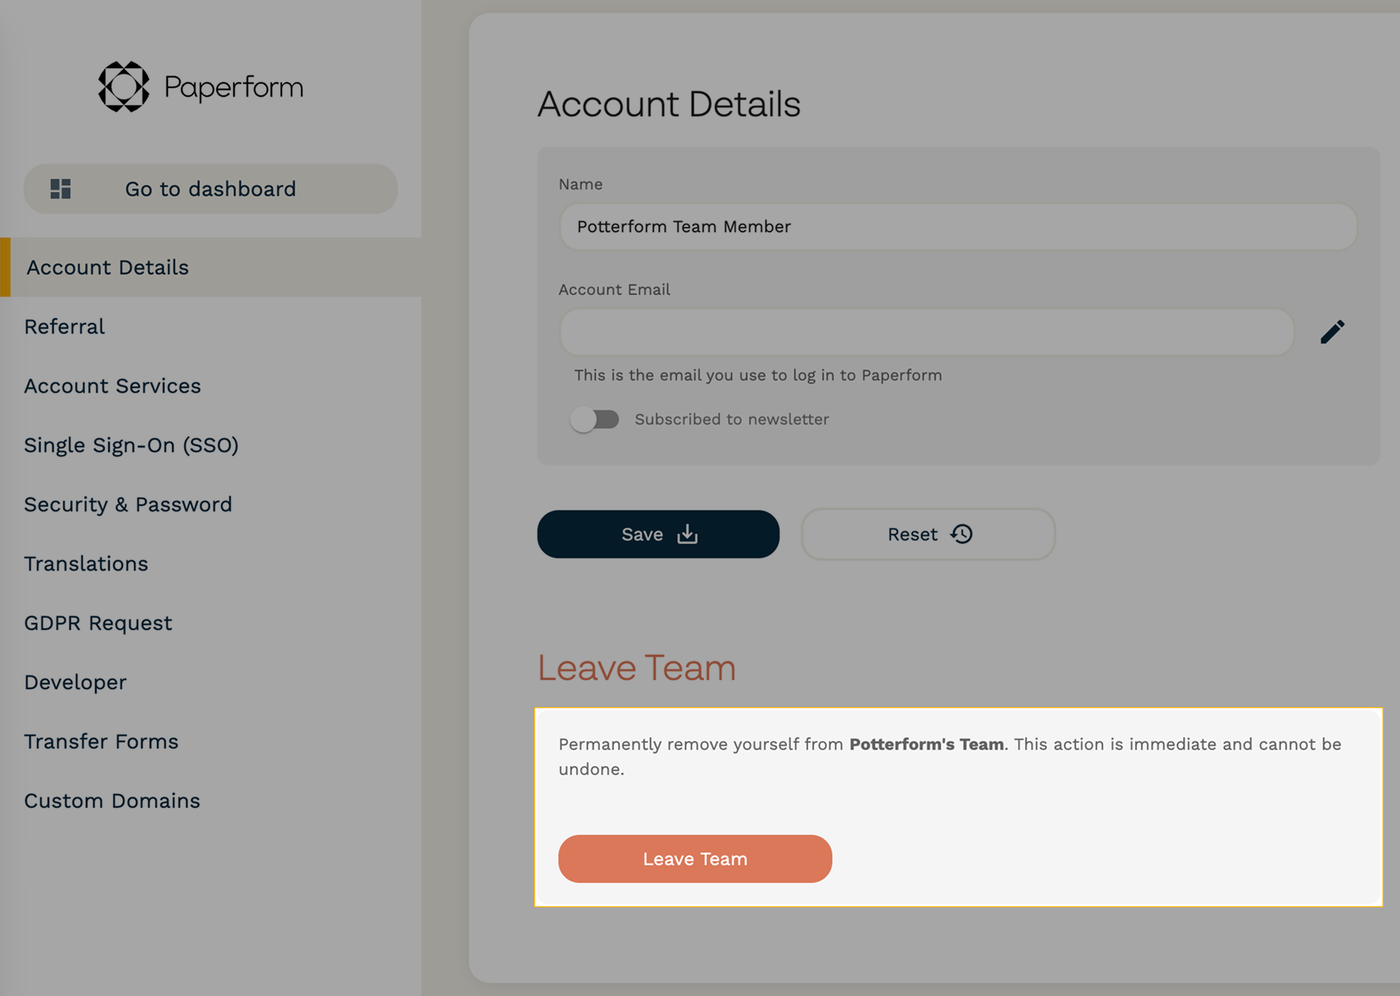
When you leave a team:
- You will immediately lose access to all forms, submissions, and integrations shared on the team.
- Any documents or assets you own in the team will be transferred to the team owner.
- To rejoin, you need to receive and accept a new invitation from the team owner.
Team owners can’t remove themselves from a team they own.
Send bulk invites
You can quickly add multiple users to your Papersign or Paperform team from the respective product's Dashboard.
To complete this action, you must have admin permissions.
-
Open the avatar menu.
-
Select “Invite your Team”.

-
Enter the email address of user(s) you wish to invite. Separate emails with a comma.

-
Select their permission level and which Spaces they have access to.
-
When you’re done, click the “Invite” button.
The users will immediately be sent an email inviting them to join your team. They will be marked as “Pending” until they accept the invitation.
You can view, update, or remove permissions from the Manage Team Members page.
For Platform Plans
Users and Roles
Admin
- Full control over all of the forms and account settings.
- Full control over Users/ Viewers.
- Ability to add payment accounts.
- Ability to copy forms and spaces between teams.
- Ability to transfer forms and spaces between teams.
User
- Create, update, delete and restore forms and view their respective submissions.
- Access to spaces/ tags is restricted until assigned by an Admin.
- Forms created by Users are automatically added to the space they are assigned to.
Business Access Levels
The Business Plan allows for even more levels of access: Full Access, Full Access + Team Management, Team Management, and Paperform Viewer.
Full Access
- Ability to create forms, documents, and workflows.
- Access to view, export, delete, and restore submissions, and resend submissions to integrations and webhooks.
- Ability to create tags for forms.
Full Access + Team Management
- Full control over all of the forms, documents, and workflows, and account settings.
- Full control over Users/ Viewers.
- Ability to add payment accounts.
- Ability to copy forms and spaces between teams.
- Ability to transfer forms and spaces between teams.
Team Management
- Full control over Users/ Viewers.
- Ability to add payment accounts.
- Ability to create forms.
- Ability to move forms between spaces.
- Full control over all Papersign documents.
- Full control over all Stepper workflows.
Paperform Viewer
- Access to Paperform product only.
- Access to view, export, delete, and restore submissions, and resend submissions to integrations and webhooks.
- Ability to change allocated stock levels for products.
- Access to all team workspaces by default.
- Ability to create tags for forms.
- Cannot create, update, or delete forms.
When adding a Team Management member, be sure to toggle on Team and Billing Admin first if you’d like them to manage team members and billing.
Managing Users
Invite a user to your team
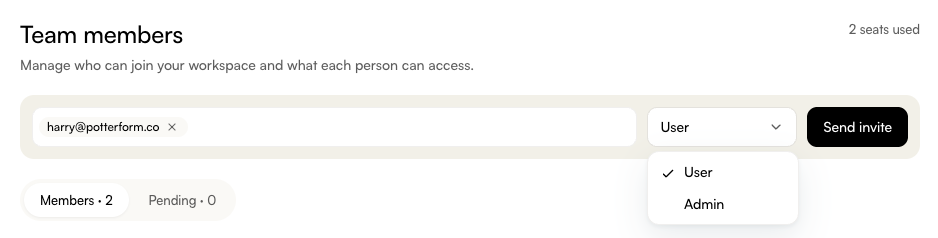
When sending an invite, you can configure the roles that person will have on your team. The invited user can then accept your invite and add their prexisting Platform account to your team or register for a new one. It is important to make sure the user you're inviting to your team has a Platform (Not Legacy Paperform) subscription.
To complete this action, you must have team management permissions.
- Go to Account Settings → Manage Team Members.
- Enter the new team member's email address and choose their level of access.
- Click Send Invite.
Updating a sub-user in your team
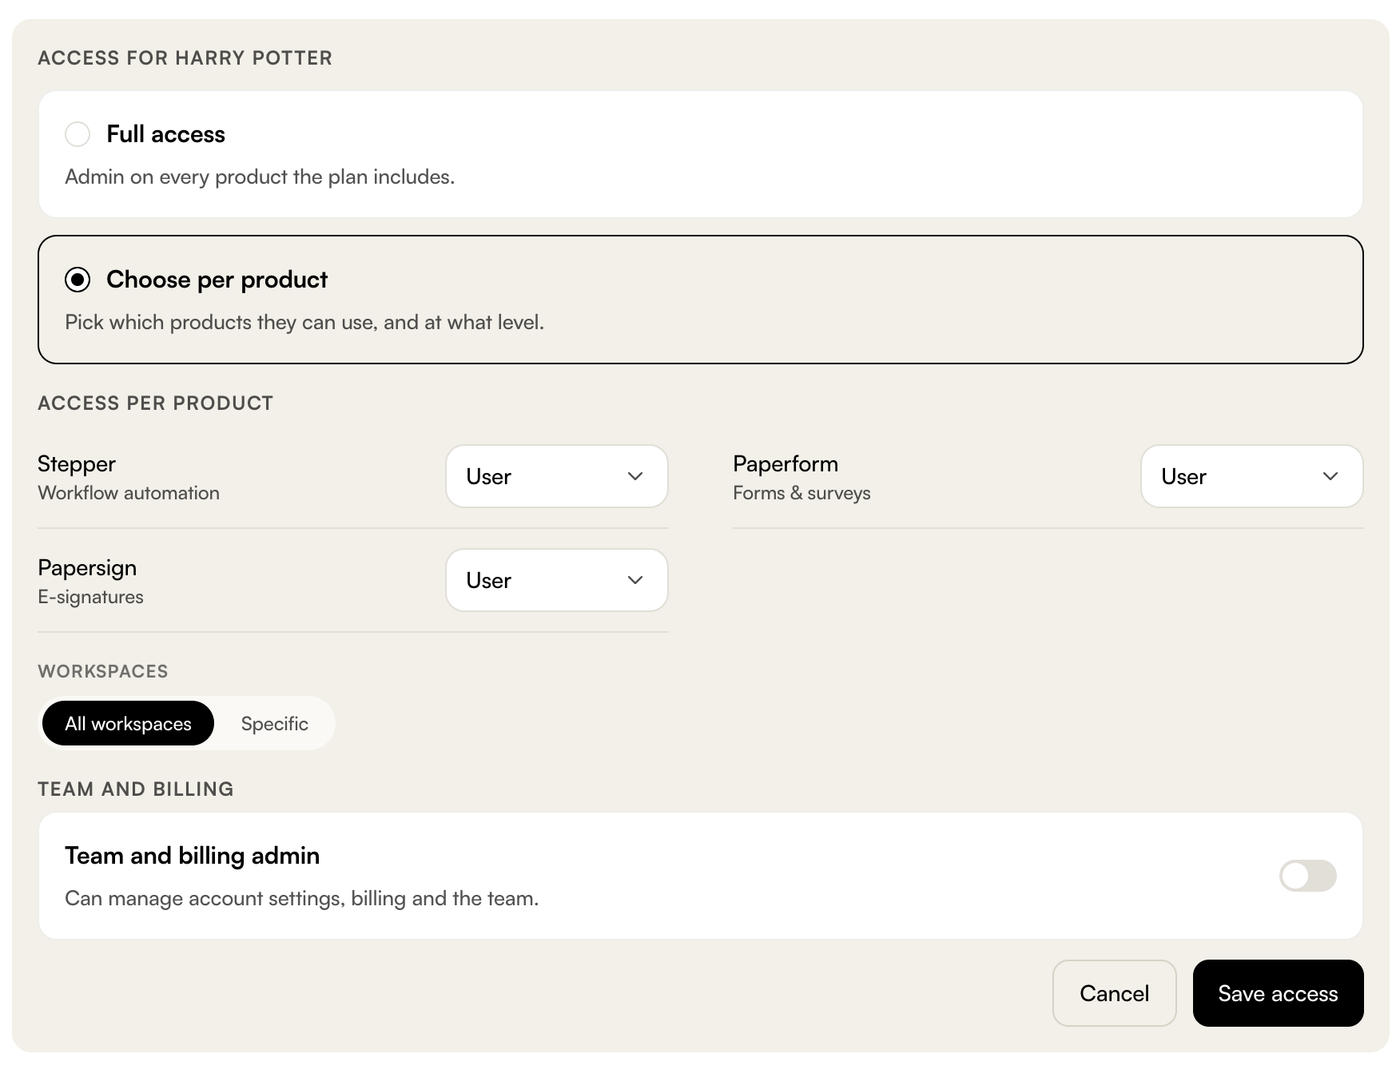
- Click the horizontal three-dot menu to the right-hand side of the user you wish to edit.
- Click Edit Access.
- Make changes to each product for the user and click “Save access.”
Removing a sub-user in your team
- Click the horizontal three-dot menu to the right-hand side of the user you wish to edit.
- Click “Remove from team.”
- The user will be removed immediately.
For Legacy Plans
Users and Roles
Admin/Owner
- Full control over all of the forms and account settings.
- Full control over Users/ Viewers.
- Ability to add payment accounts.
- Ability to copy forms and spaces between teams.
- Ability to transfer forms and spaces between teams.
User
- Create, update, delete and restore forms and view their respective submissions.
- Access to spaces/ tags is restricted until assigned by an Admin.
- Forms created by Users are automatically added to the space they are assigned to.
Viewer
- Access to view, export, delete, and restore submissions, and resend submissions to integrations and webhooks.
- Access to spaces/ tags is restricted until assigned by an Admin.
- Cannot create, update, or delete forms.
Accounts
- Access to manage account billing only.
Managing Users
Invite a user to your team
When sending an invite, you can configure the roles that person will have on your team. The invited user can then add themself to your team if they already exist or register and be added to your team.
To complete this action, you must have admin permissions.
-
Go to Account Settings → Manage Team Members.

-
Click “Invite to Team” on the top right corner to open the invitation modal.
-
Enter the email address of the user you wish to invite.

-
Then, use the toggles to specify their role(s) and permission level. If the user is not an admin, you have the option to restrict which tags and Spaces the user has access to. Note: Team Spaces display for everyone on the team, even if you’ve only set permissions for the team member to view one space.
-
When you’re done, click the "Send Invite" button.
The user will immediately be sent an email inviting them to join your team. They will be marked as “Pending” until they accept the invitation.
If you exceed the number of seats on your plan while on trial, you will be automatically upgraded to a plan that fits your team. You can check which plan you're on in your Account Settings > Billing page.
Once added to your team, you can update permissions or remove them at any time from the Manage Team Members page.
Accepting the invitation
To accept the invitation, click on the invitation link in the email and follow the prompts.
If you already have a Paperform or Papersign account, you'll be prompted to log in with your credentials. Otherwise, you will be prompted to create a new account.
Once you complete the invitation process you will be logged in on your dashboard for that specific team.
Updating a sub-user in your team
To complete this action, you must have admin permissions.
If you would like to edit an existing sub-user's permissions, follow the steps below:
- Go to Account Settings → Manage Team Members.
- Click on “Permissions” next to the user you want to update.
- Make changes to the user then click “Save”.
Removing a sub-user in your team
To complete this action, you must have admin permissions.
- Go to Account Settings → Manage Team Members.
- Click on "Remove" next to the user's name.
- When prompted with the message "Are you sure you want to remove this user?", click "Ok".
The user will immediately be removed from the list of sub-users.