All Solutions
Explore all the solutions you can create with Paperform: surveys, quizzes, tests, payment forms, scheduling forms, and a whole lot more.
See all solutions


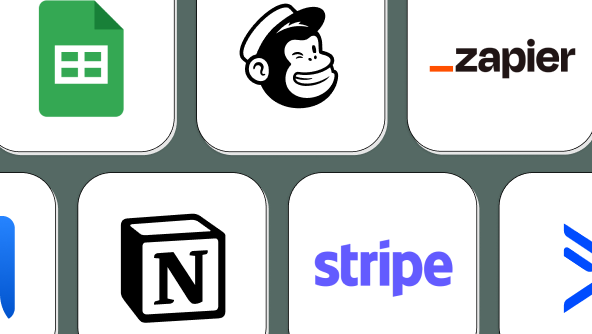
Connect with over 2,000 popular apps and software to improve productivity and automate workflows
See all integrationsProducts
Solutions
All Solutions
Explore all the solutions you can create with Paperform: surveys, quizzes, tests, payment forms, scheduling forms, and a whole lot more.
See all solutionsIntegrations
Connect with over 2,000 popular apps and software to improve productivity and automate workflows
See all integrationsResources
Getting Started with Agency+
Overview
Agency+ is a Paperform offering that helps you manage forms and accounts across multiple clients in one place. It’s built for anyone who creates forms on behalf of clients, partners, or franchisees.
Sound interesting? Try Agency+ here.
With Agency+, you can create separate teams for each client, keeping their forms, branding, and access independent. As an Agency+ admin, you can be added to client teams to manage their forms and settings directly when needed. You can also easily copy forms and spaces between teams, giving you the flexibility to reorganize client work as projects grow or change.
Deliver a custom-branded Paperform experience for your clients with custom domains and tailored branding across the app, forms, and emails. With flexible access controls and easy team management, you’re always in control of who can view, edit, and collaborate.
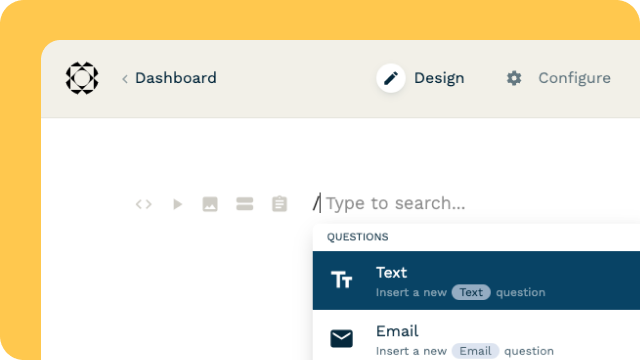
This guide will provide an overview of Agency+'s key features: setting up teams, brands, and domains. Select Agency+ from the product sidebar to get started!

To help you get started, each section will be pre-populated with a sample configuration until you add your own.
Client Teams
What are Client Teams?
Client Teams in Agency+ are separate workspaces you can manage under a single Paperform account. Each team has its own forms, branding, domains, and team members, making it easy to keep client work organized and independent. You can control access, assign plans, and customize each team’s experience to match your agency or client’s brand.
Creating a Client Team
Navigate to the Client Teams page and click “Create client team.” You’ll be asked to provide a team name and the name and email of the team owner. These should be the details of the user who will be the primary contact and have overall responsibility for the team, including adding other users.
Once created, you can choose the plan type for the team, change branding, invite the owner, and invite other team members. The team will use Paperform’s branding by default, and you can invite the owner immediately or once you have configured optional settings for a specific brand. You must invite the team owner before inviting other team members and setting user permissions.
You can invite additional users with Admin, User, and Viewer roles. Our guide on managing users and teams provides details on the included permissions for these roles.
Managing Client Teams
As the Agency+ admin, you can directly manage the forms and settings of your client teams. To access a client team’s dashboard, click the Paperform icon next to the team.

If you’re not already a team member, you'll be prompted to join. Confirming this will add your account to the team as an admin seat. The team dashboard will open in a new tab. You can return to this team anytime by selecting it from the product sidebar.
Please note: You must invite the team owner first before you can join the team.
Copying Forms between Client Teams
Once you've created your client’s team, you can copy individual forms or entire spaces between your Paperform account and the client’s team—making it easy to streamline setup and reuse work across accounts. To do this, make sure you’re an admin of both the source and destination teams in the Agency+ dashboard.
To copy a form:
- Click the meatball icon (...) next to the form name.
- Select "Copy to team…" from the dropdown.
- Choose the destination team from the prompt.

To copy an entire space:
- Click the cogwheel next to the space name.
- Select "Copy to team…" and choose the destination team.
What is included in the copy?
All your form questions and theming will be copied over. However, some back-end settings like integrations, payment accounts, and calendar connections won’t be included and will need to be re-connected within your client's account. For a full breakdown of what’s copied and what’s not, check out our help article.
Ejecting a Client Team
If you no longer need to manage a client team under your Agency+ account, you can eject it. This transfers the team out of your Agency+ workspace, allowing the team to operate independently and manage its own billing and settings.
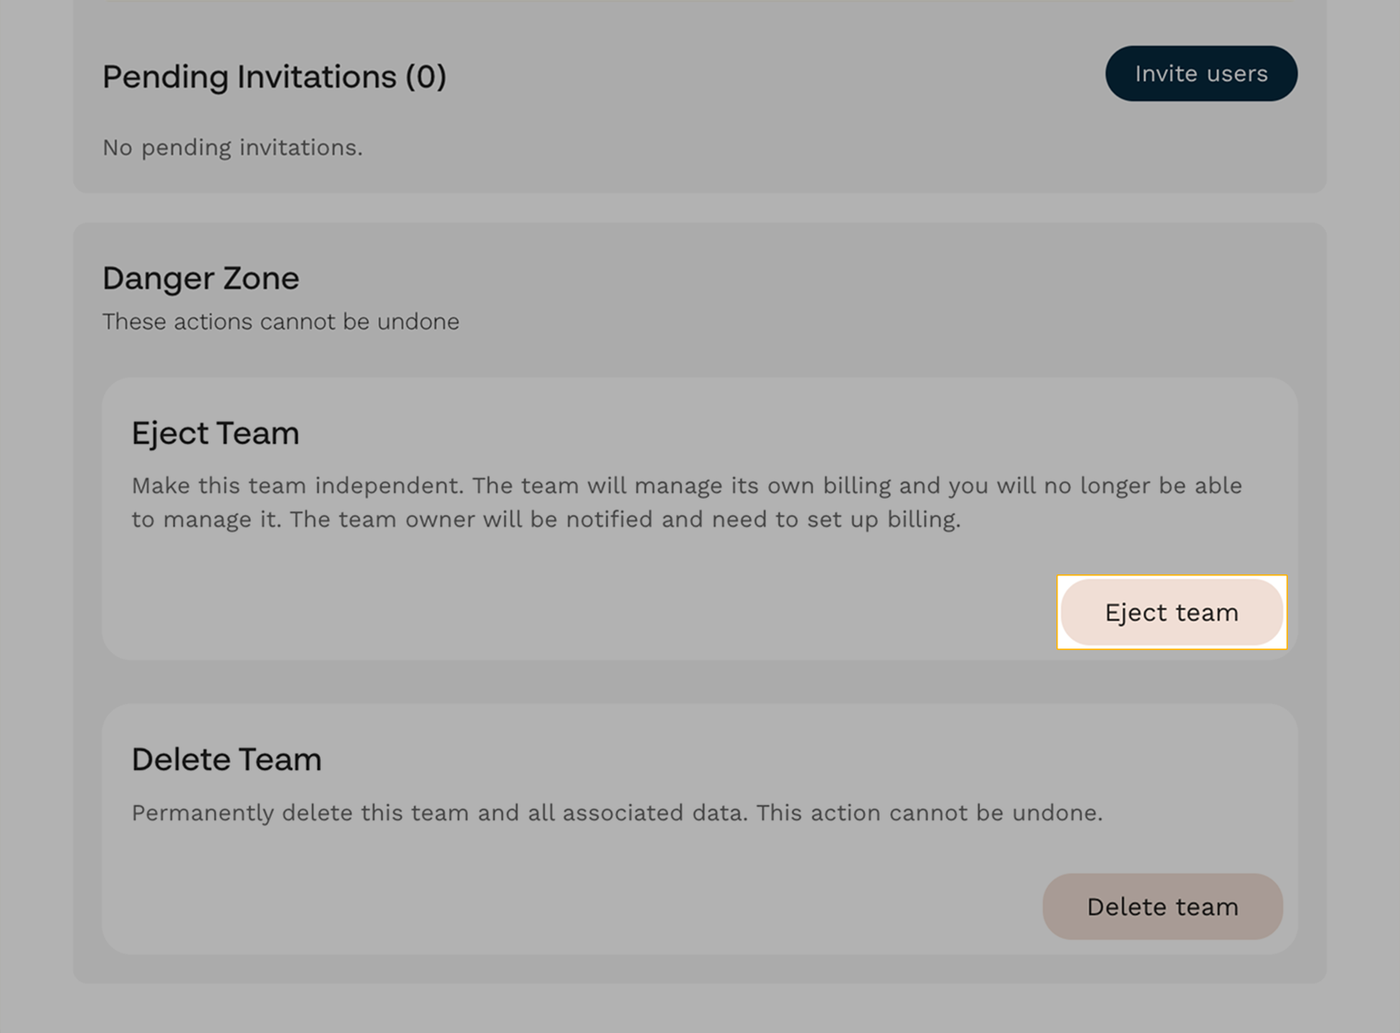
Please note: Ejecting a team may impact your Brands depending on whether the team brand is used by other teams. The implications will be clearly outlined in the UI before you confirm the ejection.
Once a team is ejected, it will no longer appear in your Agency+ dashboard, and you will no longer have access to its forms, settings, or usage data.
Brands
What are Brands?
Brands in Agency+ let you customize the Paperform experience for each client team. A brand defines the visual identity and key configuration settings, including your logo, brand name, custom app domain, form domains, and email domains. Once a brand is set up, you can assign it to specific teams to deliver a branded experience that reflects your agency or client’s identity.
Create a Brand
Select Brands in the left pane, click “Create Brand,” and add a brand name. Once created, you can update the brand name and upload a logo to display in the product for client teams that use this brand. Click “Update details” to save your changes.
You can also configure App Domains, Email Domains, and Form Domains to use with your brand and specify client teams that will use the brand. If you create the new domains from your Brand settings, you must go to the respective entries to configure them before use. Instead, we recommend creating new domain entries from their respective panels the first time and linking them to your brand, rather than creating partially configured domains from the Brand configuration.
App Domains and Form Domains involve creating CNAME records, requiring setting aside subdomains that will only be used for a single purpose. A CNAME record makes an entire subdomain an "alias" for something else. So, choose subdomains that you are not using for any existing webpages.
Please note: Although it’s usually not possible, certain hosting providers will allow you to create a CNAME record for the root domain. We don’t recommend this unless you plan to use the entire root domain for Agency+ and don’t have your own website at that web address.
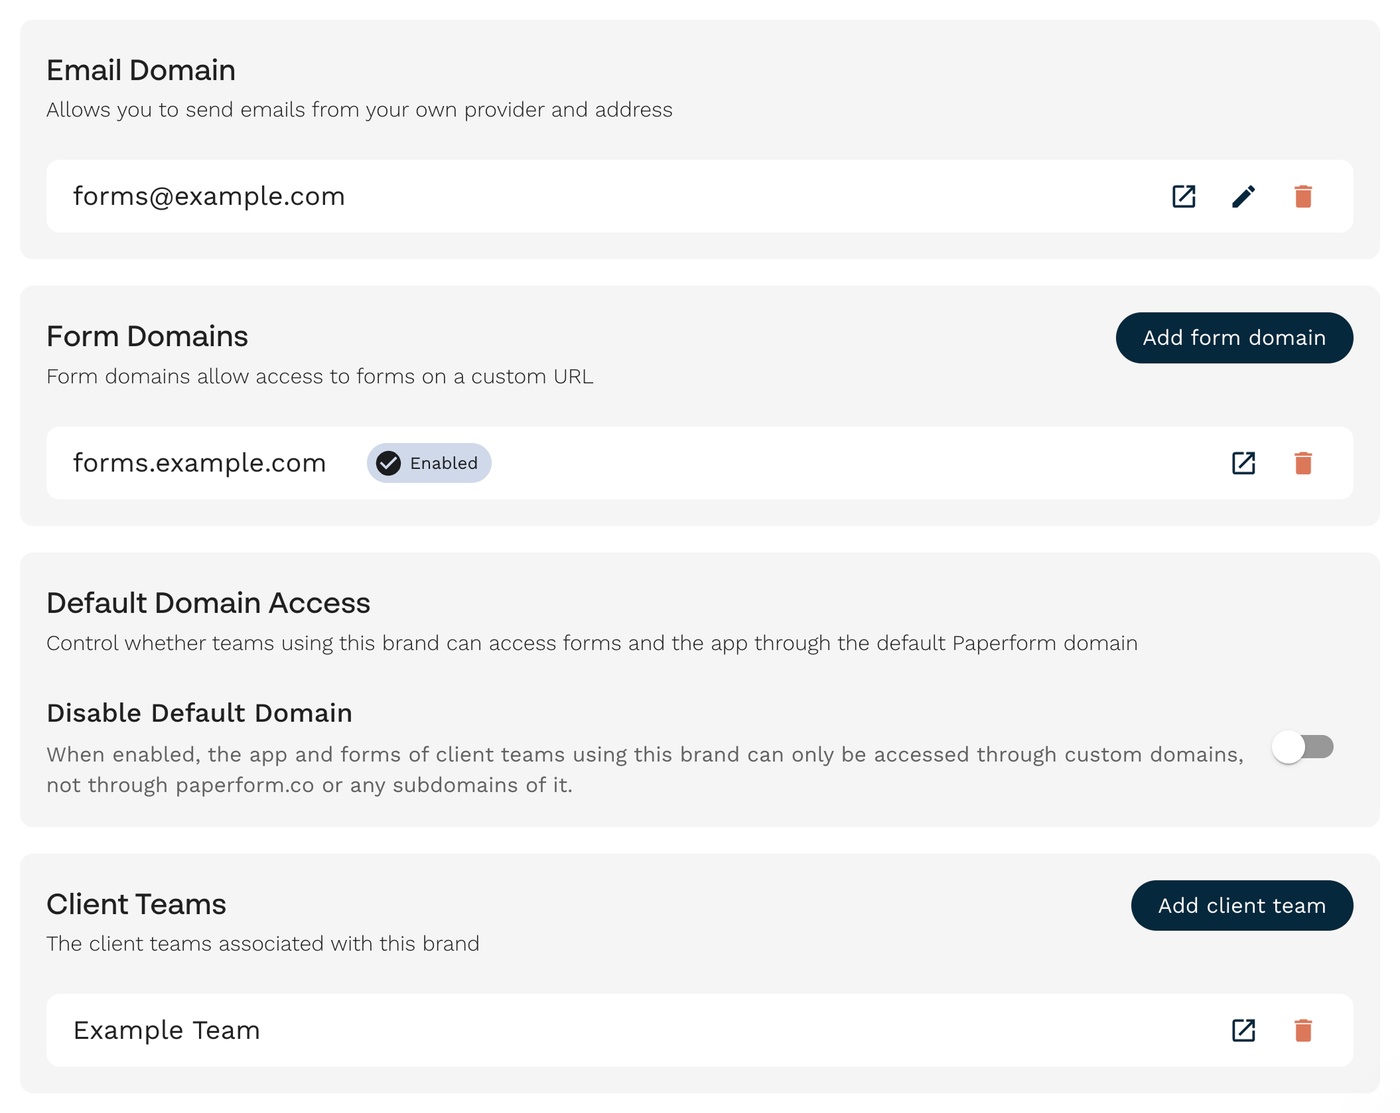
Default Domain Access
You can control whether client teams using this brand can access their forms and the app through the default paperform.co domain. When default domain access is disabled, teams can only access the Paperform app and forms via your custom domains. To use this setting, the brand must have a custom app domain enabled and at least one form domain added and enabled.
App Domains
What are App Domains?
App Domains define the URLs used to access the Paperform app for a given brand, including the dashboard, form editor, submissions, and account settings. Each brand can use a custom app domain or the default Paperform app domain.
Create an App Domain
Navigate to App Domains in the left pane and click “Create Domain.” Add the domain name without the protocol, such as portal.example.com. Follow the instructions in the Domain configuration section. You will need to create a CNAME record that points to the domain specified in this section. Copy this URL or keep this window open.
Log in to your domain provider in a new tab and access the DNS settings. Add a CNAME record by entering the subdomain you want to use as the Name or Host (for example, use portal for portal.example.com). Then, set the Value or Target to the domain you copied from the domain configuration section in Paperform. Once saved, return to your App Domain settings in Paperform and click Configure.
Once set up, you can enable the domain and configure brands to link to it. You can specify multiple brands and a default brand to fall back to on login pages and when no other brand is specified. For example, you could have a single app domain for every client team and then set your own branding as the default brand.
Email Domains
What are Email Domains?
Email domains control how emails are sent from Paperform. Each brand can use a custom Email Domain to send branded emails or rely on the default Paperform email domain.
Create an Email Domain
Create an account with an email provider that supports sending via SMTP. Follow your provider’s setup instructions to ensure your emails are deliverable.
Navigate to Email domains in the left pane, click the ”Create email domain" button, and complete the form to configure your custom email domain. Once your domain is set up, you can use the Test button to send a test email from your domain to your Paperform account email. Once the email domain is configured, you can specify brands to use it with.
Forms will use the From Name specified in each form's email settings. If this isn't populated, we will use the default From Name specified in the Email Domain settings for the team’s brand.
Recommended email provider services
- Mailgun offers a free plan. Follow their quickstart guide and then use your SMTP credentials to get started.
- Postmark also offers a free plan. Get started by following their introduction manual.
Form Domains
What are Form Domains?
Form Domains provide additional URLs that can be used to access forms. Each brand can have multiple custom form domains alongside the default form domain. The default form domain is a subdomain of the brand’s app domain. For example, a default form URL might look like my-form.my-app-domain.paperform.co.
Create a Form Domain
Navigate to Form Domains in the left pane and click Create Domain. Add the domain name without the protocol. For example, forms.example.com. Follow the instructions in the Domain configuration section. You need to create a CNAME record that points to the domain specified in this section. Copy this URL or keep this window open.
Log in to your domain provider in a new tab and access the DNS settings. Add a CNAME record by entering the subdomain you want to use as the Name or Host (for example, use forms for forms.example.com). Then, set the Value or Target to the domain you copied from the domain configuration section in Paperform. Once saved, return to your Form Domain settings in Paperform and click Configure.
Set a homepage
Your forms will be available at URLs with the format formdomain/form-slug. For example, forms.example.com/myform. There are two options for what happens if someone visits your form domain directly:
- No homepage: visitors will be redirected to paperform.co.
- Custom homepage: visitors will be redirected to the URL you specify, such as your website homepage or a customized error page.
Click "Update homepage" to make your changes live. For more information on these options, see our article on Custom Domains.
Gotchas
Deleting Domains
When deleting brands, app domains, email domains, or form domains, remove them from the brand first in your Brand settings; otherwise, you won’t be able to delete the domains.
App and Form Domains
DNS changes can take time to be detected. If you can't immediately configure your app domain, we recommend checking your settings and retrying over a 24-hour period.
Email Domains
Aliases
If you use email aliases with your service provider, ensure they are set up correctly.
Google Workspace
As of May 1st, 2025, Google stopped allowing username/password as an option for sending emails through its email servers.
Delivery issues
When using your own email domain, you are responsible for ensuring the correct domain configuration and handling any outages or service issues with your email provider. You must ensure your email provider is correctly configured for your email domain; otherwise, your emails may bounce or be filtered as spam.
SMTP credentials using multi-factor authentication (MFA or 2FA)
We don't support using SMTP credentials that require MFA/ 2FA or a one-time passcode, as Paperform doesn't have access to your secondary device to generate a new passcode. Instead, we recommend producing an inbox or a new set of credentials that don't require this additional step for use on Paperform. Please consider the security implications of this approach when deciding if it is suitable for your use case.