All Solutions
Explore all the solutions you can create with Paperform: surveys, quizzes, tests, payment forms, scheduling forms, and a whole lot more.
See all solutions


Connect with over 2,000 popular apps and software to improve productivity and automate workflows
See all integrationsSolutions
All Solutions
Explore all the solutions you can create with Paperform: surveys, quizzes, tests, payment forms, scheduling forms, and a whole lot more.
See all solutionsIntegrations
Connect with over 2,000 popular apps and software to improve productivity and automate workflows
See all integrationsResources
Digital Product Ecommerce Software
The internet has opened unprecedented avenues for digital commerce. Long gone are the days where you needed a retail store and complex distribution channels to sell products—now all you need is a computer, an internet connection and a willingness to work hard.
The internet has opened unprecedented avenues for digital commerce. Long gone are the days where you needed a retail store and complex distribution channels to sell products—now all you need is a computer, an internet connection and a willingness to work hard.
This digital revolution hasn’t just expanded the way products are sold, it’s expanded the type of products you can sell in the first place. From courses and spreadsheets to graphics and Notion templates, when it comes to selling digital goods the sky (or should we say ‘the cloud’) really is the limit.
But once you’ve figured out what to sell, you still need to decide where you’ll sell it. While there are third-party platforms like Amazon and Shopify to use, there’s a better option that gives you ultimate control over your digital creation (and better profitability): a personalised eCommerce solution.
This is where Paperform comes in. The flexibility of our SaaS platform empowers you to build your own tailored digital product eCommerce app—all with one tool. You’ll be able to spend less time fiddling with external vendors and more time producing awesome digital products to sell.
What Are Digital Products?
Wondering what constitutes a digital product? Well, that’s easy. A “digital product” is any product without a tangible, physical form that you can sell online. It could be a PDF, a video, access to a piece of software or a full online course.
Typically digital products are downloaded, streamed, or accessed through a “paywall” that folks can only bypass once they’ve made a purchase. For example, you might sell an eBook on your own website that people can download straight to their Kindle.
ebook download form
If you already have an idea of the type of digital product you want to sell, that's fantastic. All you need to do is get to work. But if you want to start your own online business and aren’t sure what to sell, here’s a list of popular digital product ideas:
- Ebooks Online courses
- Templates (e.g. resumes, landing pages)
- Wordpress plugins and themes
- Membership websites
- Spreadsheets
- Software
- Audio (e.g. music, podcasts)
- Images
- Graphics
- Illustrations
- Software
- Online tools
- Audio and podcasts
- Digital art
- Video games
- Indie mobile apps
Want to create an indie video game? Sell your digital art on your own online store? Make a few bucks outside your job with a downloadable guide to email marketing? The choice is yours.
The beauty of digital products is that you can choose whatever suits you, based on your own unique area of interest and expertise. On the internet, you can guarantee there’s an audience for just about any niche.
Why Should You Start Selling Digital Products?
So why should you wave goodbye to physical products? It’s not just for the fun of it. There is a range of benefits that come along with selling digital items.
- Easier: There are none of the worries that come with physical goods. You don’t need to think about inventory and order management, shipping delays or many processes associated with traditional sales.
- Cheaper: All the physical storage and distribution and in-person sales cost a lot of money. With digital items, your overheads are a tiny percentage of traditional products.
- Scalable: You can only produce so many physical items, but with digital products, you don’t really need to worry about arbitrary numbers or storage space. There’s very little difference between selling 5 or 5,000 digital files.
- Higher Profits: With fewer costs associated with selling and inventory your money goes where it belongs—straight in your pocket (minus the costs of your tech stack.)
- Adaptable: Found a typo in your ebook or want to update your SEO guide for 2021? It’s a breeze to create new products or customise existing ones whenever you need.
- Useful automations: With the right eCommerce platform you can automate processes (like payment processing or updating a product management system) and free up time to focus on what matters.
- Faster growth: While physical goods will always have a market, downloadable products are the future. By selling online you can curate a dedicated audience and build your own small business with minimal startup costs.
Curious as to where you can sell your online products? Well, there is no shortage of options, but the best choice depends on the products you’re trying to sell.
Of course, there are names like Amazon, WooCommerce, eBay and Shopify, which are known as the best eCommerce platforms (or at least the biggest), but there are others too.
Gumroad, Fetchapp, Sellfy and Sendowl are just a few of the smaller eCommerce solutions that have popped up in the last few years, all promising to simplify the sales of digital products.
But no matter what eCommerce platform you look at you’ll find a few glaring problems. Most are either:
- Bloated with confusing features
- Overly expensive (especially when it comes to taking a chunk of your processed sales)
- Lacking customization
- Just plain unintuitive to set up
These weaknesses go against many of the core benefits that are supposed to come with selling digital products in the first place. In contrast to the standard eCommerce solutions, Paperform offers a cost-effective option that’s flexible and easy for anyone to use.
With our platform, you can build a tailored eCommerce app that gives you everything you need at a fraction of the price, from your own digital storefront to seamless digital downloads.
On top of that, we don’t take a cut of your purchases. Why? Because we think your money is just that: your money.
Use Paperform To Sell Digital Products Online
Thanks to Paperform’s versatile tools and expansive features, you can build your own digital product eCommerce software in a flash. Whether you need something simple or super complex, our platform offers a customizable experience suitable for any need.
Want to sell tickets to a webinar? Charge a monthly fee for content? Offer files with easy digital downloads? Build an online store with multiple products and a range of options? Or something completely unique? We can help you with all that and more.
We would be here all day if we went through every possible solution. So to keep things simple, in this guide we’ll showcase how you can use Paperform to build an elegant eCommerce store.
Get Started
For tutorials, we assume you’ve got a Paperform account. If not just sign up for a free trial—you don’t even need any Credit Card details.
Get Started With Paperform Now
Follow along with this tutorial and build your own digital product eCommerce software
When you’ve got an account head to the Digital Product Template page and click “Use This Template”. You can start a form from scratch if you like, but using templates takes care of the heavy lifting and allows you to see some of Paperform’s features at work.
digital guide purchase form
Set Up Your Storefront
You’ll notice that the template comes pre-filled with a variety of headings and images related to Patagonia Guides. You can simply change or remove the heading—and adjust any of the text or visuals—as you would in a Word doc.
When highlighting the text you’ll see a contextual options bar appear. From here you can change the appearance and positioning, or even add a hyperlink.

If you wish to remove the image or replace it with one of your own, simply click on it. Select the ‘Picture’ icon to replace it or the ‘X’ to remove it entirely. This is a good chance to highlight your company logo or place an eye-catching picture of your products.
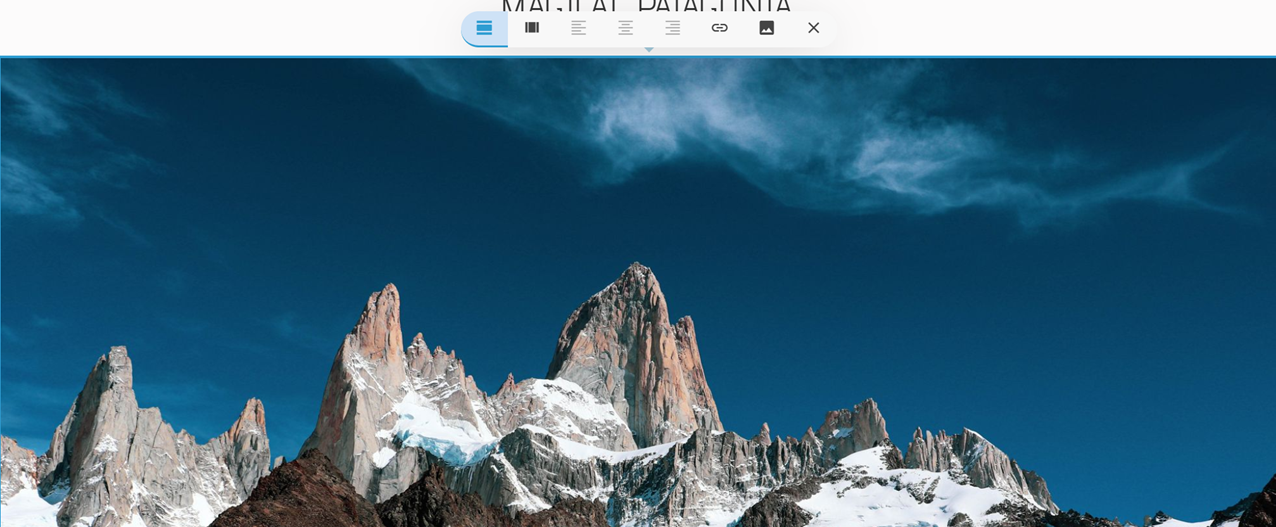
You can insert an image, question, video or any other type of media anywhere on the page. Just follow the small toolbar on the left of the editor and click the corresponding icon. Play with these text and media options to build up a beautiful landing page.

Add Products
You’ll notice three dummy products within the templates. To replace these with products of your own, enter settings by hovering over the ‘Products’ field and selecting the gear icon. Navigate to the ‘Products’ tab.

Each product has a name, pricing, SKU and stock fields. Replace the pre-existing information with the details of your own products and voila! Done. Plus you can add as many as you require.
Keep a list of your inventory in a spreadsheet? Just click ‘Import’ and products will automatically be added and updated with the relevant information.
When all your products are uploaded, click over to the ‘Appearance’ tab and adjust how they’re displayed. There are three layout options that you can switch between at any time:
- List view
- Gallery view
- Card view
List view is great for menus and purchase order forms, while products where visuals matter (like digital artwork) are best displayed in the gallery or card views. Luckily you don’t have to commit now—you can change this at any time.
Now let’s add a page break before our next section. These are used to divide the content within your store, so the webpage has a better flow. They look like this:

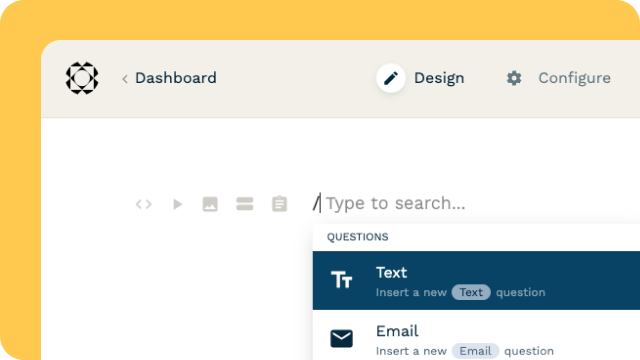
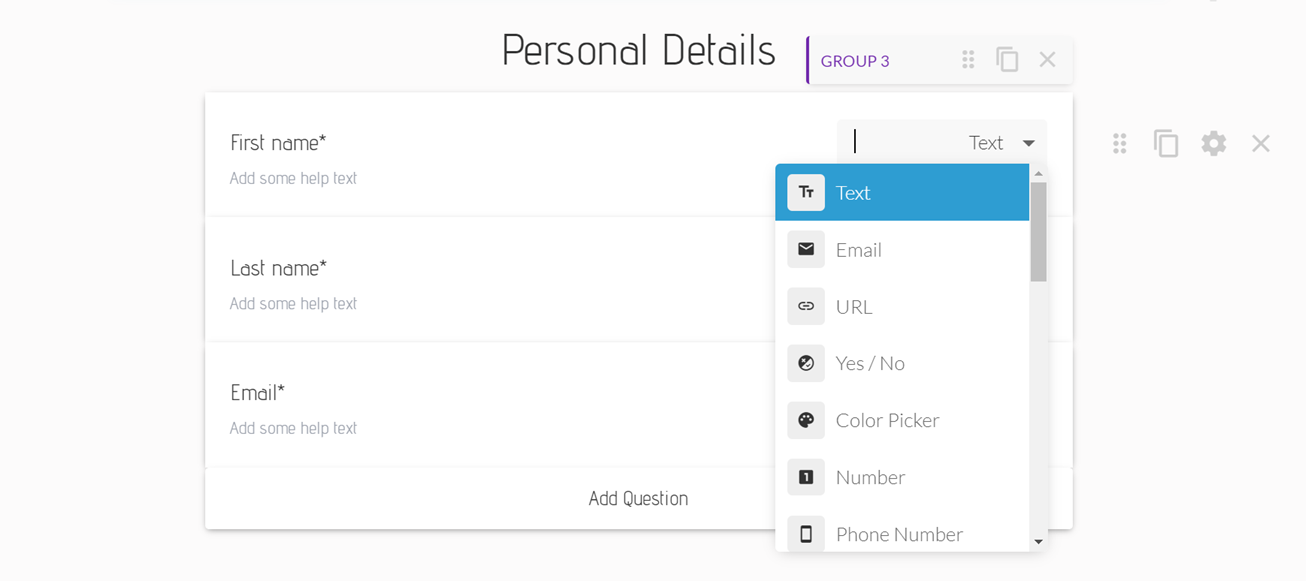
Insert Question Fields
With questions, you can collect important personal information. This is particularly important for digital eCommerce stores as you’ll be needing to send our confirmation emails and receipts (as well as some marketing materials if you so wish.)
Paperform offers over 20 question field types—including the Product field we just added. Here we’ll concentrate on fields to collect basic contact details, terms & conditions and a calculation field to let the customer know which product they selected.
In a few taps of the keyboard, you can add fields for first and last name and email address. Split up the page by adding a heading too, like so:
‘Calculation’ fields dynamically adjust to user responses to calculate and display a value. Let’s say someone bought the ‘Cerro Castillo Guide’ for $10. We could combine a ‘Calculation’ and a simple ‘Yes/No’ field to create a simple purchase confirmation.

Connect A Payment Gateway
Your products are looking all snazzy and your question fields are set up. But before visitors can fill their virtual shopping cart with all your amazing products, they need a way to pay you. Enter, Paperform payments.
With Paperform you can accept a variety of payment methods, including PayPal, Stripe, Square and Braintree. Plus unlike many of the most popular eCommerce platforms, we never add any extra transaction fee or cut into your profits.
From the form editor head into ‘Configure’ > ‘Payments’ and choose from the payment options. All you have to do to get started is add the requisite payment account. (Set one up by going to the ‘Manage Payment Accounts’ tab and following the prompts.)

Now when a customer selects a product and confirms their details they’ll progress through to a fully-fledged payment checkout. Once they input their details you’ll receive payment through to your gateway of choice.
How To Trigger Automated Digital Downloads
Our fictional company sells PDFs delivered by direct download. When payment is accepted customers are redirected to a webpage with a clickable link that fetches the file and downloads it to their device.
This makes the process simple and intuitive and requires very little work for you on the backend. You can easily create an automatic link for your own digital files with any file upload service. For this example, we’ll use Google Drive.

- Upload the file you wish to share to Google Drive.
- Get the file’s sharing link (our example is https://drive.google.com/file/d/1Dxkow7A-1mYVKiutb0VIMosaVkA2Hpyq/view?usp=sharing.)
- Change the permissions from ‘Restricted’ to ‘Anyone with a link’.
- Determine the file ID. This follows directly after "/file/d" within the link. (our example is 1Dxkow7A-1mYVKiutb0VIMosaVkA2Hpyq.)
- Add that file ID to the end of the following URL https://drive.google.com/uc?export=download&id=
- Your link should now look similar to https://drive.google.com/uc?export=download&id=1Dxkow7A-1mYVKiutb0VIMosaVkA2Hpyq.
- Create a new form to house the link that triggers the automatic download.
Take a look at our example here. When customers purchase the ‘Marble Caves’ guide they are redirected to https://marblecaves.paperform.co. This page has a hyperlink to the file download, and another is sent in the follow-up email.

If you do not wish to have an automatic download redirect, then you can just include a link to the file in the automatic ‘After Submission’ email (more on that soon.)
To ensure customers are redirected to the right page based on their purchase, we quickly have to set up a few dynamic success pages for each product.
From the editor click ‘After Submission’ > ‘Success Pages & Redirects’ and scroll to the bottom of the page. Toggle on ‘Dynamic Success Pages & Redirects’.
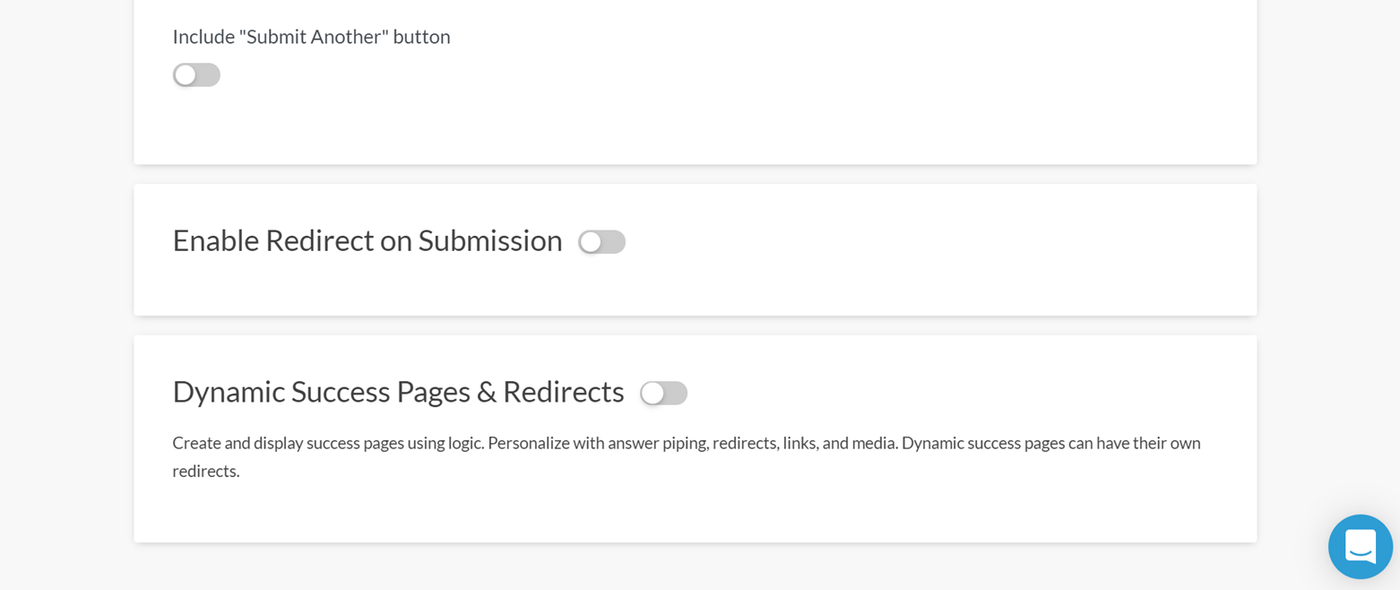
This feature allows us to create dynamic success pages based on customer actions. We want to create a unique page for each product. Pick ‘Add a page’ and toggle ‘Page has conditions when it should be used’ on.
Now from the dropdown box select your ‘Product’ question. In this example we want customers to be taken to the ‘Marble Caves’ landing page when they purchase that specific guide. So we’ll set the conditions as so:

Enable ‘Redirect to another URL’ and input the URL of that specific product page, which in this case is https://marblecaves.paperform.co/. You would then repeat this for each of your products.
Set Up An Automated After Submission Email
Things don’t just end when a customer makes a purchase. You’ll want to confirm their payment and send a receipt, and if there are files to download you’ll want to send a link along too.
Emailing every one of your customers manually would just create unnecessary busywork. You can take the hassle out of this whole process with Paperform’s email automations, which allow you to trigger emails when people make purchases.
Head to ‘After Submission > Emails’ and click ‘add email’. Here you’ll be able to customise the body and contents of your email. Want to include a receipt? Just say yes to ‘Include receipt in the email’ and it’s done.
Automated emails can feel a bit robotic. Use Answer Piping to auto-fill your customer’s name or email address based on their details, and give your emails a more personal feel.

Let’s not forget—you’ll want to set up separate email flows for each product, especially if you’re sending out download links. If this is the case you’ll need to use the conditional logic as we did with the dynamic success pages.
Scroll past the main body of the email and toggle ‘Email logic’ on. Then set up the conditions as needed.

customer feedback form
Level Up With Integrations
There’s one thing you can’t escape whether you’re an entrepreneur, small business owner or independent blogger—there’s just not enough time in the day to get everything done.
With all the effort you put into your products, you probably don’t have the bandwidth to deal with things like marketing, social media, customer relationship management and all the busy work that comes with running a business. That’s where integrations come in.
Integrations allow you to connect to your favourite tools and automate simple processes. Want to automatically send customer data to Mailchimp? Send feedback ideas through to your Notion database? Connect with popular marketing tools?
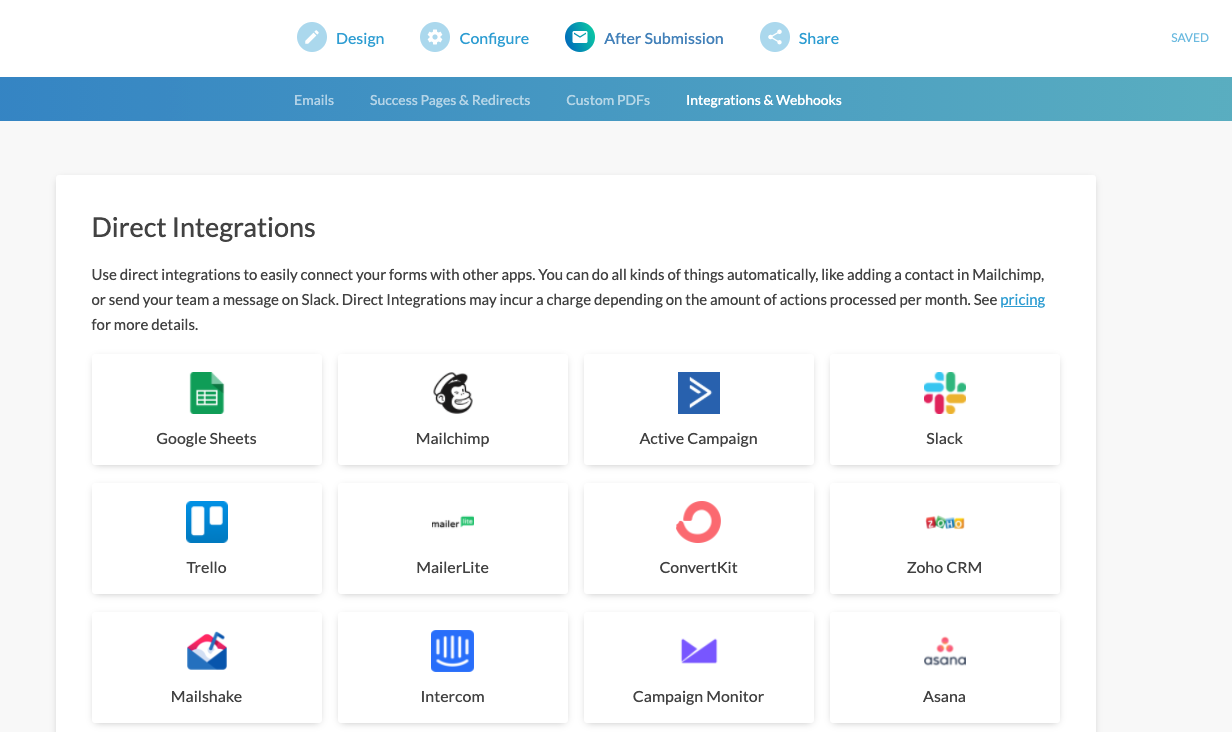
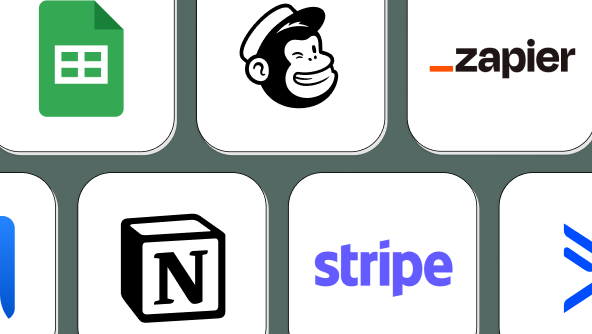
With our integrations, you can do all this and more. Get started with Direct Integrations or connect to Zapier and Integromat and unlock over 3,000 connections that’ll save you time and free you up to concentrate on what matters.
From the ‘After Submission’ tab head to ‘Integrations & Webhooks’. There you’ll see a list of our most popular apps or options to add Webhooks or Zapier Zaps.
Change The Look And Feel Of Your Form
Paperform’s built-in customisation tools allow you to personalise product pages to reflect your brand. And unlike other eCommerce platforms, you don’t need WordPress Themes or plugins to achieve the look you want—it’s all baked in by default.
You can tweak fonts, colours, and even UI elements all from the ‘Theme’ dashboard. You can even translate your entire form to multiple different languages or set a video background for a unique visual experience.

Theme settings can be found in the water drop icon on the top right of the form builder. From here you can play around with everything about your page’s look and design. The process is simple and intuitive, so you’ll have no trouble making all the changes you need.
Final Checklist
Just one last thing before you share it with your eager customers. Go to ‘Configure’ > ‘Details’ and edit the form title, description, cover image and custom URL. This makes sure your page looks professional whenever the link is shared or pops up on search engines.

Put Through A Test Submission
Your flashy new eCommerce platform is all finished. But before you put it out in the world it’s best to test things out to make sure everything is picture-perfect (there’s nothing worse than spotting a typo once a web page is live).
From the top right corner of the form editor, you’ll see an eye icon. This lets you see the live view of your store. Take a look and double-check everything looks kosher. When you’re happy, share the link on social media platforms and wait for the customers to start rolling in.
We hope you’ve found this tutorial helpful. Be sure to contact our 24/7 support team if you have any questions at all—happy form making!